Daily Pick
One deeply researched guide worth reading today.
A practical route through the systems that matter most, written to help new players make confident decisions quickly.
Overview
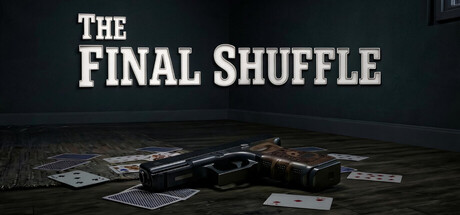
The Final Shuffle is a first-person tactical action-thriller from indie developer KaashFusionStudio, released July 15, 2026 on Steam for $5.99. You play an ordinary man, arrested without warning and thrown into a high-security prison. While you are behind bars, a shadowy gang kidnaps your wife. You escape, then hunt through neon-lit city streets, a Miami club, hotels, and corporate hideouts to uncover the conspiracy that destroyed your life.
The campaign runs 1 to 2 hours for a first playthrough, under 40 minutes for speedrunners. It blends stealth, puzzle-solving, and FPS combat with a branching narrative. Your actions are tracked silently, and three endings exist: Justice, Vengeance, and Shadows. Which one you earn depends on how many people you kill, how much evidence you collect, and how many alarms you trigger.
What kind of game is this? The developer calls it a Tactical FPS, but it plays more like a narrative-driven stealth-action hybrid with investigative gameplay. Think BodyCam or Better than Dead crossed with a conspiracy thriller. Every encounter can be approached multiple ways: ghost past enemies, knock them out, or shoot your way through. The game never forces a playstyle, but the ending system quietly rewards restraint.
Target audience: fans of narrative thrillers, tactical FPS games, and conspiracy stories with branching endings. Difficulty is moderate if you embrace stealth, punishing if you try to fight everything. The game expects you to complete entire sections with zero shots fired.
Disclosure note: the developer has stated that AI-generated assets were used for the capsule images, library assets, and game icon. Gameplay and story are handcrafted. The mature content rating covers intense violence with firearms and melee weapons, blood effects, and character death.
Quick Facts
| Attribute | Detail |
|---|---|
| Developer | KaashFusionStudio |
| Publisher | KaashFusionStudio |
| Release Date | July 15, 2026 |
| Price | $5.99 |
| Platforms | Windows |
| Genre | Tactical FPS, Stealth, Puzzle, Narrative Thriller |
| Playtime | 1-2 hours (first playthrough) |
| Difficulty | Medium (stealth), High (combat) |
| Steam Rating | Mixed (4 reviews at time of writing) |
| Features | Single-player, manual saves, three endings |
System Requirements
Minimum:
| Component | Requirement |
|---|---|
| OS | Windows 10 64-bit |
| CPU | Intel Core i5-9400 / AMD Ryzen 5 2600 |
| Memory | 8 GB RAM |
| GPU | NVIDIA GeForce GTX 1660 Ti (6 GB) / AMD Radeon RX 590 (8 GB) |
| DirectX | Version 12 |
| Storage | 20 GB available space |
Recommended:
| Component | Requirement |
|---|---|
| OS | Windows 10 / 11 64-bit |
| CPU | Intel Core i7-12700 / AMD Ryzen 7 5800X |
| Memory | 16 GB RAM |
| GPU | NVIDIA GeForce RTX 3070 / AMD Radeon RX 6800 |
| DirectX | Version 12 |
| Storage | 20 GB SSD |
These are higher than typical indie games. The game runs on Unreal Engine with DX12. At minimum spec, expect 30-45 FPS at 1080p Low. At recommended spec, 60+ FPS at 1440p High.
Patch status: the developer shipped two stability updates after launch. The first ("Bugs Are Fixed") addressed crashes and stability; the second ("Game is optimized") targeted frame rates, memory management, and background loading. If you played at launch and hit stutters, update and retry — the optimization pass is real.
Getting Started — First 30 Minutes
Cell Block A Escape (Step by Step)
You wake in Cell Block A with no memory and a headache. The game teaches you its core systems immediately.
- Examine the bed. There is a loose spring under the mattress. Take it.
- Inspect the cell door lock. Use the spring to pick it. A short QTE follows: watch the tumblers and press E as they align.
- Wait for the guard patrol. A guard passes every 30 seconds. His footsteps echo — listen with headphones. When the footsteps fade right, you have roughly 8 seconds to act.
- Crouch (Ctrl) and exit. Stay crouched. The awareness meter shows as an icon: yellow means caution (freeze), red means detected (run and hide).
- Follow the right wall to the guard room. Hug the shadows. There is a blind spot in the corridor lighting at the halfway point.
Critical early choice — the guard room has three approaches:
| Approach | Outcome | Kills |
|---|---|---|
| Knock out guard (sneak behind, press E) | Clean, no alarm | 0 |
| Shoot guard (gun from desk) | Loud, triggers alarm | 1 |
| Rush melee (3 hits) | Loud, spawns 2 extra guards | 1 |
For the Justice ending, use the stealth knockout. The handgun on the desk is still lootable after the guard is unconscious — you get the weapon without the violence cost.
Beginner Mistakes
Sprinting everywhere. Sprinting has a 10-meter sound radius and alerts nearby guards. The single biggest source of failed stealth sections is impatience. Crouch-walk in any area where you know a guard exists.
Treating the handgun as a primary weapon. You carry 24 rounds max and replenishment is rare. Every bullet spent on a non-essential guard is a bullet you do not have for the final sequence. The game is designed around completing sections with zero shots.
Missing the guard room handgun. It is free with the stealth approach. Walk past it and you enter the city unarmed, which makes the disguise sections much harder.
Ignoring the awareness meter's yellow state. When a guard is suspicious (yellow pulsing), freeze. If you keep moving, it escalates to red. Hold still for 2-3 seconds and the guard investigates an empty corner, then returns to patrol after about 15 seconds.
Skipping the tunnel medkit. The maintenance tunnel has a hidden medkit behind a loose grate on the left wall near the junction box. Medkits are the rarest resource in the game. Grab it.
Not saving manually. Autosave triggers at story beats, not puzzle sections. A failed hack minigame can cost you 20 minutes. Manual save before every major encounter.
Core Mechanics
The Stealth System
Stealth runs on three pillars: sound, line-of-sight, and awareness state.
Sound mechanics:
| Action | Sound Radius | Notes |
|---|---|---|
| Walking | 3 meters | Silent to most enemies |
| Crouch-walking | 1 meter | Effectively silent |
| Sprinting | 10 meters | Alerts nearby guards |
| Opening unlocked doors | 2 meters | Safe if no guard within 5m |
| Opening locked doors | 5 meters | The lockpick sound travels |
| Firing unsilenced gun | 30 meters | Alerts the entire area |
| Breaking glass | 8 meters | Guaranteed investigation |
Line-of-sight: guards have a 120-degree forward cone with 15-meter range in bright areas, 8 meters in dim areas. They cannot see through solid objects, but peripheral vision catches movement. If you are spotted for more than 1.5 seconds, the awareness meter hits red.
Awareness states:
| State | Icon | Guard Behavior |
|---|---|---|
| Unaware | None | Patrol route, idle animations |
| Suspicious | Yellow (pulsing) | Stops, looks toward noise source |
| Investigating | Yellow (solid) | Walks to last known position |
| Alerted | Red | Draws weapon, calls backup, pursues |
When you trigger suspicion, hold still and let the guard investigate. They give up after 15 seconds and return to patrol.
Resource Economy
Resources are intentionally scarce. The game wants you to feel desperate.
| Resource | Max Carry | Common Locations | Replenishment |
|---|---|---|---|
| Handgun ammo | 24 rounds | Guard drops, desk drawers | Rare |
| Bandages | 3 | First aid stations, cabinets | Per chapter |
| Medkits | 1 (2 with upgrade) | Hidden stashes | Extremely rare |
| Lockpicks | 5 | Guard belts, maintenance rooms | Found |
| Keycards | Varies | Essential for progression | Fixed locations |
Ammo conservation rule: if you can avoid firing, do. The final factory section assumes you enter with at least 12 rounds.
Violence Tracking
The game silently tracks three metrics:
- Kills — human enemies permanently removed
- Evidence collected — documents, recordings, photos
- Alarms triggered — areas locked down, response teams deployed
These feed into the ending calculation. The game never displays your kill count — you must track it mentally. This opacity is deliberate; the "shuffle" in the title refers to how the game shuffles your choices into an unseen tally.
The Disguise System
The fake ID from the safe house lets you walk past most checkpoints, but guards can see through it. Each guard has a scrutiny level from 1 (rookie) to 5 (veteran). Rookies glance and wave you through. Veterans ask questions, and you need the correct answers from documents you have collected.
| Guard Type | Scrutiny | Weakness |
|---|---|---|
| Rookie patrol | 1 | Never questions, just glances |
| Experienced guard | 3 | Asks one question from the document pool |
| Guard captain | 4 | Asks two questions, rejects on one wrong answer |
| Security chief | 5 | Always detects disguise (scripted encounter) |
Question pool and answers (write these down):
| Question | Answer | Where to Find |
|---|---|---|
| What department do you work in? | Logistics | Warehouse documents |
| Who is the shift supervisor? | Marcus Webb | HQ employee list |
| What is today's clearance code? | Delta-7 | Server room terminal |
| Project number for the 12th floor? | 4513 | Reception computer |
Light Management
Each area has a light level that affects guard detection:
| Light Level | Detection Range | Stealth Bonus |
|---|---|---|
| Bright | 15m, 120° cone | None |
| Dim | 8m, 90° cone | +30% stealth |
| Dark | 5m, 60° cone | +60% stealth |
You can shoot out lights (suppressed weapons, late game) or flip circuit breakers. Breaking lights makes guards investigate — use this to lure them away from doors.
Progression Strategy
Optimal Route Through the Campaign
The game has 5 major sections. The optimal approach for each:
Section 1: Prison Escape
- Stealth only. Zero kills possible.
- Loot everything. The handgun from the guard room is free with the stealth approach.
- Key items: handgun, lockpick, medkit (behind the grate in the tunnel).
Section 2: City Streets — Neon Tokyo
- Use the disguise aggressively.
- Three districts: Market (crowds = cover), Industrial (rooftops = bypass), Docks (guarded = puzzle).
- Market priority: pickpocket the courier near the fountain for the Warehouse Key side objective. This opens an alternate entrance to Warehouse 7 that bypasses the keypad.
Section 3: Docks & Warehouse 7
- Keypad code 7392, OR use the Warehouse Key from the Market District pickpocket.
- Inside: shipping manifests, photos, and the name "The Architect."
- Missable document: the warehouse office filing cabinet's bottom drawer holds a burner phone with a text log between The Architect and an unknown contact. This unlocks bonus dialogue in the final confrontation and counts toward the Justice ending.
Section 4: Corporate HQ
- Requires a security uniform (janitor closet, ground floor), a keycard (pickpocket in elevator lobby), and the server room PIN (4513).
- Optimal infiltration route: service entrance → janitor closet (uniform) → stairwell to floor 10 → elevator lobby (pickpocket) → stairs to floor 12 → server room.
- After the data download, a 90-second escape begins. Use the fire alarm distraction (near the restrooms on the ground floor) to slip past the security desk.
Section 5: Final Factory — Miami Club & Hotel
- Requires three keycards (red, blue, green) from three guard captains.
- The final areas shift to a Miami-style club and hotel. Lighting changes dramatically — use the club's strobe effects to mask movement.
- Smart approach: use the intercom system in the security office. Broadcast on each channel to lure the captains one by one. Take them out in isolation rather than fighting all three at once.
- Final door with all three cards → confrontation with The Architect → ending sequence.
Equipment Priority Order
1. Lockpicks (5) — skip hard puzzle alternatives
2. Bandages (3) — essential for combat sections
3. Medkit (1) — emergency heal, use only below 30 HP
4. Handgun + 12 rounds — enough for the final section
5. EMP charge (optional) — disables security cameras for 60 seconds
When to use the EMP: the server room on floor 12 has 8 cameras. If you trigger the alarm before downloading, the data is wiped. Use the EMP charge (found in HQ's electrical room on floor 3) to disable cameras silently.
Combat Techniques
Handgun Mastery
| Technique | Input | Effect | Ammo Cost |
|---|---|---|---|
| Standard shot | Left-click | Normal damage | 1 |
| Headshot | Aim at head hitbox | 2x damage, instant kill on most | 1 |
| Aimed shot | Right-click + left-click | +30% accuracy, -20% move speed | 1 |
| Suppressed shot | Late game only | Silent, 3m sound radius | 1 |
| Quickfire | Left-click from hip | Unreliable, wide spread | 1 |
The head hitbox is generous — aim at the top of the nose or the bridge of the glasses. Hip-fire is for close-range emergencies only.
Melee Combat
When ammo runs out, melee is the fallback:
- Basic attack (left-click) — quick, 15 damage. Three hits kill a guard.
- Heavy attack (hold left-click) — slow wind-up, 40 damage. Breaks guard stance.
- Dodge (double-tap A/D) — invincibility frames on the first 0.3 seconds.
- Counter (press E as the enemy attack lands) — one-hit kill, very tight timing.
Melee priority: Counter > Heavy > Basic. If you can time the counter, you save ammo and health. Practice on the prison guards — they have a 1-second telegraph on their swing.
Environmental Kills
The game rewards environmental awareness:
- Explosive barrels — red barrels in the Industrial Zone and factory. Shoot them for an instant area clear.
- Falling debris — shoot the chains holding cargo in Warehouse 7. The drop kills any guard underneath.
- Electrified water — the HQ server room has water puddles near exposed wires. Lure guards through them.
- Elevator shafts — hack the elevator controls while a guard is riding. Fatal fall.
These kills often count as "accidents" and may not add to your violence score — the system is opaque by design, and this is worth testing on your own run.
Puzzle Solutions — Complete Reference
| Puzzle | Solution |
|---|---|
| Prison junction box | Clue: "Start at the beginning, then skip one, then the last, then the first again." → A → C → D → A |
| Sewer exit grate | No puzzle — find the metal pipe on the ground nearby to use as leverage |
| Warehouse 7 keypad | Code: 7392 (or use the Warehouse Key via the loading dock) |
| HQ reception hack | Six colored symbols flash in sequence. Match each within 2 seconds. Random per playthrough — record it. 3 failures = 5-minute lockout |
| Server room PIN | 4513 (hint: email on the reception computer about "Project 4513 — Financial Reorganization") |
| Factory intercom | Channel 2 (loading dock) → Channel 1 (main floor) → Channel 3 (office wing). Each captain takes 60 seconds to arrive — eliminate them individually |
| Final door keycard locks | Three slots for red, blue, green cards. No specific order — insert all three simultaneously |
Endings — Full Breakdown
Ending Requirements
| Ending | Kills | Evidence | Alarms | Description |
|---|---|---|---|---|
| Justice (Best) | <5 | All 12 documents | <3 | Public expose, wife survives, conspiracy ends |
| Vengeance | >10 | <8 documents | Any | Personal revenge, conspiracy continues |
| Shadows | <5 | <8 documents | Any | Wife survives, conspiracy hidden, you remain a fugitive |
Justice Ending — Evidence Checklist (12 total)
- Prison guard's patrol log (guard room desk)
- Handwritten note from wife (safe house bedroom)
- Shipping manifest #1 (Warehouse 7 office)
- Photo of wife with timestamp (Warehouse 7 evidence board)
- Burner phone text log (Warehouse 7 filing cabinet — bottom drawer, easy to miss)
- Corporate HQ employee list (reception computer)
- Internal email about Project 4513 (reception computer, second page)
- Server room data dump (automatic after download)
- Security camera footage (HQ security room, floor 2)
- Financial records #1 (HQ server room, left rack)
- Financial records #2 (HQ server room, center rack)
- The Architect's personal journal (factory office, final area)
Zero-alarm route:
- Prison: knock out the guard (no alarm)
- City: use the disguise, never sprint past checkpoints
- HQ: use the EMP on cameras before the server room
- Factory: lure the captains individually via intercom
Violence minimization:
- Prison: 0 kills (knockout only)
- City: 0-1 kills (all encounters bypassable with disguise and patience)
- HQ: 0-2 kills (server room guards are avoidable with EMP + vent route)
- Factory: 2-4 kills (captains must be eliminated for the keycards)
The maximum kills for Justice is 4. Every kill over that pushes you toward Vengeance.
Step-by-Step Strategy Sequences
Sequence 1: The Ghost Route (Zero Kills, Zero Alarms)
- Prison: pick the lock, knock out the guard, take the handgun and patrol log. No shots.
- City: wear the disguise at all times. Walk, never sprint. Answer veteran questions with the document pool answers.
- Pickpocket the courier for the Warehouse Key. Skip the keypad entirely.
- Warehouse: gather manifests, photos, and the burner phone. Leave every guard alive.
- HQ: take the janitor uniform, pickpocket the keycard, EMP the cameras, download the data. Escape via the fire alarm.
- Factory: use the intercom to isolate each captain, knock them out, take their cards.
- Confront The Architect non-lethally. Collect his journal first.
Sequence 2: The Vengeance Route (Guns Blazing)
- Accept that alarms are unavoidable. The ending only needs >10 kills and <8 evidence.
- Prison: shoot the guard for the gun, fight through the response.
- City: skip pickpocketing; shoot through checkpoints. The Industrial District's rooftops give vantage points for headshots.
- Warehouse: use explosive barrels on the main floor crowd. Skip the office documents.
- HQ: skip the EMP and the vent route. Fight the server room guards head-on. The 90-second escape is tighter with alarms — pre-clear the stairwell before the download.
- Factory: fight the captains as they arrive. Use the strobe lighting to break their aim.
- Kill The Architect in the confrontation. This locks the Vengeance ending even with a low kill count elsewhere.
Sequence 3: The Disguise Sprint (Speedrun Fundamentals)
- Learn the disguise question answers cold — they never change.
- Skip all side objectives except the Warehouse Key pickpocket (it saves more time than it costs).
- Use the rooftop route through the Industrial District — it bypasses three guard checkpoints.
- In HQ, take the stairs instead of the elevator. The elevator triggers a scripted encounter.
- Save the EMP for the server room, not earlier. Camera downtime is the only thing that prevents the data wipe.
- Practice the final door card insertion — all three at once, no pause.
Sequence 4: The Lure-and-Isolate Method (Factory Captains)
- Reach the security office without alerting the main floor.
- Activate Channel 2 (loading dock). Captain 1 arrives in 60 seconds — take the position near the crates.
- Knock him out the moment he enters the room. No gunshots — the music masks the takedown sound.
- Repeat for Channel 1 (main floor) and Channel 3 (office wing).
- Collect all three keycards, then take the stairwell to the final door.
- If you trigger an alarm, the captains converge on the security office — retreat and use the club's strobe room for cover.
Sequence 5: The Evidence Sweep (Justice Ending)
- Track the 12-document checklist from the start. The burner phone (item 5) is the most commonly missed.
- Prison: grab the patrol log before leaving the guard room.
- Safe house: check the bedroom for the wife's note.
- Warehouse: office desk (manifest), evidence board (photo), filing cabinet bottom drawer (burner phone).
- HQ: reception computer (employee list + email), server room racks (financial records x2), security room floor 2 (camera footage — requires level 2 clearance keycard, pickpocket the IT manager in the floor 10 break room).
- Factory: The Architect's office before the confrontation.
- Verify: if you have fewer than 8 documents, you will not reach Justice. Replay to fix it — there is no chapter select.
Advanced Tips
Sound masking is your best friend. Running generators mask all sound within 5 meters — fight near them and shots go unheard. Rain (exterior sections) reduces all sounds by 50%. Ventilation ducts mask footsteps but your breathing is loud near vent exits.
Guards have patrol memory. If a guard sees a body or a broken light, they deviate from patrol to investigate. Use this to create predictable openings — break a light in a room you are not entering, and the guard walks away from the door you need.
The awareness meter is per-guard. Two guards can have different awareness states simultaneously. When one goes red, the other may still be unaware — use the split second to reposition rather than panicking.
Melee counters ignore armor. Guard captains have more HP but the same counter window. A well-timed counter one-shots them, saving the ammo you would spend on the keycard section.
The EMP has a second use. If you do not need it for the server room, it disables the factory's security cameras during the captain fights, letting you move freely.
Trailer vs. reality. The trailer shows the game at its best. At launch, performance was rough — frame drops in neon areas, occasional crashes, and the face-blur effect rendering through walls. The optimization patch helped. If you still see issues, drop shadows to Low and disable motion blur.
The voice acting is AI-generated. Reviews at launch flagged the AI voice acting as weak. It is part of the package; the gameplay and story carry the experience.
The title is a double meaning. "The Final Shuffle" refers both to the money-laundering scheme at the heart of the conspiracy and to the final hand of cards you play in the endgame. Watch the playing-card imagery throughout — it telegraphs the ending you are building toward.
Second playthroughs are fast. No chapter select means you replay the whole game to change your ending, but the prison clears in 15 minutes once you know the routes. The full game is designed for replay discovery.
Performance & Known Issues
| Issue | Details | Workaround |
|---|---|---|
| Face-blur through walls | Blur effect renders through geometry | None yet; developer aware |
| Frame drops in neon areas | Tokyo street sections stutter | Lower shadows, disable post-processing |
| Controller support incomplete | Partial Xbox support only | Use keyboard + mouse |
| Trailer vs. actual graphics | Trailers look better than the game | Expected for a $5.99 indie title |
Quick optimization checklist:
- Set shadow quality to Low — the biggest FPS gain
- Disable motion blur
- Run in exclusive fullscreen, not borderless
- Close GPU-heavy background apps
- Update GPU drivers — the game uses DX12
The game is actively patched. The two post-launch updates addressed crashes and frame rates. Check the Steam news hub for further patches.
FAQ / Common Mistakes
Q: I cannot find all 12 evidence pieces. Which are easy to miss? A: The burner phone in Warehouse 7 (bottom drawer of the filing cabinet) and the camera footage in HQ (security room floor 2, requires level 2 clearance — pickpocket the IT manager in the floor 10 break room).
Q: The final factory is too hard. What am I missing? A: The EMP charge from HQ floor 3's electrical room, or the intercom system. The captains are designed to be fought one at a time. Fighting all three at once is nearly impossible.
Q: I got the Shadows ending but thought I did everything right. A: You probably missed evidence. The game never tells you how many documents you have. Cross-check against the 12-item list above.
Q: Can I replay chapters to fix my ending? A: No chapter select. Replay from the start. On a second run the prison clears in 15 minutes.
Q: How long is the game? A: 1-2 hours for a first playthrough. Speedrunners finish in under 40 minutes. The $5.99 price reflects the shorter runtime.
Q: Is there controller support? A: Partial Xbox controller support. Keyboard + mouse is recommended. Full controller support is planned.
Q: I am stuck on the HQ reception hack. The pattern is too fast. A: Record it with your phone. You get 2 seconds per symbol — generous once you watch the whole sequence first.
Q: The game runs poorly on my PC. A: Drop shadows to Low, disable motion blur, run exclusive fullscreen. The optimization patch improved frame rates; update the game first.
Q: Can I kill The Architect? A: Yes, but it locks the Vengeance ending even with a low kill count. The confrontation has a dialogue path for the non-lethal option.
Q: Is the game worth $5.99? A: If you like short narrative thrillers with branching endings and replay value, yes. The performance issues are real but patchable, and the stealth gameplay is genuinely solid.
Common mistake: hoarding the medkit. Use it below 30 HP. Hoarding until death wastes the resource.
Common mistake: answering disguise questions wrong. Write down the four answers. A wrong answer on a captain triggers combat and an alarm.
Common mistake: missing the Warehouse Key. The pickpocket takes 10 seconds and saves you the keypad puzzle plus potential alarm risk.
Common mistake: assuming the ending is based on dialogue choices. It is based on kills, evidence, and alarms — the silent tally. Track them yourself.