Daily Pick
One deeply researched guide worth reading today.
A practical route through the systems that matter most, written to help new players make confident decisions quickly.
R.E.P.O. is a physics sandbox wearing a horror costume, and the money is the real horror. This deep dive adds the layers the standard guide points at: quota economics and the rounding tax, per-level time budgets, three complete named loadouts, duo adjustments, a monster encounter decision tree, extraction-zone physics, and the noise discipline rules that decide which maps your crew walks out of.
Overview
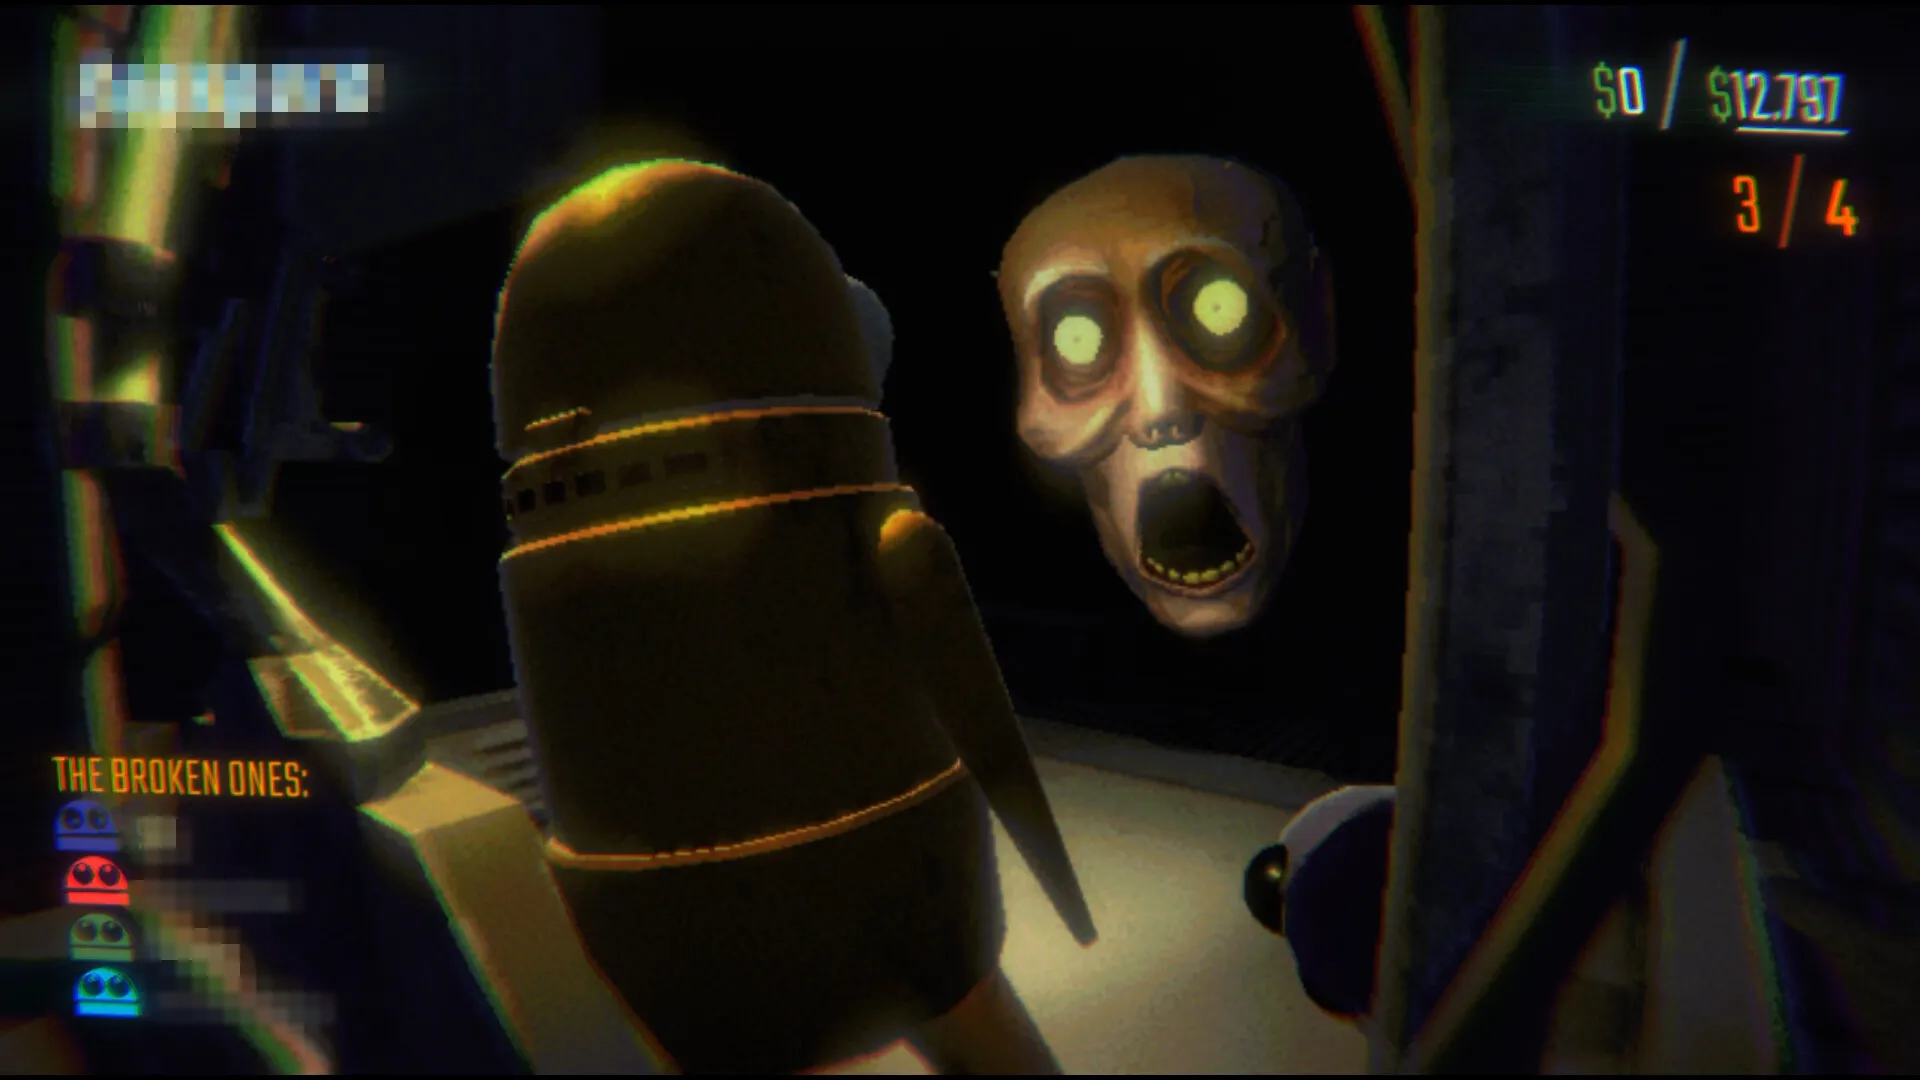
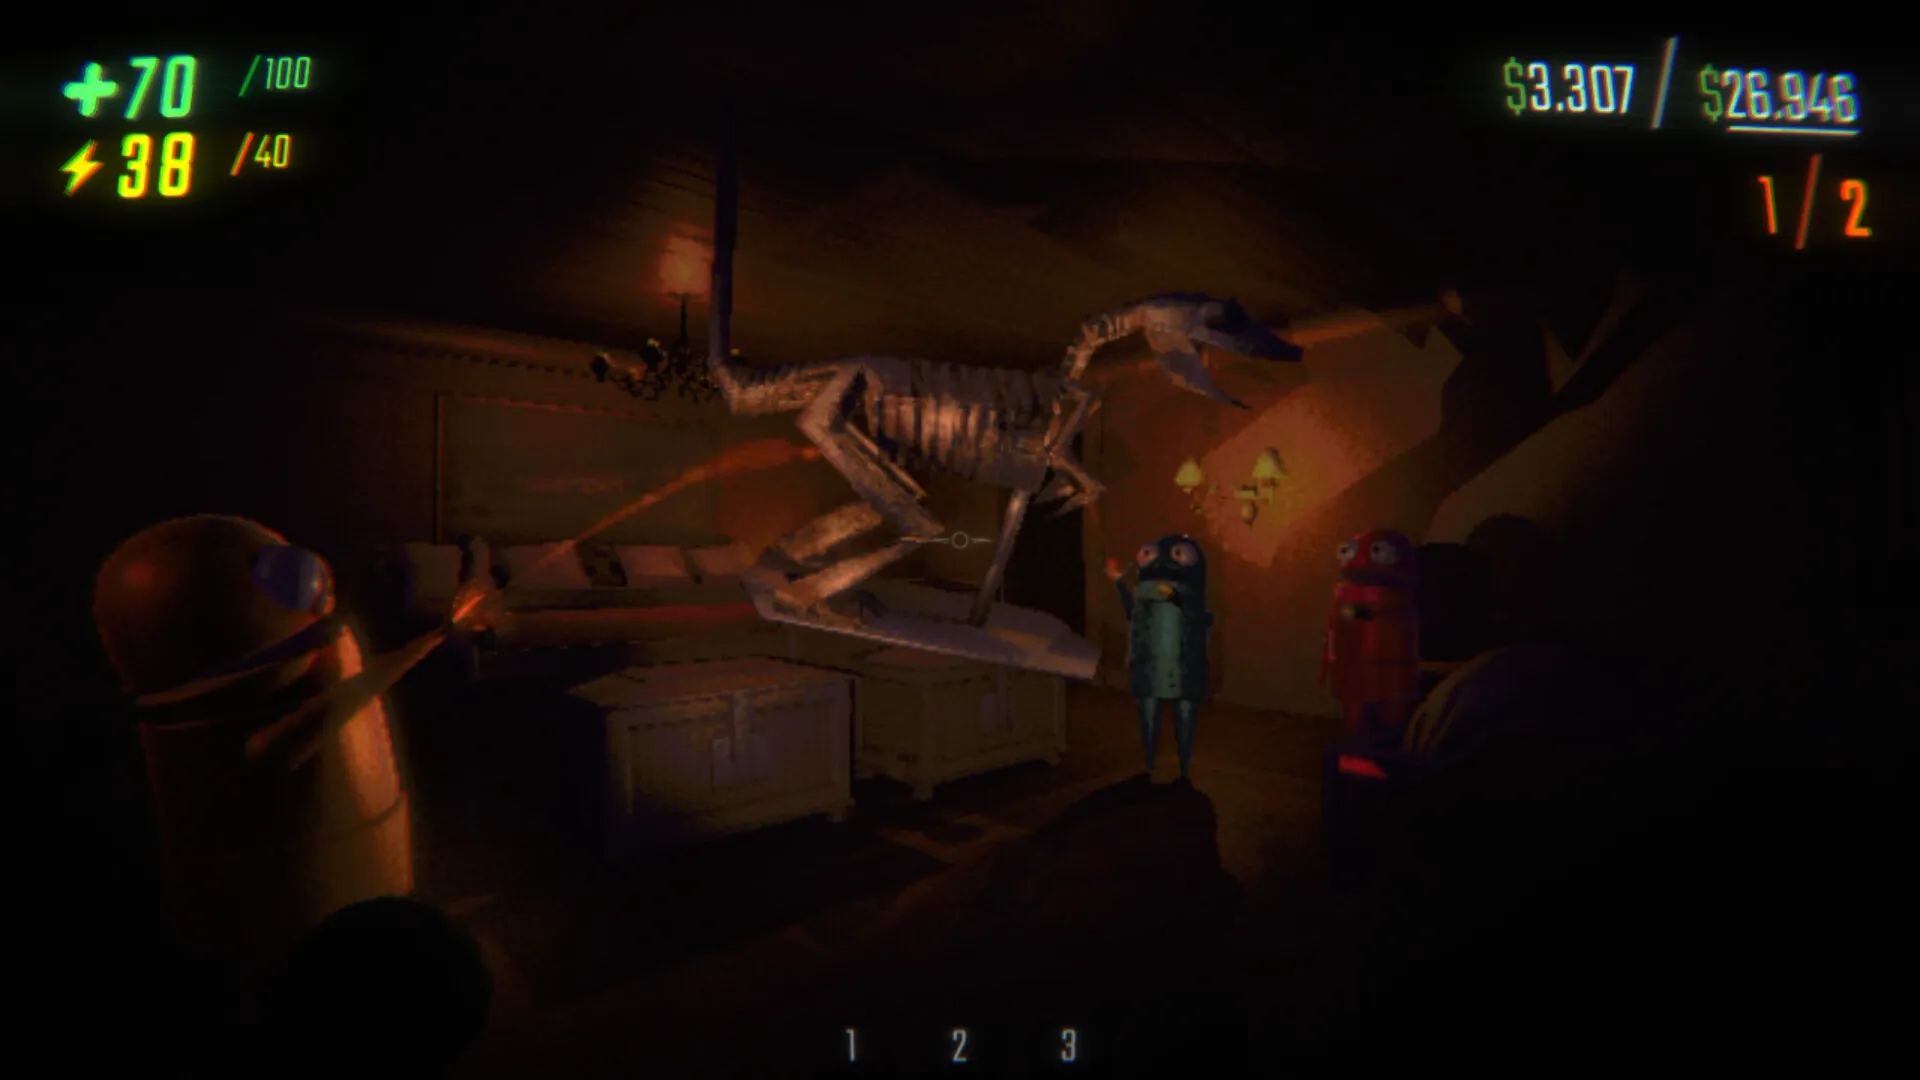
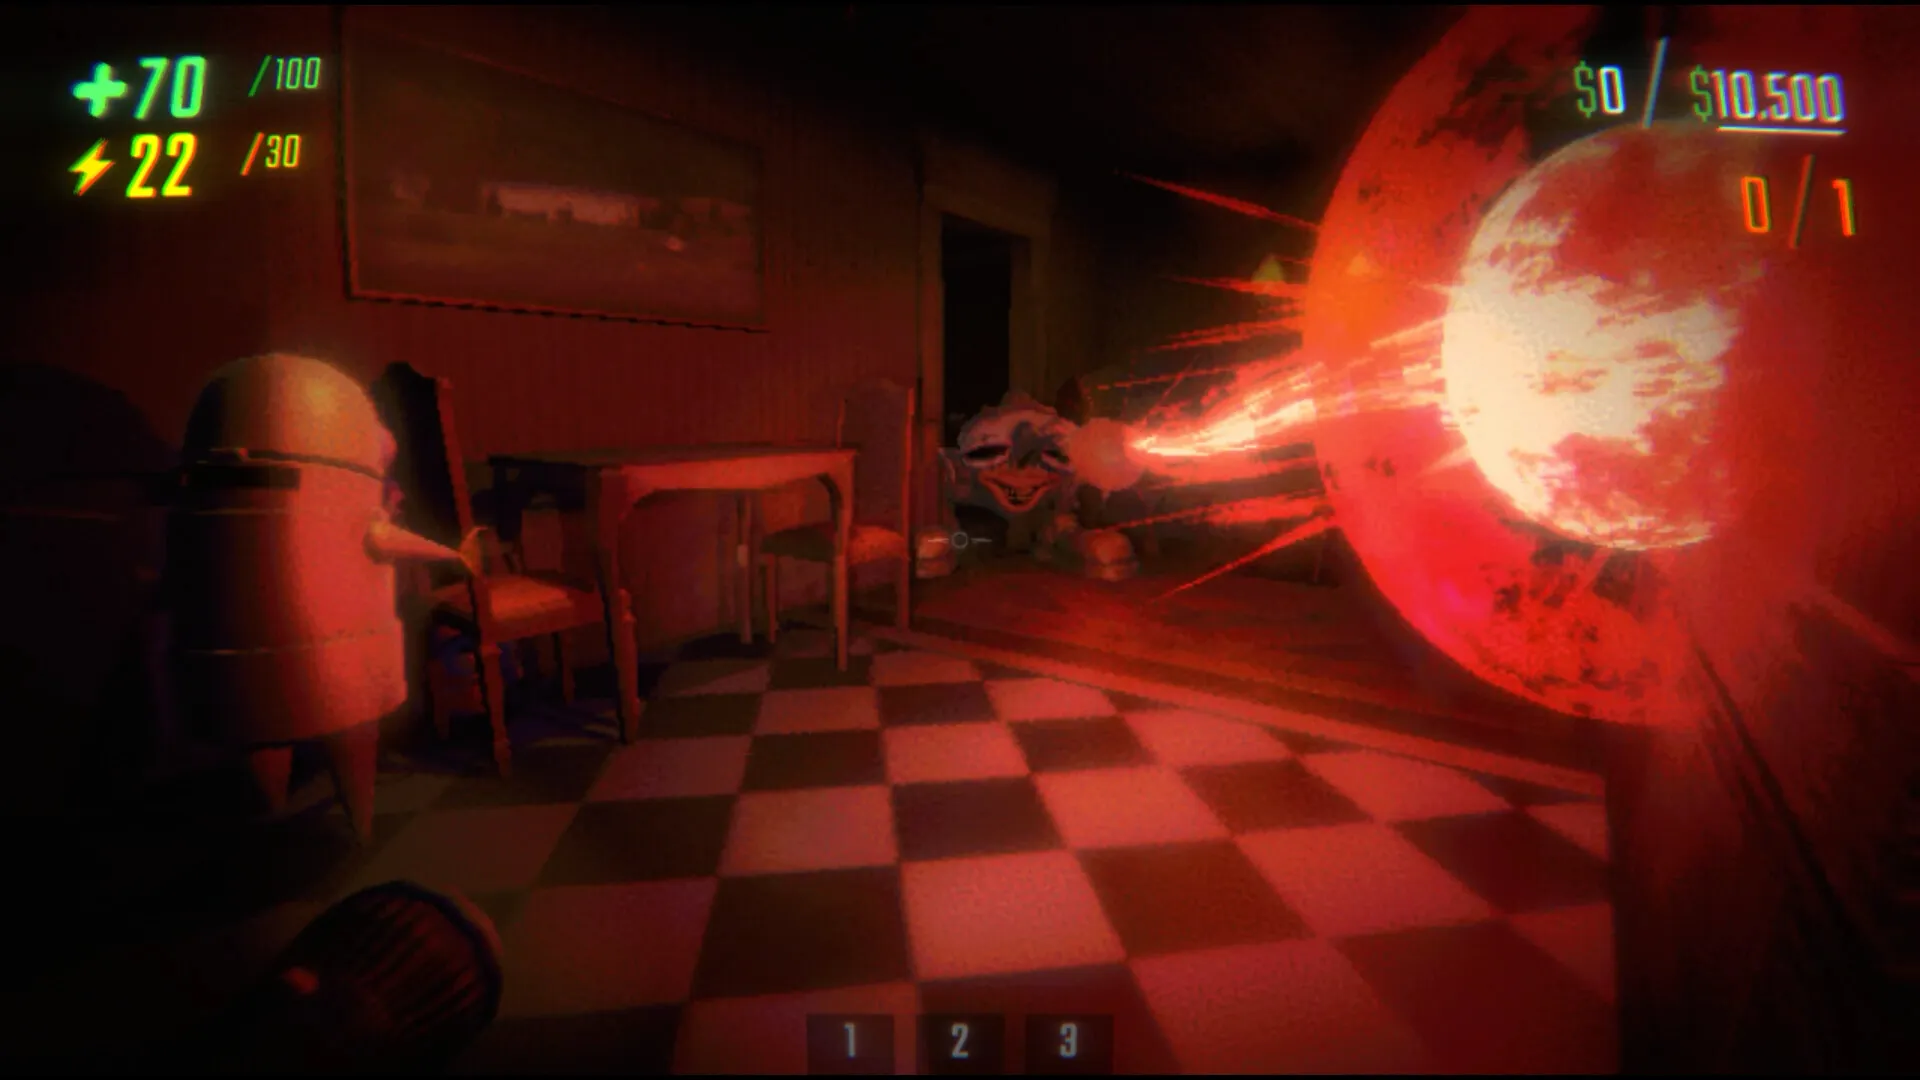
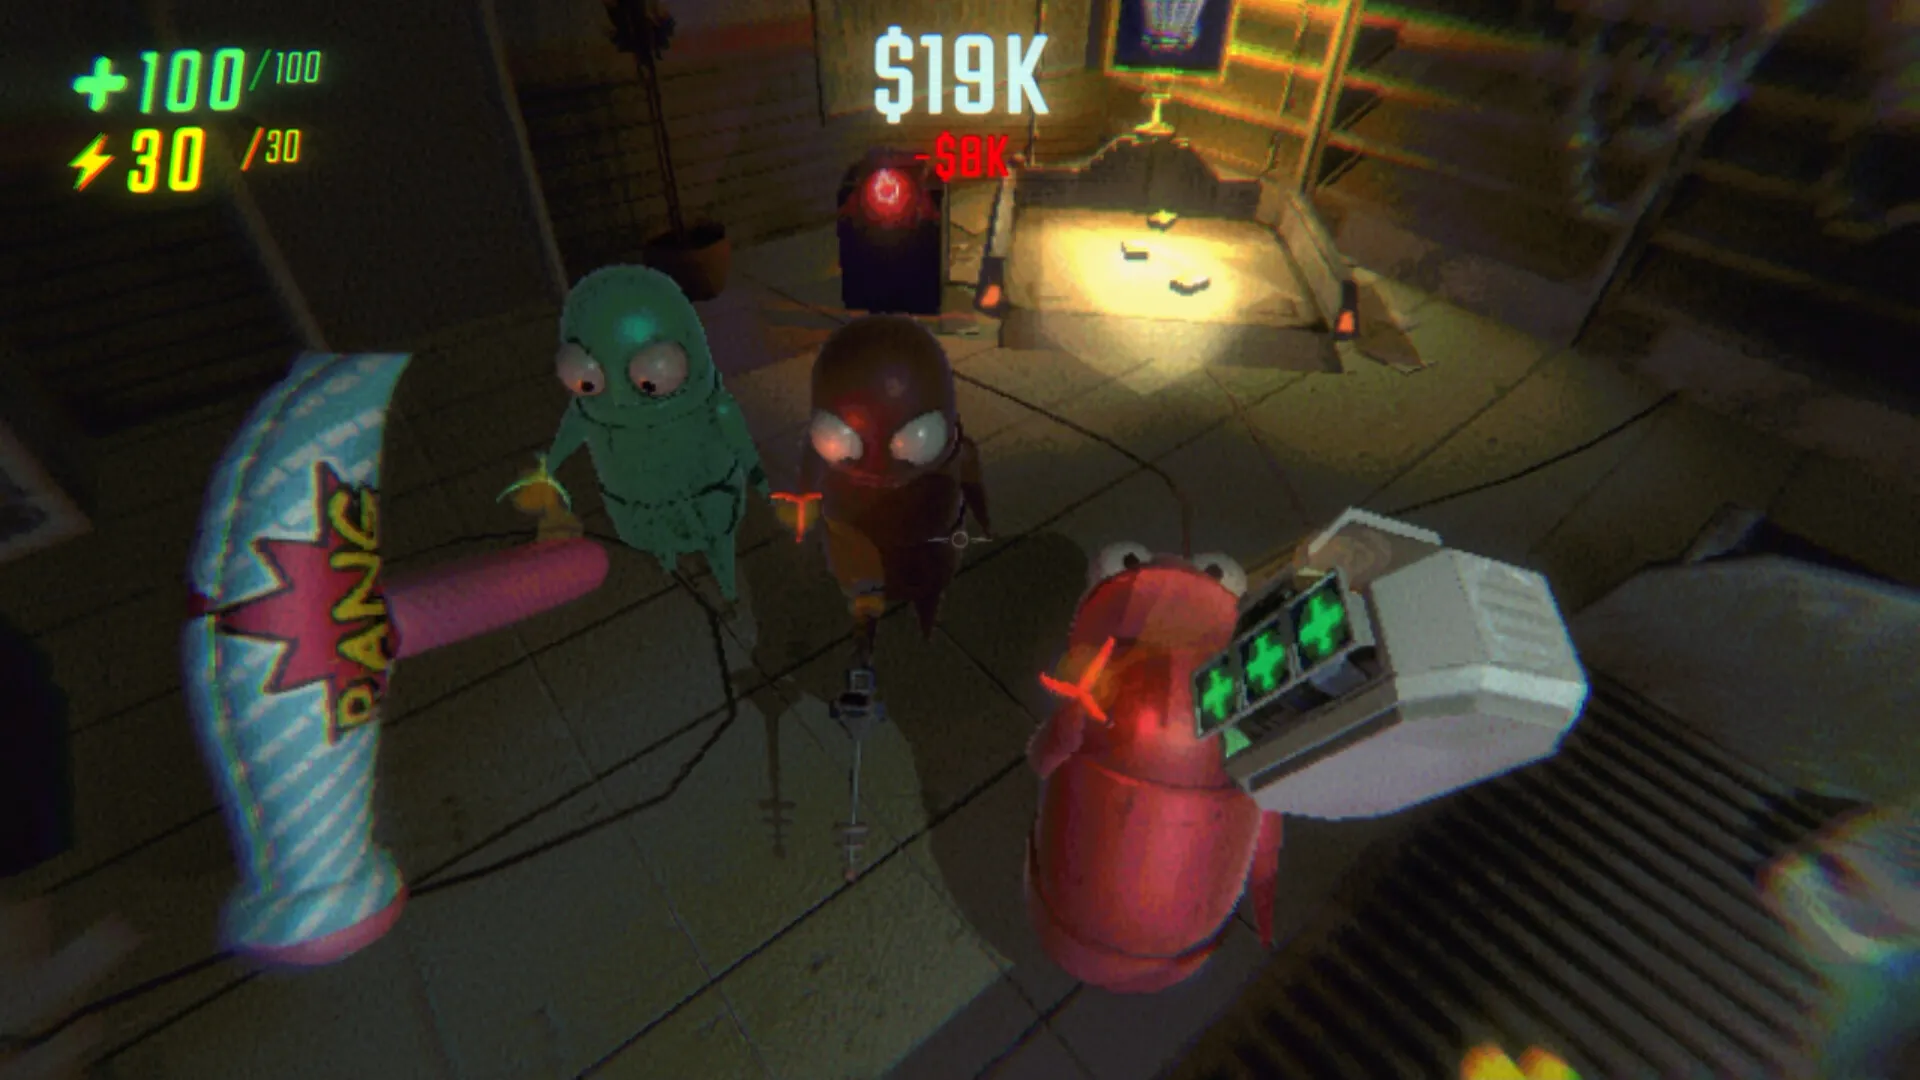
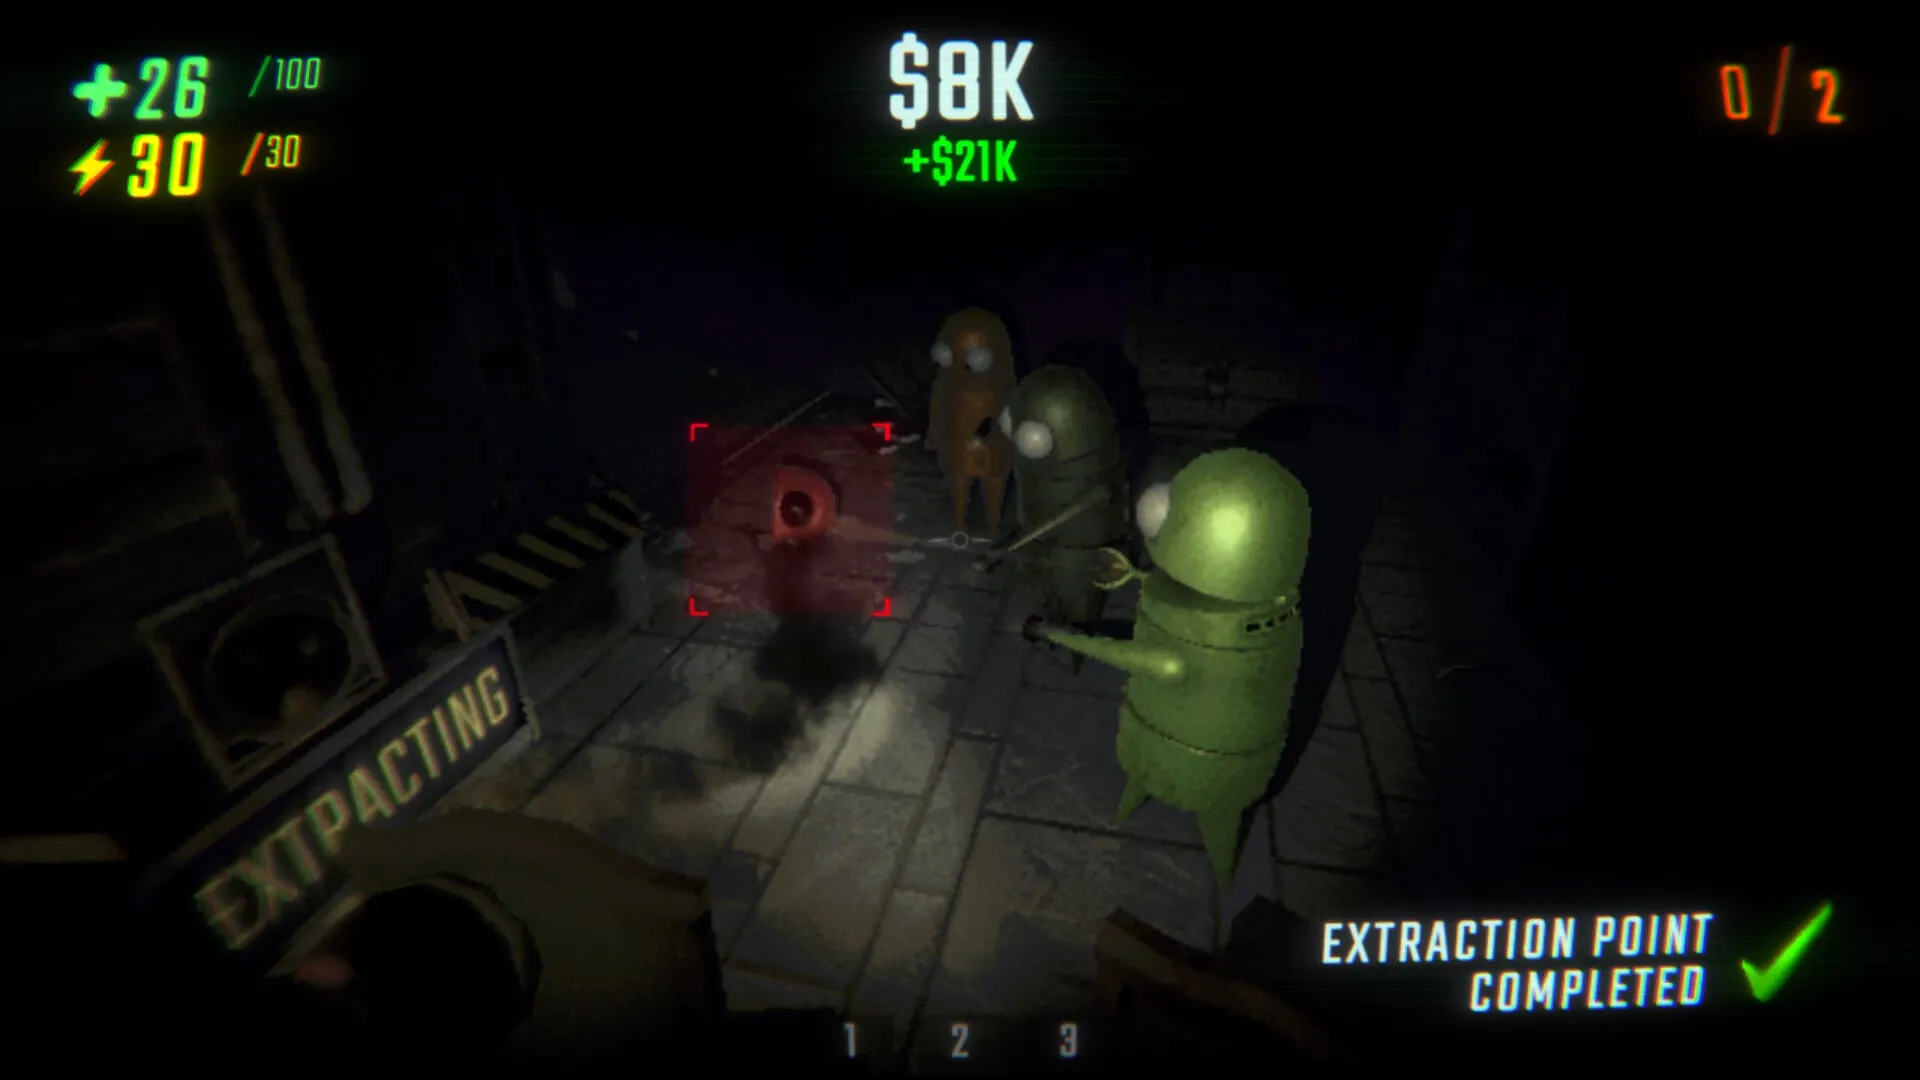
R.E.P.O. (Retrieve, Extract and Profit Operation) is a co-op physics horror game by Swedish studio Semiwork, launched February 26, 2025 on Steam Early Access. Up to six players control Semibots, expressive little robots dropped into procedurally generated facilities to retrieve physics-based valuables. Every object has real weight, balance, and fragility. Drop a vase and it shatters. Crash a cart into a doorframe and its contents scatter. The tension between careful handling and roaming monsters makes every run uniquely chaotic.
The game blends slapstick physics comedy with genuine horror. Most failures come not from monsters directly, but from haste, greed, and poor coordination. R.E.P.O. is fundamentally a game about discipline. Control your movement, manage your team's attention, and make smart decisions under pressure. It holds an Overwhelmingly Positive rating across 175,000+ Steam reviews, peaked at 230K concurrent players in its first weekend, and took the Golden Joystick for Best Early Access Game in November 2025.
| Fact | Detail |
|---|---|
| Developer / Publisher | Semiwork (Sweden) |
| Engine | Unity + Photon Networking |
| Release | February 26, 2025 (Early Access) |
| Platforms | Windows PC via Steam |
| Price | ~$3.49 base (S$9.50 SGD on the Singapore store) |
| Players | 1–6 (online co-op) |
| Steam Rating | Overwhelmingly Positive (175K+ reviews) |
| Peak Players | 230K concurrent (first weekend) |
| Awards | Golden Joystick Best Early Access Game 2025 |
| Crossovers | Fortnite Semibot outfits (Fortnitemares 2025) |
| Status | Early Access, approaching 1.0 |
| Locations | 4 explorable facilities + Service Station + Disposal Arena |
Getting Started
First Run Checklist
- Play the tutorial. The tutorial button glows on first boot. It walks you through grab mechanics, the cart, extraction types, tumbling, and shop use. The room respawns you if you die, so experiment freely.
- Pick your team size. Solo is viable but much harder. The sweet spot is 3–4 players. Difficulty and cash quotas scale with team size.
- Choose a contract at the van terminal. Each mission has a cash quota. Fail to meet it and you lose the upgrades you bought that run.
- Learn the cart. A C.A.R.T. spawns near the van entrance. It's your lifeline for moving loot. Push it carefully. Rough handling damages items.
The Core Loop
| Phase | What Happens |
|---|---|
| Entry | Arrive at the facility. Open the map (Tab), find the extraction point, plan a route before touching loot. |
| Recon | Open rooms slowly. Listen before entering. Check under beds, inside cabinets, lockers, and safes. |
| Looting | Collect valuables. Prioritize compact high-value items. Load them onto the cart. |
| Route Management | Clear paths to extraction. Create temporary drop zones near the exit. Mark hazards with glowsticks. |
| Extraction | Move loot into the extraction zone. Items must be fully inside. Meeting the quota closes the point and rewards a tax break for going over. |
| Evacuation | Head back to the truck. A timely extraction beats a greedy wipe every time. |
Beginner Mistakes to Avoid
- Sprinting everywhere. Noise is the #1 killer. Sprinting throws a sound bubble roughly the width of a hallway. Walk inside, crouch in unfamiliar rooms.
- Talking near a Huntsman. Voice chat is audible noise. He hears at 5x the range of other monsters.
- Ignoring your watch. The departure timer is on your watch face. Check it every 60 seconds. Getting stranded loses everything.
- Carrying fragile items while running. One stumble and that priceless vase is confetti.
- Blocking corridors with the cart. You will trap yourself or your teammates. Monsters also attack objects they get stuck on.
- Overstaying for "one more item." The most common wipe cause. Extract when you hit quota.
Complete Controls Reference
| Action | Key |
|---|---|
| Move | WASD |
| Look | Mouse |
| Grab / Interact | Left Click |
| Rotate Held Object | Right Click |
| Use Equipped Item | E |
| Jump | Space |
| Sprint | Shift (consumes energy) |
| Crouch / Collapse | Ctrl (turns off flashlight, reduces noise) |
| Inventory / Map | Tab |
| Drop Item | G |
| Ping / Communicate | Q |
| Tumble / Object Mode | Hold Q |
| Push-to-Talk | V |
| Chat (robot voice) | T |
| Item Hotbar Slots | 1, 2, 3 |
| Adjust Grip | Mouse Scroll Wheel |
| Expressions | 5 (angry), 6 (sad), 7 (suspicious), 8 (eyes closed), 9 (crazy), 0 (happy) |
Recommended Settings
| Setting | Recommendation |
|---|---|
| Camera Shake | 0% (reduces motion sickness) |
| Camera Animation | Off (removes head bob) |
| Lens Distortion | Off (clearer image) |
| Grain | Off (removes VHS-style noise) |
| Gamma | Slightly above default (visibility in dark areas) |
| FOV | 90–100 (wider peripheral vision) |
Core Mechanics — Deep Dive
How Monster Detection Works: Sight, Sound, and Proximity
Every monster uses one of three detection systems, and the system decides which survival rule applies. This is the single most important framework in the game.
| Detection Type | How It Works | Survival Rule |
|---|---|---|
| Sight-based | A detection cone in front of the monster. Stand outside it and you are invisible. Even thin table legs or chair backs block sightlines. | Break line of sight. Use doors, walls, and furniture. |
| Sound-based | Monsters investigate noise. Noise alone usually does not trigger an attack phase, with one exception: the Huntsman fires on sound. | Crouch-walk everywhere. Never sprint near a sound monster. |
| Proximity-based | A trigger radius around the monster. Direction and noise do not matter. | Keep your distance and know the radius. |
Detection timings by stance (these numbers matter):
| Stance | Vision Cone Size | Time To Get Spotted |
|---|---|---|
| Standing | Largest | ~1 second |
| Crouched / tumbled | Smaller | ~2.5 seconds |
| Hiding / crawling under furniture | Smallest | ~5 seconds |
Vision exceptions: The Oogly's cone is a green spotlight that always points down. The Cleanup Crew has a full 360-degree dome of vision. The Huntsman is blind. The Loom always knows exactly where its target is.
Ignored until provoked: The Birthday Boy ignores you until a balloon pops. Bella ignores you unless you block her path or grab her. The Shadow Child ignores you unless stared at. The Tick ignores you unless it sees your tractor beam holding something.
The Action Timer and the Monster "Leave" State
This mechanic is barely explained in-game and controls the rhythm of every level. When at least one monster shares a room with a Semibot, an action timer starts climbing at a rate equal to the danger level of each monster present (DL1 = 1/sec, DL2 = 2/sec, DL3 = 3/sec). Multiple monsters stack, so one of each level in your room ticks at 6/sec.
When the timer fills, it resets and every active monster on the level is forced into its Leave state. They vacate rooms containing Semibots and move several rooms away before returning to roam. You can see it happen: the Loom, Gambit, Bowtie, Reaper, and Elsa run off at an accelerated pace; the Huntsman grumbles and shrugs before walking away. This is why a monster never camps a room forever. If you can survive the burst of activity, the map goes quiet again.
Practical use: When the heat is on, split up briefly. Each isolated player speeds up their own room's timer, and the whole map clears sooner. But be careful, a leaving monster can still attack if it spots you on the way out.
The Danger Level System and Spawn Scaling
Every monster carries an official Danger Level from 1 to 3. It controls the threat ceiling and how many of each tier spawn per location.
| Game Level | DL1 Spawns | DL2 Spawns | DL3 Spawns |
|---|---|---|---|
| 1–2 | 1 | 0 | 1 |
| 3–5 | 1 | 1 | 1 |
| 6–8 | 2 | 2 | 2 |
| 9 | 2 | 3 | 2 |
| 10–19 | 2 | 3 | 3 |
| 20+ | 3 | 4 | 4 |
About 2.1% of the time on levels 1–2 (1.2% on level 3), a DL3 spawn is replaced by a pack of low-tier monsters: 6 Bangers, 4 Apex Predators, 10 Gnomes, 3 Elsa, 3 Bowties, and so on. A Huntsman slot converting to a pack of Bangers is a different problem and needs a different response.
Idle time at the start of a level tells you how long you have to loot before the map wakes up: level 1 gives 240–360 seconds, level 5 drops to 54–81 seconds, level 10 gives 22–33 seconds, and level 11+ starts at zero. There is a 20% chance any given level shortens idle time to a quarter of normal, so a quiet first minute is never guaranteed.
Monster despawn rules: a spawned monster has a fixed 3–4 minute survival timer that cannot be paused, then a 20–40 second despawn window that freezes whenever a Semibot is within 20 units. If it despawns, it respawns elsewhere. This is the basis of the "run two rooms away and wait" strategy.
The Respawn Timer Table — Why Long Runs Get Deadly
A despawned or killed monster always comes back as the same monster, and its respawn speed scales with how long the team has been in the level. This table is the reason veteran teams set a hard time budget per level.
| Time in Level | Respawn Timer |
|---|---|
| 0–10 minutes | 4–5 minutes |
| 10–20 minutes | 3.2–4 minutes |
| 20–30 minutes | 2.4–3 minutes |
| 30–40 minutes | 1.6–2 minutes |
| 40–50 minutes | 0.8–1 minute |
| 50+ minutes, or after the final extraction point | 1 second |
Three consequences follow directly from this table:
- Killing is a temporary fix, not a solution. In the first 10 minutes of a level, a killed monster takes at least 12 minutes to come back (the pre-final-extraction timer gets a x3 multiplier). That is a real window of safety. At the 40-minute mark, killing something barely matters.
- Noise shortens timers. Items that broadcast sound on their own, TVs, radios, instruments, actively accelerate monster respawns. Unplug or avoid them, especially on long levels.
- The final extraction point flips the table. The moment the last extraction completes, every dead or despawned monster returns within one second, and the spawn logic changes: monsters reappear between the truck and the players, never behind the players and never inside a player's room or an adjacent one (unless the team camps near the truck, in which case the truck room itself is fair game). Send your fastest player ahead to sweep the return route the instant the last point closes.
Health, Energy, and Death
- Base HP: 100. Base energy (stamina): 40.
- Health sharing: stand behind a teammate and left-click the green bar behind their head to transfer 10 HP. You cannot give away your last hitpoint.
- When you die: your body explodes and drops a head. Teammates carry it to the extraction zone to revive you with 1 HP, plus 1 second of invincibility after revive (v0.4.4).
- Bonus revive: if your head is in the extraction zone when the level ends, you revive with +25 HP.
- End-of-level heal: all surviving players heal 25 HP at level completion.
- Instant-death scenarios: Trudge's hammer slam, the Clown's laser into a wall, Cleanup Crew's head explosion at close range, the Huntsman's exact-position shot.
The Energy (Stamina) System
Stamina is your most limited resource. Walking costs nothing. Sprinting drains it. At zero, you cannot sprint until it regenerates.
- Crouch-walking is silent and costs no stamina. Make it your default in unexplored areas.
- Sprinting while carrying a heavy item drains stamina roughly twice as fast. Drop the item before sprinting from a threat.
- Stamina regenerates faster when standing still and unencumbered. After a sprint burst, stop behind cover for 3–4 seconds and you recover about half the bar. Burst and recover; do not spam sprint.
- Grabbing a monster to stun it costs stamina based on its mass. Heavier monsters drain more while held.
Loot Management: Values and Sizes
Every valuable belongs to a value type and a size type. Value types set the price range; size types decide where it spawns and how hard it is to move.
| Value Type | Range | Value Type | Range |
|---|---|---|---|
| Very Cheap | $250–500 | Medium++ | $4,500–5,000 |
| Cheap | $500–650 | High | $5,500–7,500 |
| Cheap+ | $850–1,100 | High+ | $9,500–12,000 |
| Cheap++ | $1,200–2,000 | Expensive | $18,000–25,000 |
| Medium | $2,000–3,000 | Expensive+ | $30,000–45,000 |
| Medium+ | $3,500–4,500 | Expensive++ | $45,000–50,000 |
Size types: Tiny and Small are easy one-hand carries. Medium items are manageable. Big items may not fit the cart. Wide items fill an extraction point alone and usually need two players. Tall and Very Tall items need care; Very Tall objects cannot fit through most doorways upright and must be stood upright or placed diagonally in the extraction zone.
Generation rules: the total number of valuables a level can hold is capped at 50, and the maximum total value scales with level until it caps at level 20+. Items near the entrance are intentionally low value. The game rewards pushing deeper.
Loot discipline rules:
- Carry one item at a time in dangerous areas. Two items means you cannot react.
- Create drop zones near the exit. Mark them with glowsticks.
- Stack small items on the cart before moving it.
- Broken items lose 50–80% of their value. A cracked vase beats a shattered one but loses to an intact one.
- Priorities: gems, jewelry, and gold bars first. Medium electronics next. Furniture and giant objects last, unless the quota demands them.
Extraction zone rules:
- Items must be fully inside the zone. Anything on the dashed red perimeter line is destroyed when the piston drops.
- A living player inside the zone during extraction is killed, then revived at 1 HP. Stay out of the way.
- Each extraction point can be used once per level, and only one is active at a time.
- Meeting the quota exactly gives a green checkmark. Going over grants a tax break worth bonus cash.
- Heads placed in the zone during extraction revive with 1 HP.
Sound and Stealth
| Action | Sound Level | Risk |
|---|---|---|
| Walking | Low | Minimal |
| Crouching | Very low | Safe, flashlight turns off |
| Running | High | Attracts nearby monsters |
| Sprinting | Very high | Sound bubble roughly hallway-width |
| Landing from a jump | Very high | Pulls sound monsters from across the map |
| Breaking valuables | Very high | Alerts everything nearby |
| Holding Q (object mode) | Silent | Undetectable while stationary |
| Text chat / voice chat | Audible | Huntsman investigates and fires on it |
Stealth checklist:
- Crouch when entering unfamiliar rooms. Make it a habit.
- Flick the flashlight on and off. A constant beam is visible.
- Use glowsticks to mark paths. Cheap and silent.
- Listen for cues: footsteps, breathing, humming, screaming, clacking teeth, giggles.
- Hear something odd? Stop and identify the monster before acting.
- Break line of sight and wait. Monsters despawn or enter Leave state within 20–30 seconds of losing you.
- Throw bottles or cans to misdirect. Impact noise draws monsters to the point of impact.
Stun Rules — The Item-Size Ladder
Throwing valuables at monsters is not just a panic move, it is a system. Most monsters enter a knocked-down state when hit by an item of sufficient size, and a stunned monster is easy to grab, lift, or finish off. The ladder works like this:
| Item Size Needed | Monsters Stunned |
|---|---|
| Small item or larger | Animal, Spewer, Gnome, Headgrab, Shadow Child (knocked down, not fully stunned), Apex Predator (only while stunned) |
| Medium item or larger | Bowtie, Chef, Clown, Huntsman, Mentalist, Reaper, Robe, Rugrat, Upscream, Headman, Trudge |
Rules that make the ladder useful in practice:
- Lift requirements drop to nearly zero while a monster is stunned. A Duck no player can ever grab awake becomes liftable the moment it is dazed, which is how the toilet-and-cauldron trick works: flush or boil first, then grab the dazed duck and slam it.
- Throw cheap, sturdy junk, not the $18K trophy. The thrown item takes impact damage too. A $300 candlestick does the same stun work as a priceless urn.
- Backstab beats frontal throws. A hit from behind stuns more reliably and does not require winning a strength check first.
- Team lifts stack. Every player contributes internal strength (base 5, +1 per upgrade), and two players grabbing the same monster simultaneously can freeze it in place for several seconds. That is how a fresh team lifts breakpoint-4 monsters with zero upgrades.
Off-Beat Shop Tools Worth Knowing
The Service Station stock rotates, but four underused purchases solve specific problems:
| Tool | Price | What It Does |
|---|---|---|
| Explosion Mine | $3K–9K | Arm it and place it on a monster's patrol path. 200 damage plus a stun, no need to be anywhere nearby. The safe answer to a DL3 blocking a loot room. |
| Tape Grenade | $2K–10K (secret stock) | Four charges, 100 damage each. Cheap stunlock fuel for Huntsman escorts or a Trudge near the extraction route. |
| Roll Drone | $9K–11K | Attaches to an enemy and ragdolls it around; terrain impacts do the damage. Doubles as crowd control on pack spawns. |
| Feather Drone | $15K–18K | Attach to a stunned enemy to lift and slam it regardless of your Strength level. Breakpoint 13 monsters become team-killable without a single Strength upgrade. |
Pair the Feather Drone with any reliable stun (thrown cart item, Tranq Gun, mine) and a level 1 team can delete a Trudge. That combo is the cheapest boss-kill in the game.
The Service Station — Economy, Upgrades, and Loadouts
Between levels you stop at the Service Station. Cash earned is rounded down (9.6K becomes 9K). You can test any item for free with infinite ammo, and any damage taken is healed when you leave. Dead players are revived by the shop's extraction point.
Upgrade Categories
| Color | Category | Upgrades |
|---|---|---|
| Red / Orange | Grabber | Strength, Range |
| Blue | Mobility | Tumble Launch, Tumble Wings, Extra Jump, Tumble Climb |
| Yellow | Stamina / Speed | Stamina, Sprint Speed, Crouch Rest |
| Green | Defense | Health |
| Beige | Tools | Map Player Count, Death Head Battery |
Max purchasable upgrades: 21. Upgrade prices rise every time you buy more of the same one. The formula roughly doubles the price per purchase, with a small discount per extra player.
Every Upgrade, Exactly
| Upgrade | Effect Per Level | Notes |
|---|---|---|
| Strength | +20% grab strength | The single most important upgrade. See breakpoints below. |
| Range | +40% grabber range | Reach stops extending at level 8 unless you also run Tumble Climb. |
| Stamina | +10 max stamina | Base is 40. Never skip these. |
| Sprint Speed | +20% speed, +1 stamina/sec drain | Fun, but drains your reserves faster. |
| Crouch Rest | +1 stamina/sec regen while crouched (+0.5 while moving) | Pairs with stealth play. |
| Health | +20 max HP | One early level lets you survive a 100-damage DL3 hit. |
| Tumble Launch | +3 forward force | Faster, longer tumbles. Does not add tumble damage. |
| Tumble Wings | 1s glide base, +0.25s/level | Resets fall damage. At 16 levels you glide with zero gravity. |
| Extra Jump | +1 air jump | Reach high shelves, cross gaps. |
| Tumble Climb | Grab walls/ceilings while tumbled | Drains stamina as a % of max, so more stamina does not extend climb time. Level 1 allows ~5.7s of climbing, level 10 ~9.2s. |
| Map Player Count | Shows alive players on map | Singleplayer: never appears. Once used, never respawns. |
| Death Head Battery | +battery time when dead | Base 25s, max 125s. Longer after-death comms. |
Strength Breakpoints (the most important table in the game)
Strength upgrades determine which monsters you can grab with the tractor beam. The listed breakpoint is the number of upgrades needed for one player to grab the monster while it is awake (not stunned).
| Breakpoint | Monsters |
|---|---|
| 0 | Gnome, Banger, Tick |
| 4 | Rugrat, Birthday Boy, Upscream, Animal, Spewer, Headgrab, Hidden, Mentalist |
| 7 | Bowtie |
| 9 | Bella, Chef, Gambit, Heart Hugger, Oogly, Huntsman, Reaper |
| 13 | Cleanup Crew, Clown, Headman, Loom, Robe, Trudge |
| Impossible | Apex Predator, Elsa, Peeper |
Multi-player grabbing: internally every player starts with 5 strength points and gains 1 per upgrade, so a monster's effective grab threshold is 5 higher than listed, and every additional player contributes 5 more. Think of it as subtracting 5 from the listed breakpoint for each grabbing player beyond the first. Two players with zero upgrades can grab anything with a breakpoint of 4. That is how a fresh team lifts a Rugrat or an Upscream.
Why four is the magic number: at four Strength upgrades you can solo-grab and slam Rugrats, Birthday Boys, and Upscreams, throw them into pits, or use them as improvised weapons.
Upgrade Manipulation
Upgrades exist in exactly one place at a time: the shared pool, the truck (up to 16, excess goes to a void), or the shop (10 slots). The same upgrade cannot be in two places.
The trick: the shop always displays 10 upgrades. If you buy all 10 and do not consume them, they sit in the truck and the same 10 respawn in the shop next time. If you consume an unwanted upgrade (use it), that slot frees up and something else can roll in. So to chase a specific upgrade, buy the shop out, consume what you do not want, and keep what you do. Since the Museum update, Strength is the most valuable roll in the game, so this is how you guarantee it shows up.
Rerolling: hold the button in front of the upgrade machine. The first reroll costs $5K and each subsequent one adds another $5K. The button can randomly break after 1–3 rerolls and is fixed at the next station.
Recommended Purchase Order
- Strength 4 (priority one). Unlocks solo grabs on the whole DL2 light tier.
- Health 1. Survives one DL3 attack.
- Stamina 2. More sprint, more survival.
- One melee weapon. Wrench or Crowbar. Quiet defense.
- A second C.A.R.T. Hauling efficiency pays for itself in one run.
- Range 1–2. Grab loot from safer positions.
- Energy crystals early. They cost $5K–7K on early levels and balloon to $11K–18K later. Buy a stack at levels 3–5.
- Tumble Climb or Tumble Wings once you are comfortable with tumbling.
Weapon Tier List
| Weapon | Tier | Type | Best Use Case |
|---|---|---|---|
| Frying Pan | S | Melee | Highest melee damage; scales with Strength. |
| Crowbar | A | Melee | High damage, reliable. |
| Shotgun | A | Ranged | Emergency burst. |
| Tranquilizer Gun | A | Ranged | Stuns enemies, enables safe kills. Reveals the Hidden. |
| Wrench | B | Melee | Quiet, cheap, great early game. |
| Handgun | B | Ranged | One accurate bullet kills a Peeper. |
| Zero Gravity Staff | A | Ranged (6 pips) | Lifts enemies, lets you fly when used on self (v0.4.4). |
| Roll Staff | B | Ranged (6 pips) | Rolls enemies away; now targets enemies. |
| Void Staff | C | Ranged (6 pips) | Situational group clear. |
| Clown Doll | S (situational) | Valuable weapon | Explosive. Honk the nose 3 times to detonate. Best answer to the Trudge. |
| Duck Bucket | S (situational) | Tool | Pacifies the Apex Predator and Elsa. |
| C.A.R.T. Cannon / Laser | A | Mounted | Bolt onto a cart for heavy firepower. |
| Energy Crystal | — | Consumable | Recharges staffs and weapons. Auto-consumes to refill the truck. |
Melee note (v0.4.4): weapon handling now scales properly with Strength. High-strength builds make melee dramatically better, and Tumble Launch without Tumble Launch upgrades stays cheap, so hybrid builds are stronger than ever.
Build Roles & Team Composition
R.E.P.O. has no formal classes, but the best teams assign roles. Aim for 3–4 players: one Scanner, one Grabber, one Driver, and either a Runner or a Fighter.
| Role | Core Gear | Upgrade Priority | Job |
|---|---|---|---|
| Scanner | Map upgrade, Radio | Range → Map → Stamina | Enters rooms first, calls values, tracks monsters |
| Grabber | Strength upgrades | Strength 4+ → Stamina | Hauls high-value items |
| Driver | Extra C.A.R.T.s | Stamina → Range | Cart logistics, extraction timing |
| Runner | Sprint upgrades | Stamina → Sprint | Shuttles small valuables and heads |
| Fighter | Staffs, Tranq Gun | Stamina → Strength | Monster management, kiting |
Role snapshots:
- Scanner: sweep each room from the doorway before entering. Call out values and monster positions. Your awareness prevents ambushes.
- Grabber: follow the Scanner's callouts. Carry one item at a time in danger zones. When two players carry a heavy object, both must aim the same direction; pulling opposite ways drops it.
- Driver: never let the cart sit in a hallway. Keep it tucked in a cleared room. When the cart is full, push it to extraction while the team keeps looting.
- Fighter: between the monster and the team. Tranq problem monsters, kite the Reaper, and designate yourself as the sacrifice when the team must escape.
- Runner: small high-value items only. You also carry dead teammates' heads; heads ride on the cart just fine.
Communication callouts:
- "Ping [item] [room]" for valuables.
- "Monster [type] [location]" the moment you see one.
- "Quiet, Huntsman" is the most important callout in the game.
- "Timer X minutes" at 2, 1, and 0.5.
- "Extraction ready" before pulling the piston.
Monster Encyclopedia — Complete Threat Assessment
All 29 monsters, grouped by Danger Level, with exact HP, damage, and the counter that actually works.
Danger Level 1 — Low Threat (Avoidable)
| Monster | HP | Damage | Detection | Counter |
|---|---|---|---|---|
| Apex Predator (Duck) | 150 | 10/hit, up to 3 bites/sec enraged | LoS, proximity, touch | Never grab it. Duck Bucket pacifies. Flush down a toilet or lure under the extraction piston for an easy kill worth $2,000–3,000. |
| Bella (Tricycle) | 200 | 5/hit | Blocked path, touch | Watch the bell, not the bike. Ring 1 is green, ring 2 is yellow, ring 3 is red: the ghost appears and attacks for about 15 seconds. Walk around her. Do not grab her. Her phantom phases into your hiding spot while attacking, so hiding in place is not cover. |
| Birthday Boy | 150 | 10/hit | After balloons pop | Do not pop the balloons. |
| Elsa | 600 | 30/hit | LoS, proximity, touch | Pet her 5 times by grabbing. Break line of sight before she enrages; once enraged she always knows where you are. Duck Bucket works. |
| Gnome | 20 | 10 | LoS, proximity, touch | Grab and smash into a wall. Do not kill them after the final extraction points are done, they respawn instantly in packs. |
| Peeper | 30 | 2/sec stare | Line of sight | Break LOS with furniture or items. One Gun bullet kills it. Do not rush in after a teammate breaks LOS, it re-targets you. |
| Shadow Child | 150 | 50 | Eye contact | Short glances only. The giggle cue warns you. Small thrown items knock it down. |
| Spewer | 65 | 10/hit | LoS, proximity, touch | Duck its vomit. If it latches onto your face, aim the vomit at other monsters to stun them. Tranq it first for a clean kill. |
| Tick | 10–100 | 10/hit | Holding something | Just do not hold items near it. It ignores empty-handed players. |
Key DL1 tactics:
- Apex Predator: the duck actively baits you into grabbing it by jumping onto your crosshair. One rule: do not click it. If enraged, outrun it for 10 seconds; it cannot be hidden from, but it exhausts after 30 seconds of flying and falls to its death if it went airborne. The cleanest kill is luring it under the extraction piston, which also pays you its $2,000–3,000 orb.
- Elsa: pet by grabbing, five times. Heart particles confirm. If she starts barking faster with reddening eyes, you have about 15 seconds to break line of sight before the enrage.
- Peeper: after about 3 seconds of staring it drains 2 HP/sec. Break LOS with a door, wall, or item. Open the map to navigate while affected. Jump-swing with a melee weapon, or one bullet from the Gun, kills it.
- Spewer: if it latches onto your face, crouch; it eventually leaves. Point the vomit away from valuables.
Danger Level 2 — Medium Threat (Requires Tactics)
| Monster | HP | Damage | Detection | Counter |
|---|---|---|---|---|
| Animal (Insect) | 150 | 2/hit | LoS, proximity, touch | Sidestep after it locks on; it charges your old position. Two players grabbing simultaneously freezes it. $2,000–4,200 orb. |
| Banger | 50 | 30 explosion | LoS, proximity, touch | Pick up and throw like a grenade at stronger monsters. No orb on death. |
| Bowtie | 200 | 5 physics/hit | LoS, proximity, touch | Giant mouth on detection, ~55 dmg strikes. Slow. Just run. |
| Chef (Frog) | 150 | 10/hit | LoS, proximity, touch | Sidestep the moment its leap wind-up starts. |
| Gambit | 150 | Wheel: 50 or sets HP to 1 | LoS, proximity, touch | Do not engage. Run. |
| Headgrab | 150 | 5/hit, 15 dropkick | LoS, proximity, touch | Keep your distance. |
| Heart Hugger | 300 | 30/hit | LoS, proximity, touch | Heavy hitter. Run; it is a meat wall. |
| Hidden | 100 | None (dragging) | Invisible, breathing | Have a friend grab you while it carries you. Tranq reveals and stuns it. |
| Mentalist | 150 | 50 slam | LoS, proximity, touch | Pull teammates out of the aura. Land on a cart or extraction point for zero fall damage. Grab or stun it mid-channel to interrupt. |
| Oogly | 200 | 4/hit | Green spotlight | Stay out of the green light. Easy to hide from. |
| Rugrat | 150 | 19–225 (thrown items) | LoS, proximity, touch | Stun with a thrown cart item. Pick it up at 3 Strength and slam it. |
| Upscream | 50 | 10 + launch | LoS, proximity, touch | Break LOS. In trios, chain stuns kill. Tranq or hide. |
Key DL2 tactics:
- Animal: it charges the exact spot where you stood when it detected you, then moves randomly. Sidestep after it locks on and it misses. Two players grabbing it at once freezes it in place for several seconds.
- Hidden: completely invisible. Listen for loud footsteps and breathing. It grabs you and runs off, often straight toward a Huntsman or Headman. The counter is teamwork: a friend grabs you mid-carry and holds you in place. The Tranq Gun reveals and stuns it.
- Mentalist: silent movement. If it catches a teammate in its purple bubble, grab and pull them out before the bubble turns red. If you are slammed, land on a cart or extraction point to take zero fall damage.
- Upscream: it screams and flings you backward for 10 damage. Three of them near a clustered team chain-stun people to death. Sedate with the Tranq or hide under furniture.
- Bangers: each is a walking bomb. Throw them at stronger monsters. Like Gnomes, do not kill them once all extraction points are done; they respawn instantly in packs.
Danger Level 3 — High Threat (Run or Hide)
| Monster | HP | Damage | Detection | Counter |
|---|---|---|---|---|
| Cleanup Crew | 350 | 85 head explosion, 15/sec radiation | 360° vision | Corner the head or dodge sideways at the last moment. Avoid the radiation zone for 30–45 seconds. |
| Clown | 250 | 100 laser, 60 kick | LoS, proximity, touch | Crouch under the horizontal laser. Jump over downward sweeps. Never hide right next to it. |
| Headman | 250 | 50 bite | LoS, proximity, touch | Silent patrol. Crouch-slide under it. A C.A.R.T. parked in a doorway blocks it. |
| Huntsman | 250 | 100 per shot | Sound only (5x range) | Be silent. Voice chat is audible. Lure it down stairs to stun it. |
| Loom | 500 | 100 clap + 25 physics | Always knows target | Survive ~30 seconds; it retreats on its own. Marked by a heartbeat overlay. |
| Reaper | 250 | 10/hit | LoS, proximity, touch, sound | Break LOS fast. It cannot jump high, so take the high ground. Attack from its sides. |
| Robe | 250 | 100 normal, 50 hiding | LoS, proximity, touch | Do not look at it. It walks slower than you when unobserved. |
| Trudge | 500 | 100 slam, 100 explosion, 35 crouch bite | LoS, proximity, touch | Just run. It is slower than your crawl. Never hide near it. |
Key DL3 tactics:
- Huntsman (the run-ender): completely blind with 5x hearing. Every sound in a 25-tile radius is a potential target, and a single shot does 100 damage. Voice chat counts as noise. Crouch-walk everywhere, stay silent, and if you must communicate, type instead (chat is quieter than voice, though still audible). Lure it down stairs: it falls, takes physics damage, and stuns briefly, opening a kill window.
- Loom: cannot be escaped by hiding; it always knows where you are. The only win condition is survival. After about 30 seconds the screen flashes orange and it hunches over and sprints away. If you get clapped, the shockwave launch plus surface impact is usually lethal. Keep walls between you and it.
- Trudge: the slowest monster in the game, but its mace slam is an instant kill and creates a vacuum that sucks in valuables and carts. Never hide near it, it will stare you down for 5 seconds then bite you to death at 35 per hit. Designate one player to lure it away from the loot path.
- Cleanup Crew: 360-degree vision makes it nearly impossible to flank. When it throws its head, do not run in a straight line; the head builds momentum. Turn a corner or dodge sideways. After the explosion, the radiation zone ticks 15 damage per half second, so mark it and give it 30–45 seconds.
- Reaper: persistent and fast enough to corner you if your stamina is gone. Break line of sight and change rooms. Attack it from the sides or it bats your weapon out of your hands. It cannot jump high; ledges are safe.
- Robe: it stalks you slowly, but the moment you look at it, it accelerates drastically. Do not look at it. Walk away without eye contact and it cannot catch you.
- Clown: its laser sweeps horizontally at head height. Crouch under it. If it aims down, jump; if it aims up, stand still. Its kick is dodgeable by jumping or backpedaling.
Fight vs Avoid: The Decision Framework
| Situation | Decision | Why |
|---|---|---|
| DL1 or DL2 monster blocking a needed corridor | Fight or pacify | Cheap to remove, low risk with Strength 4+ |
| DL2 monster near the cart | Kite or hide | The cart is the priority |
| DL3 monster anywhere | Run | One mistake is instant death |
| Monster near the extraction piston | Lure it under | Free kill plus item value |
| Any monster while you carry fragile loot | Hide | The loot is worth more than the fight |
Step-by-Step Strategy Guide
Early Game (Levels 1–3) — Foundations
- Open the map, find the extraction point, and plan a route before touching loot.
- Clear rooms nearest the truck first. Create a safe perimeter.
- Grab compact valuables only. Gems, gold bars, and jewelry beat furniture every time.
- Load the cart methodically. Push it through cleared paths only.
- Hit the quota and leave. Going over is nice, surviving is mandatory.
- At the Service Station: Strength to 4 first, one Health, one Stamina, one melee weapon.
Mid Game (Levels 4–8) — Team Optimization
- Expect multiple extraction points and more monsters. Plan which point to use in which order; each works once.
- Assign roles explicitly. Scanner, Grabber, Driver, Fighter.
- Use the map actively. Yellow dots are valued valuables, blue dots are items and carts, red dots are dead teammates.
- Kite dangerous monsters. One player leads a Bowtie or Chef away while the rest extract.
- Revive dead teammates immediately. Heads ride on the cart to the extraction zone.
- Buy the second upgrade tier. Strength 4+ and Stamina 2+ change how the game feels.
- Buy energy crystals now while they are cheap.
Late Game (Levels 9+) — High-Stakes Extraction
- Monsters wake up almost immediately (22–33s idle, zero at 11+). Budge from the truck fast.
- Environmental hazards everywhere. Never fight near pits or lava.
- DL3 monsters are regulars. Respect every single one.
- Stockpile energy. At 11K–18K late game they are prohibitive.
- Use Q object mode strategically. Teammates carry you past dangerous corridors.
- Always leave someone on cart duty. An unguarded cart gets destroyed by monsters or sucked in by a Trudge.
- Coordinate extraction order. Highest value first. If time runs short, abandon cheap items.
5 Actionable Extraction Sequences
Sequence 1: Standard Room Clear
1. Approach door → crouch → listen for 3 seconds
2. Open door slowly → flick the flashlight
3. Room clear → scan for valuables → call out values
4. Monster inside → close the door quietly → mark it on the map → move on
5. Return after confirmation → grab the highest-value item → back to the cart
Sequence 2: Monster Evasion
1. Hear a monster cue → stop moving immediately
2. Identify direction and monster type from the sound
3. Crouch-walk to the nearest cover (corner, furniture, pillar)
4. Hold Q to enter object mode → wait 20–30 seconds
5. The monster enters Leave state or despawns → continue with caution
Sequence 3: Team Revive Under Pressure
1. Teammate dies → locate the head (pinged on the map)
2. Runner or Driver grabs the head
3. Place the head on the cart for safe transport
4. Clear a path to the nearest extraction point
5. Deposit the head → teammate revives with 1 HP
6. Health-share immediately to top them up
Sequence 4: Multi-Cart Logistics
1. Driver pre-positions 2–3 carts near the entrance
2. Grabbers fill cart one → Driver pushes it to extraction
3. Grabbers switch to cart two while Driver returns
4. Cart three stays mid-map as an emergency stash
5. Final two minutes: consolidate everything onto the active extraction zone
Sequence 5: Emergency Evacuation
1. Timer hits 2 minutes → call "final push" on voice
2. Everyone stops looting and moves toward extraction
3. Grabbers carry one high-value item each and sprint
4. Fighter watches the rear, delays pursuers
5. Driver counts heads at the zone, confirms everyone is present
6. Extract with 30+ seconds to spare. Never cut it close
Advanced Tips
Tumble Tech
Sprint, jump, then press Q mid-air. You launch forward as a physics projectile. Tumble Launch upgrades extend the distance; Tumble Wings lets you glide; Tumble Climb lets you grab walls and ceilings and scramble around the environment while tumbled.
Combos:
- Tumble Launch + Clown Doll: detonate the doll (honk its nose 3 times) while tumbled to avoid the blast yourself.
- Tumble dash under attacks: sprint + crouch rolls you forward, dodging under laser sweeps, tricycle charges, and head dashes.
- Tumble + carry: a tumbled teammate can be picked up and thrown. Throw them across gaps, or have the Driver throw a tumbled player onto a high shelf to reach a Very Tall valuable.
C.A.R.T. Boosting
Hold the C.A.R.T. handle (STRONG mode, blue-green beam) and rotate to face the opposite direction. You get a speed boost while in front of the cart. This is the core speedrun movement tech. Only works as the host or in singleplayer. Put a Pocket C.A.R.T. inside a full C.A.R.T., face it forward, and hold its strong mode to "drive" the cart hands-free.
Extraction Piston Kills
The piston crushes anything under it. Lure small monsters (Apex Predator, Gnome, Banger) under the piston and extract. You get the kill reward plus the enemy valuable. A single Apex Predator cropped this way pays $2,000–3,000, and you can repeat it every extraction point.
Multi-Player Grab Lock
Two or more players grabbing the same Animal freezes it for several seconds. The same principle works on many breakpoint-listed monsters: use stacked grab strength to hold a monster still while the team unloads on it or dumps it into a pit.
Huntsman Stairs Trap
Hit a staircase with the Huntsman nearby. He follows the noise, falls down the stairs, takes physics damage, and stuns briefly. Wail on him during the stun window.
Upgrade Manipulation Loop
1. Reach the Service Station
2. Read the 10 upgrades in the shop
3. Wanted upgrade present → buy it, consume it
4. Unwanted upgrades → buy them, keep them in the truck unconsumed
5. Same unwanted set respawns in the shop → repeat until the wanted pool is all that spawns
Hotbar Discipline
Slots 1, 2, and 3 hold small items. Dedicate them to gems and jewelry. A full hotbar of compact valuables deposits in 3 seconds, roughly triple the efficiency of hand-carrying.
The 2.1% Preparedness Rule
A small chance exists that a DL3 slot becomes a swarm (6 Bangers, 4 Ducks, 10 Gnomes). When the map starts with a swarm, everything changes: mass noise, mass chaos, no single big threat. Split up early, never cluster, and clear swarms with thrown Bangers before they corner you.
Solo Play Guide
Solo is the hard mode. The game is balanced around 3–4 players, and no one can revive you mid-level.
- Strength is king. Rush to 4 Strength upgrades. You carry everything yourself.
- Go slow. One mistake ends the run.
- Monster management: two rooms away and 20–30 seconds is enough for most monsters to despawn or leave.
- Priority ruthlessly: compact high-value items only. Never touch furniture.
- Recommended path: Strength 4 → Health 1 → Stamina 2 → Range → Tumble Climb.
- Avoid combat. You cannot afford the health loss. Hide and wait.
- Extract early, extract often. Greed is the solo killer.
- Use Q liberally. Object mode near walls is your best defense.
- Tranq Gun for the Hidden. It is your only reliable counter.
- Speedrun aid: at the Service Station, buy what you need and self-destruct to skip walking to the truck. Damage is undone when the next level starts.
Locations
| Location | Vibe | Loot Notes |
|---|---|---|
| Swiftbroom Academy | Magic school | Stone floors amplify footstep sounds; cauldrons can stun enemies |
| Headman Manor | Haunted mansion | Tight rooms; the Headman's home turf |
| McJannek Station | Train station | Long corridors; sound carries; carts block doorways well |
| Museum of Human Art | Art gallery | Security lasers; open halls; the Clown's lore home |
| Service Station | Shop | Buy upgrades and items between levels |
| Disposal Arena | Game over | Last Loser Standing minigames |
Disposal Arena Minigames
After a team wipe, the Taxman drops your tumbled bodies into one of two minigames:
- Battle Ring: an octagonal platform with rings that collapse outward. Kill the others with the weapons and valuables scattered around. Grab the crown for "King of the Losers" bragging rights until the next arena. If only one player enters the arena, they drop into the void: "GAME OVER."
- Scout Race: kart racing with Scouts. Platforms constantly drop, so keep moving forward. Use A/D to slide and ram rivals off course (risky, it slows you too). The crown flies to the last survivor. Note: weapons used in the prior game retain their charge state, so pre-check your gear.
Recent Updates & Roadmap
R.E.P.O. is in active Early Access. Semiwork ships regular updates.
v0.4.4 (Latest Patch)
- Melee weapon handling scales with Strength. High-strength melee finally feels firm.
- 1 second of invincibility after revive, no more instant deaths on pickup.
- Zero Gravity Staff: more controllable, lasts longer on objects, and players can fly while targeting themselves.
- Roll Staff: rolled objects now home in on enemies, and players get the Roll Drone effect, roll freely and steer with the camera.
- Void Staff: stronger pull on heavy objects plus outward surges near the center so items stop idling in midair.
- Trudge buff: it now uses Void Staff-style suction, pulling in bigger valuables more easily with more chaos at the center. Treat a nearby Trudge as an active threat to unguarded carts, not just to you.
- All staff weapons standardized to 6 battery pips.
- Cosmetic box spawns increased, including Ultra Rares.
- Vehicle grab button shrank to cut accidental activations; a save-file backup system protects against quit-during-save corruption.
v0.4.0 — The Cosmetic Update (May 2026)
- Over 500 cosmetic parts to unlock.
- Cosmetic Shop Machine and Cosmetic Boxes with a "bad luck" multiplier.
- Tumble Climb got silently buffed and most players missed it: it drains far less stamina than before. If you skipped it in earlier patches, retest it. It is the backbone of the next update's new level.
Upcoming
- A brand new level: TUMBLE CLIMB is the main focus of the next update, a vertical climbing layout built around the Tumble Climb upgrade.
- Devlogs are slowing down because the small team is building the new level and 1.0 at the same time.
- The game is marching toward a 1.0 full release.
System Requirements
| Component | Minimum | Recommended |
|---|---|---|
| OS | Windows 10 | Windows 11 |
| Processor | Core i5 6600 | Intel Core i7 8700 |
| Memory | 8 GB RAM | 8 GB RAM |
| Graphics | GTX 970 | GTX 1070 |
| DirectX | Version 10 | Version 12 |
| Storage | 1 GB available space | 1 GB available space |
| Network | Broadband Internet | Broadband Internet |
The game runs on Unity and is well optimized for the genre. On lower-end systems, disable volumetric lighting, reflections, and post-processing to hold 60 FPS.
FAQ / Common Mistakes
Top 5 Mistakes Beginners Make
| Mistake | Why It Hurts | Fix |
|---|---|---|
| Sprinting everywhere | Noise attracts monsters across the facility | Walk inside, crouch in unfamiliar rooms |
| Buying weapons before upgrades | A gun does not help if you cannot carry the loot | Strength and Health first |
| Ignoring the timer | Being stranded loses all unextracted loot | Check your watch every 60 seconds |
| Overloading the cart | A full cart is slow, loud, and hard to defend | Extract when the cart is 80% full |
| Fighting every monster | Combat damages loot and wastes time | Hide and wait; most monsters despawn or leave |
Quick Answers
Is R.E.P.O. free? No. About $3.49 on Steam, frequently discounted. The Singapore store shows S$9.50.
Can I play solo? Yes, but it is significantly harder. Difficulty scales with team size.
How many players? Up to 6 in online co-op. The sweet spot is 3–4.
Does R.E.P.O. have matchmaking? It is built for friends. Most teams form through the R.E.P.O. Discord or Steam friends.
What platforms? Windows PC via Steam. No console or Mac versions yet.
Does progress carry over? Upgrades and cosmetics purchased with cash persist. Run loot does not. A team wipe loses the run.
Is there an ending? No story campaign. The goal is to survive as many runs as possible and amass wealth.
Can I save mid-run? Checkpoints exist if the host exits without a full wipe. A wipe resets the run.
How do I revive teammates? Grab the dropped head, put it in the extraction zone. Revives at 1 HP with 1 second of invincibility. Heads in the zone at level end revive with +25 HP.
What is the best weapon? Early game: Wrench or Crowbar. Mid game: Tranquilizer Gun. Late game: Shotgun for emergencies, Frying Pan for melee, Clown Doll vs the Trudge.
Which upgrade first? Strength 4. It unlocks grabs on the DL2 light tier and makes melee usable.
Why does cash get rounded down? R.E.P.O. rounds down between levels. 9.6K becomes 9K. Plan your spending.
Has R.E.P.O. won awards? Golden Joystick Best Early Access Game, November 2025.
Is there a Fortnite crossover? Yes, Semibot outfits arrived in Fortnitemares, October 2025.
Are there staff weapons? Three: Zero Gravity, Roll, and Void staffs, added in v0.4.x. Six battery pips each, recharged with energy crystals.
What is the Shopkeeper? A special shop monster that tracks ruckus: noise, theft, and aggression. Be polite, pay for items, leave quickly. Third offense is an explosion.
What is the Duck Bucket? A shop item that pacifies the Apex Predator and Elsa. Place it on top of them.
Does voice chat matter to monsters? Yes. Text chat uses a robotic voice that counts as noise, and Push-to-Talk voice is audible to the Huntsman from 5x normal range.
Quick Reference Card
Top priorities in order: Strength 4 → Health 1 → Stamina 2 → cheap crystals → Tumble tech.
The five rules that keep you alive:
- Crouch in unfamiliar rooms.
- Never sprint with loot.
- Break line of sight the moment you are spotted.
- Extract at quota, never chase one last item.
- Treat every DL3 monster as an instant death you outrun, not a fight you win.
Quota Economics: The Money Model Nobody Teaches
The Service Station guide covers what to buy. This section covers the deeper question of whether you can afford it, which is the actual constraint that ends runs. R.E.P.O. taxes every decision you make with time, and time converts to quota pressure.
How Quotas Scale
Each contract sets a cash quota per level, and the required total climbs with both level number and team size. The scaling is deliberately steep: a 4-player crew on level 5 owes roughly double the quota of the same crew on level 1, and the marginal player adds quota faster than they add carrying capacity before Strength upgrades land.
The practical consequences:
- Levels 1-3 are the cheap-upgrade window. Quotas are low, valuables are plentiful, and idle time is long (240-360 seconds on level 1). Every run should exit level 3 with Strength 4 bought and a second cart on order.
- Levels 4-8 are the quota crunch. Required totals roughly double while idle time collapses (54-81 seconds on level 5). This is where teams die economically: the loot is there, but the extraction math stops forgiving extra trips.
- Levels 9+ are a scoring exercise. Quota growth continues but your upgrade base should already generate enough extraction efficiency that the run's length is bounded by monsters, not money.
The Rounding-Down Rule and What It Steals
Cash rounds down between levels. 9.6K becomes 9K; 19.9K becomes 19K. Two planning rules follow:
- Never hold a fractional balance you intend to spend. Spend down to a whole number before the level ends. A 9.6K bank buying an 8K upgrade loses the 1.6K remainder entirely; the same bank spending 6K first keeps 3K usable next station instead of 3.6K rounded to 3.
- Track the rounding tax across a run. Six levels with an average 0.5K rounding loss each is 3K, a free Strength upgrade's worth of value leaking out of your economy every run. This is the hidden cost of "grab one more item" play.
The Tax Break of Overfilling
Meeting the quota exactly closes the extraction point with a green checkmark. Exceeding it grants a tax break worth bonus cash proportional to the overage. The bonus makes overfilling the correct default when three conditions hold: the extraction point is still open, the items are already near the zone, and the team's time budget has slack. When any one fails, quota-plus-leave beats one more cart run every time, because the marginal item's expected value has to beat the respawn-timer cost of staying (see the time budget below).
The Time Value of One More Minute
The respawn timer table is the real currency exchange rate. In the first 10 minutes of a level, a killed monster takes 12+ minutes to return, so the level is effectively safe and extra minutes cost little. At the 30-minute mark, respawns arrive every 2-3 minutes and each additional minute multiplies your encounter count. The value of one more extraction run:
Minutes 0-10:   marginal cost of an extra cart run ≈ zero
                (monsters stay dead; loot density is the only limit)
Minutes 10-20:  cost = 1-2 additional encounters per cart run
Minutes 20-30:  cost = 2-3 encounters, and DL3s do not stay down
Minutes 30+:    every extra run risks a wipe that erases the whole level
The doctrine: front-load extraction. Two disciplined cart runs in minutes 5-15 beat four greedy ones in minutes 15-35, because the first two run at monster-free rates and the last two run at full price.
The Per-Level Time Budget
Turning the respawn table into doctrine, here is the budget veteran teams hold per level:
| Level phase | Target time in level | Why |
|---|---|---|
| Levels 1-2 | 12-18 minutes | Idle time is long, monsters die slow to return; bank a big first haul |
| Levels 3-5 | 10-15 minutes | Quota crunch starts; extract in two waves, leave the junk |
| Levels 6-8 | 8-12 minutes | Respawn 3.2-4 min; every fight is priced |
| Levels 9-10 | 6-10 minutes | Near-zero idle; the map wakes as you enter |
| Level 11+ | 5-8 minutes | Zero idle, respawn approaching 1.6-2 min; quota-or-die economy |
Three habits enforce the budget:
- Call the time at half-budget. Someone announces the clock at 6 minutes on a 12-minute level. Every cart decision after that call is a leave/stay vote.
- Wave extraction instead of final sweep. Push a full cart to the zone at half-budget, then decide whether the remainder justifies a second wave. The first wave is the level's real profit; the second is bonus.
- The 30-minute hard rule. If the level somehow runs past 30 minutes, the next extraction closes the trip regardless of quota overage. Past that point the respawn table prices every additional item at near-certain monster contact.
Three Named Loadouts
The upgrade guide lists what every item does. These are three complete builds, tested as packages, with shopping orders.
Build 1: The Quiet Professional (recommended for solo and duos)
A stealth-first build that treats every monster as an avoid state and pays for awareness instead of firepower.
Purchase order:
  Strength 4          (grab DL2-light tier solo)
  Stamina 3           (sprint escapes at full weight)
  Map Player Count    (if it appears; team awareness)
  Range 2             (loot from doorways)
  Health 1            (survive one 100-damage mistake)
  Energy crystals x4  (stocked early at 5-7K each)
  Wrench              (quiet melee for Gnomes and stuns)

Playbook: crouch default, object-mode (hold Q) near every unknown,
  never fight above DL2, extraction waves at half-budget.
  The Tranq Gun replaces the Wrench once money allows: it is the
  solo answer to the Hidden and the safest stun in the game.
This build loses speed but almost never loses players. On duos, the second player mirrors it with Health 2 and a Frying Pan instead of the Tranq, and the pair can still grab-freeze breakpoint-4 monsters.
Build 2: The Monster Hunter (for 3-4 player crews)
A combat build that monetizes the fight table: piston kills, thrown Bangers, and the Feather Drone combo.
Purchase order:
  Strength 4 → 6      (Breakpoint 7 grabs the Bowtie; 9 grabs Reapers)
  Stamina 2
  Health 2            (two DL3 hits deep, not one)
  Frying Pan          (S-tier melee, scales with Strength)
  Tranq Gun           (stunlock fuel)
  Feather Drone       (lift-slam anything stunned, ignores breakpoints)
  Energy crystals x6

Playbook: Fighter pairs with a Runner. Fighter stuns (Tranq or thrown
  cart item), Feather lifts, the slam or the piston finishes. An Apex
  Predator under the piston pays 2-3K per level, and every DL1-DL2 body
  is potential orbit money. The crew extracts less per minute than a
  quiet crew but kills its way to bonus orbs on every map.
This build needs discipline to stay profitable: fights are only taken under the piston or on stunned monsters, never as standing battles.
Build 3: The Physics Goblin (for coordinated 4-6 player crews)
A movement-tech build built around tumble tech, cart boosting (host/SP), and extraction-zone manipulation.
Purchase order:
  Tumble Launch 4     (long-range tumble projectiles)
  Tumble Climb 2      (wall/ceiling routes)
  Strength 3          (enough for BP-4 grabs with a partner)
  Stamina 3
  Extra Jump 1
  Zero Gravity Staff  (fly on self-targeting since v0.4.4)
  Energy crystals x8  (staffs drink them)

Playbook: tumbled players get thrown across gaps with valuables;
  the Zero Gravity Staff floats Very Tall furniture through doorways
  sideways; Pocket C.A.R.T. nesting drives full carts hands-free.
  Highest ceiling of the three builds, highest skill floor, and the
  only one that turns the new TUMBLE CLIMB level into a highway.
Duo Adjustments
Duos sit in the awkward middle: too many monsters for solo rules, too few bodies for full squad tactics. The fixes:
- Both players buy Strength first. At Strength 4 each, your combined internal strength (5 base + 4 each = 9 per grabber, 18 stacked) freezes everything at or below breakpoint 13 while both grab. That is Trudge-lock with two people and zero drones.
- One watch, one cart. The driver never loots more than one room from the cart; the looter never leaves the driver's line of sight. Duos die by split-screen ambush more than by monsters.
- The revive pact. Whoever dies first, the other extracts the head immediately, even at quota loss. A two-player crew cannot absorb a full level at one man down; the head is worth more than the loot run it interrupts.
- Skip the Fighter fantasy. Without a third body to extract while you fight, kills cost tempo you do not have. Duos run the Quiet Professional build doubled, with one Tranq between them.
The Monster Encounter Decision Tree
When something appears, run this sequence instead of improvising:
MONSTER SIGHTED
│
├─ Do I know what it is?
│   ├─ NO → treat as DL3: freeze, crouch, break line of sight,
│   │        observe from cover until identified
│   └─ YES ↓
│
├─ Is it a sound-only detector (Huntsman)?
│   ├─ YES → silence protocol: stop voice chat, crouch-walk,
│   │        never sprint, text chat only if life demands it
│   └─ NO ↓
│
├─ Is it provoked-only (Birthday Boy, Bella, Shadow Child, Tick)?
│   ├─ YES → do not provoke: no balloons, no blocking, no staring,
│   │        hands empty near Ticks
│   └─ NO ↓
│
├─ Is it between me and my extraction route?
│   ├─ YES → can I wait it out? (most monsters Leave in 20-30 s)
│   │        ├─ yes → hold Q in cover, wait
│   │        └─ no  → route around; never fight through
│   └─ NO → resume looting, mark it on the map, re-check the mark
│           after each room
│
└─ Is it profitable to kill? (piston access + DL1/DL2 + stun tool
   available + time budget has slack)
    ├─ YES → stun → grab/lift or Feather → piston or pit
    └─ NO  → there is no NO: leave
The tree's bias is deliberate: every default is "do not engage." Kills in R.E.P.O. are a bonus mechanic, not a game mode.
Extraction Zone Physics: Rules That Save Money
- The line rule is binary and brutal. Anything overlapping the dashed red perimeter is destroyed when the piston fires, including items a teammate is still pushing in. Stop pushing at the line's edge and let the zone's pull finish; a destroyed Expensive+ item is a run-wrecking loss.
- Extraction has suction. Items near the zone drift inward once the piston is charged. Use it: place medium items a body-length out, charge the piston, and let physics carry them the last meter.
- Very Tall items go through doorways diagonally or not at all. Rotate with right-click until the long axis matches the door's diagonal, walk it through, then upright it inside the zone. Two players rotating opposite ends coordinate on "clock" calls (rotate to 12, to 3, to 6).
- Crouch-sliding under the piston while charged is a death wish; the zone kill-revives players caught inside at 1 HP, but the revived body counts as an obstacle for items still arriving.
- Cart in the zone is fine; cart under the piston is not. Park carts at the zone's rim. The piston's kill check does not care how much the cart is worth.
Noise Discipline SOP Per Monster
| Monster | Voice chat | Text chat | Sprint | Jump/tumble landings |
|---|---|---|---|---|
| Huntsman | Forbidden in its zone (5x hearing, fires on sound) | Quiet but audible; use only to save a life | Never | Never |
| Everything else (sight/proximity) | Normal at range, hushed within ~2 rooms | Fine | Only in cleared corridors | Fine outside its room |
| Sound-investigators (generic) | Hushed | Fine | Only with exit mapped | Avoid in its zone |
The operational summary: voice is free until a Huntsman exists, then voice becomes a weapon aimed at you. Teams that set a "Huntsman protocol" callout (one word, everyone drops to text) survive maps that end voice-first teams.
Advanced FAQ Additions
Are energy crystals worth hoarding? Yes until level 8, then spend them. They cost 5-7K early and 11-18K late; the same 12K that buys four crystals at level 4 buys one at level 12. Staffs and charged weapons pay the difference back many times over.
Does the host have real advantages? Two. Cart boosting (the strong-mode speed trick) works host-only or singleplayer, and the host's physics simulation means item breakage rules resolve on their screen. Client players in physics-heavy rooms should let the host do delicate carries.
What exactly persists after a wipe? Purchased upgrades and cosmetics persist across runs. Run cash, unspent shop inventory, and level progress do not. A wipe is a full economy reset; treat any level you cannot exit as a total loss on the ledger.
Why did my upgrade reroll break the machine? It did not break from overuse by you; the reroll button randomly fails after 1-3 uses per station visit by design. The fix costs nothing but waiting: the next station visit resets it.
Is the Scout Race crown worth anything? Bragging rights only, but the race itself matters: the weapons you carry into the arena keep their charge state, so a team that plans to fight in Battle Ring should enter with charged gear and a plan for who holds the Frying Pan.
Do monsters take fall damage? Physics damage is universal. Lured down stairwells (Huntsman) or off ledges (anything chasing a tumbled player), monsters take the same impact math you do. The stairs trap against the Huntsman is just this rule, weaponized.
Expanded Quick Reference
ECONOMY
  Quota crunch: levels 4-8 (idle 54-81s at L5, ~0 at L11+)
  Rounding: spend to whole numbers before level end
  Overfill = tax break bonus | extract early, extract in waves
  Time budget: L1-2 12-18 min, L4-8 10-12, L9+ 5-8, hard stop at 30

BUILDS (buy order)
  Quiet Pro:  STR4 → STA3 → Map → Range2 → HP1 → crystals → Tranq
  Hunter:     STR4-6 → STA2 → HP2 → Frying Pan → Tranq → Feather
  Goblin:     TumbleLaunch4 → Climb2 → STR3 → STA3 → ZG Staff
  Duos:       both STR4 first; one watch, one cart; revive pact

ENCOUNTER DEFAULT
  Unknown monster = treat as DL3
  Provoked-only types: do not provoke
  Huntman active: voice off, text only, never sprint
  Kill only under piston / on stunned / with time slack

EXTRACTION ZONE
  The red line destroys: stop pushing at the rim
  Use suction: place, charge, let physics finish
  Very Tall: rotate diagonal for doorways
  Cart parks at rim, never under the piston

CRYSTALS
  Buy 4-6 at levels 3-5 (5-7K each)
  Never buy above 11K except to save a staff-dependent run