Daily Pick
One deeply researched guide worth reading today.
A practical route through the systems that matter most, written to help new players make confident decisions quickly.
Overview
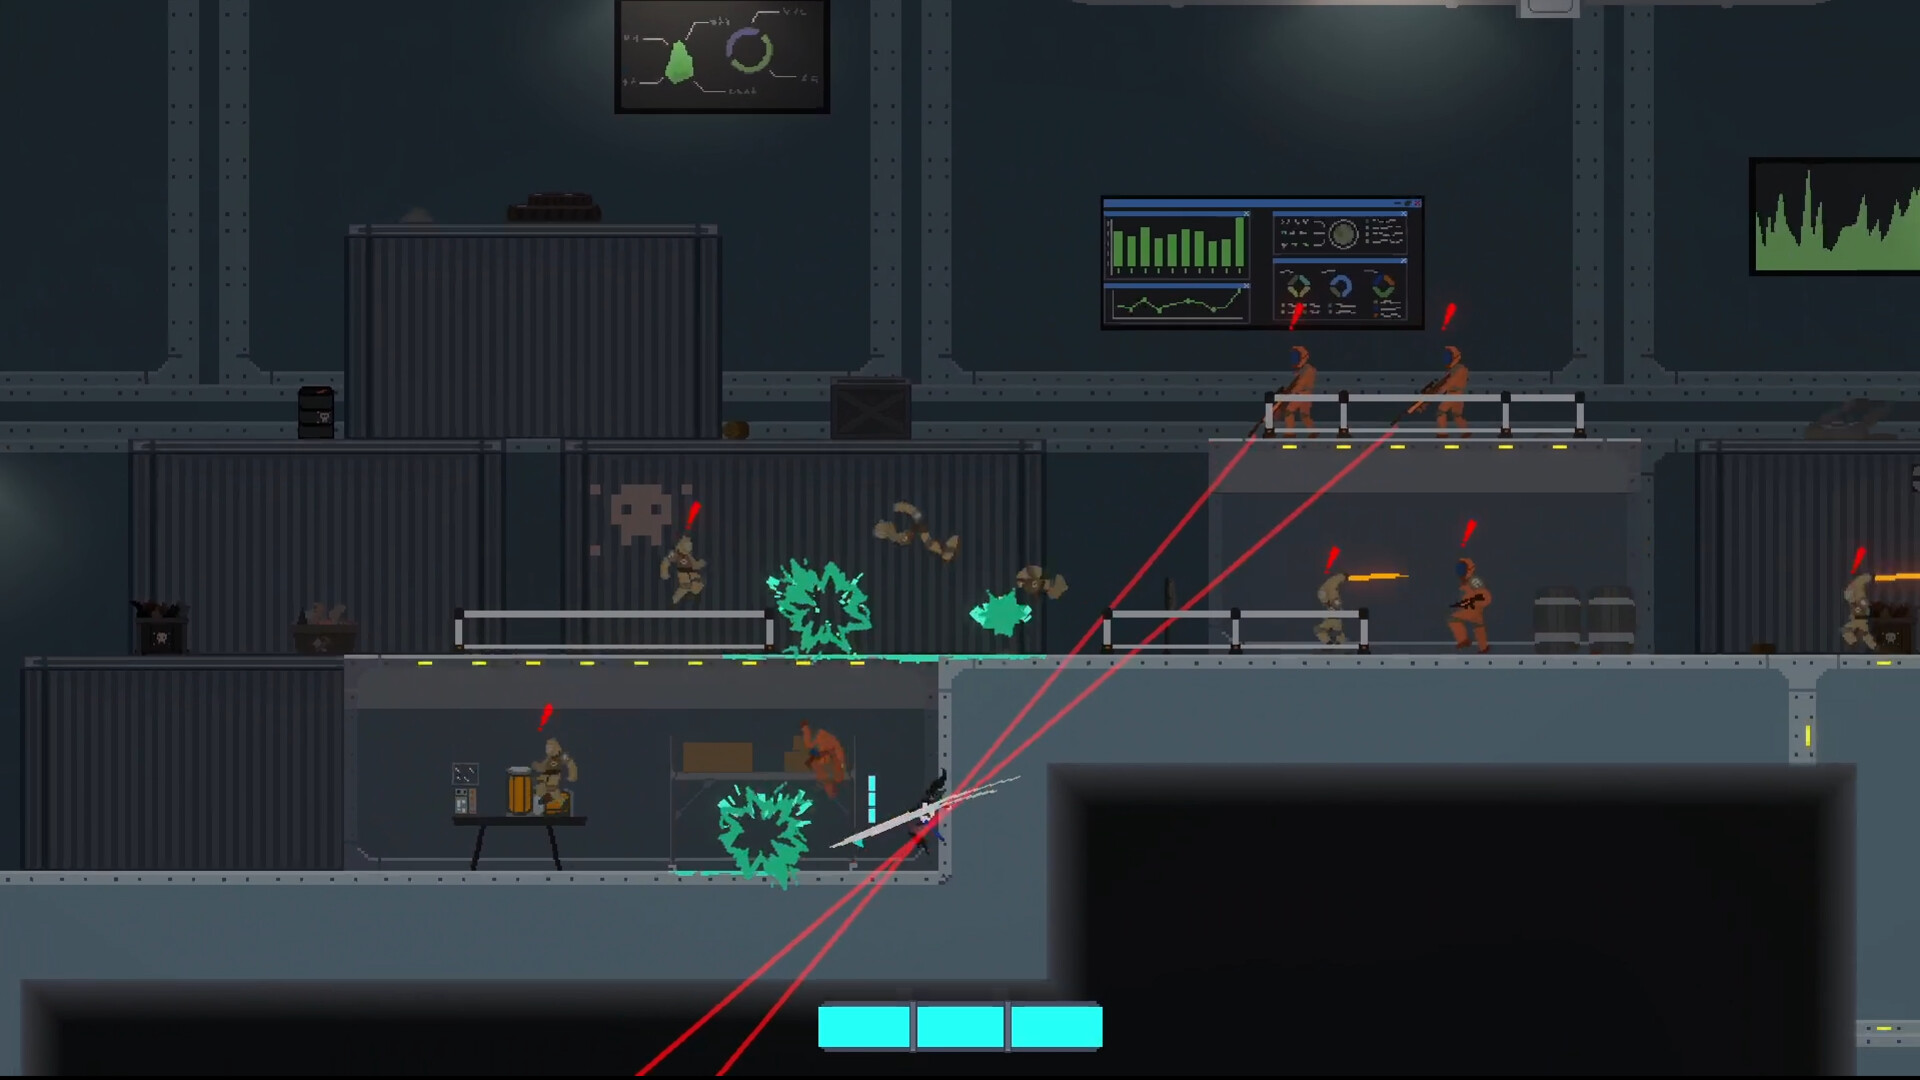
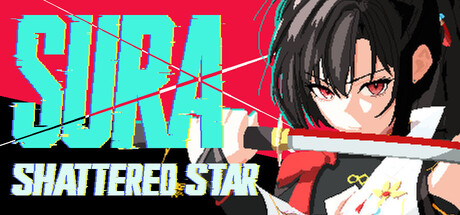
SURA: Shattered Star is a free-to-play, space-themed sword-fighting action platformer from HanRyang Studio, a two-person indie team in South Korea, published under Krafton's Jungle Game Lab label. You play Sura, a retired mercenary turned warrior, grieving the loss of his family and hunting the corrupt megacorporation that took everything from him. The hunt takes you through a colossal starship drifting in deep space. Research sectors, industrial facilities, and heavily fortified military zones stand between you and a truth that shatters everything you believed.
The core pitch is one sword, one man, one vow. The combat loop is built on a draw-and-sheath mechanic with a twist most players miss on their first run: the draw applies marks to every enemy it hits, and the sheath detonates all accumulated marks at once. Drawing and immediately sheathing hits one enemy once for minimum value. Drawing, moving through a group while the draw attack marks each one, and sheathing at the moment of maximum accumulation detonates every marked enemy simultaneously. That gap between the two uses is the game's real skill ceiling.
The game was built in roughly two months as a Proof of Concept (POC) final project at Krafton Jungle Game Lab. Expect a curated, focused experience rather than a 100-hour epic. No skill trees, no loot boxes, no stamina bars, no microtransactions. Free, complete, and built to be finished in a weekend.
| Fact | Detail |
|---|---|
| Developer | HanRyang Studio |
| Publisher | Jungle Game Lab (Krafton) |
| Engine / Style | 2D pixel art, hand-crafted sprites |
| Platforms | Windows (Steam) |
| Price | Free (Free To Play, no microtransactions) |
| Players | Single-player |
| Genre | Action / Adventure / 2D Platformer / Side Scroller |
| Release | August 14, 2026 (delayed from July 31) |
| Languages | Korean, English, Japanese, Simplified/Traditional Chinese, French, German, Spanish, Russian, Thai, Portuguese-Brazil, Mongolian |
| Match Length | 4–6 hours for a first playthrough |
| Save System | Save anywhere |
| Controller | Full support (Xbox, DualShock, DualSense) plus keyboard and mouse |
Target audience: players who enjoy tight, deliberate 2D sword combat. Think Katana Zero's pacing with more platforming and less dialogue. If you liked Sekiro's posture-and-punish rhythm but want it in a fast 2D package, this is aimed squarely at you. The mark system borrows the stylish-action DNA of Devil May Cry's style meter and Metal Gear Rising's parry game: easy to learn at surface level, genuinely deeper as you get skilled. Players who need progression systems, crafting, or build variety to stay motivated will find little to chew on.
Getting Started
Step 1: Learn the Draw-Sheath Rhythm
The single most important skill in SURA is not a combo. It's the flow between your sword being drawn and sheathed.
- Drawn state: your attacks come out fast, but you commit to the swing and recover slower.
- Sheathed state: you move faster, reposition freely, and your next draw strike hits harder and faster than a normal attack.
The optimal loop is: stay sheathed while moving and reading the enemy, draw at the exact moment you commit to an attack, land your strikes, then sheath again to reset. Players who keep the blade out permanently are slower and eat more damage. Players who sheathe constantly without committing never deal damage. The rhythm is the game.
Step 2: Master the Three Core Moves
| Move | Input | What It Does | When To Use |
|---|---|---|---|
| Light Slash | Tap attack (drawn) | Quick horizontal swing, chains 3 hits | Harassing, finishing staggered enemies |
| Heavy Slash | Hold attack (drawn) | Overhead chop, breaks guards, double damage | Opening against shields and armored foes |
| Dash Slash | Attack during dash | Covers distance, hits everything in the dash path, costs 1 energy | Closing gaps, clearing groups, escaping |
Step 3: Understand the Mark System (batdo / napdo)
This is the mechanic that separates SURA from every other sword platformer. The developer frames it precisely: "The moment of drawing is when the execution begins; the moment of sheathing is the preparation time for the next strike."
- Draw phase (batdo): applies marks to every enemy hit during the attack. Marks are accumulated potential — damage not yet delivered.
- Sheath phase (napdo): detonates all accumulated marks simultaneously, converting potential into real damage across every marked enemy at once.
The skill questions this creates are specific: have I marked enough enemies to justify detonating? Is there a better position to trigger the detonation from, where chain kills create space for the next sequence? Which enemies should I prioritize marking, given that detonation eliminates all marked targets at once? Neither phase is neutral movement — the draw is the setup, the sheath is the payoff, and your skill shows in the quality of the setup.
Step 4: Know the Glow
Every enemy telegraphs its next attack with a visual cue before it swings.
- Red glow: fast attack. Parry or dodge through it.
- Yellow glow: heavy attack. Interrupt it with your own hit.
- Blue glow: ranged attack. Close the distance or break line of sight.
Learn the colors before you learn the patterns. The colors tell you the category of threat; the pattern tells you the timing. Once both are instinctive, you can react instead of predict.
Step 5: Save Before Everything
Save-anytime is a gift. Use it. Save before every new room, every boss door, every serious platforming section. Dying sends you back to your last save, and a 30-second habit saves ten minutes of backtracking. There is no penalty for saving, so there is no reason not to.
Step 6: Break Everything
Crates, terminals, and glowing panels drop health or energy shards. Energy powers your dash and special moves and does not regenerate on its own. If you enter a fight with an empty energy bar, you cannot dodge. Break crates during combat, not just before it. A fight that drags on will drain your mobility otherwise.
Core Mechanics, Deep Dive
The Draw-Sheath System
The game's signature mechanic is deceptively simple: one sword, two states, constant switching.
- Sheathed movement is your neutral game. You are faster, your hitbox reads cleaner, and you can bait enemy attacks safely. When an enemy commits to a swing, that is your window.
- The draw strike is your punish. Drawing into an attack comes out with extra speed and reach. Land it, follow with one or two light slashes, then sheath and reset.
- Sheathing is a recovery tool. After a combo, sheathing cancels the tail end of your recovery animation, letting you reposition before the enemy counterattacks.
This creates a combat loop of bait, draw, punish, sheath, reposition. Everything else in the game is built to test how well you maintain that loop under pressure.
The Mark Economy: Restraint and Detonation
The mark system rewards patience with position. A simple draw-and-sheath on one target gives you one detonation. The skilled play is:
- Draw into a group so the attack arcs through multiple enemies.
- Keep moving while the marks sit on them — marks do not expire instantly, and you can extend the window with aerial maneuvering.
- Reposition to a spot where the detonation's chain kills will hit the most targets.
- Sheath and watch every marked enemy die at once.
Chain kills matter. Killing a marked enemy can stagger or damage nearby foes, which means a well-timed detonation in a crowd clears a room in one button press. Practice marking two enemies, then three, then a full pack. The jump from one mark to five is the entire skill curve of the game.
Energy System
Energy refills only by breaking crates and defeating enemies. You start with 3 energy bars. Each bar powers one dash or one special move. Because energy does not auto-regenerate, prolonged fights drain your mobility. Smart play means topping up on shards between fights, never entering a boss room empty, and treating energy as a resource to spend rather than hoard. Just do not burn your last bar on a dash when the enemy is already dead.
Enemy Types
| Enemy | Behavior | Counter |
|---|---|---|
| Drone | Flies at you, explodes on contact | Dash through, slash from behind |
| Soldier | Walks toward you, sword attack | Parry the first swing, then heavy attack |
| Heavy | Slow, armored, charges after 2 seconds | Dash sideways, heavy attack from the rear |
| Turret | Fixed position, shoots projectiles | Dash toward it between shots, slash twice |
| Corrupted | Fast lunge attacks, deals 3 hearts of damage | Bait the lunge, punish the recovery |
Boss Structure
Each stage ends with a boss. Bosses run 2–3 phases, signaled by a visual change. A glow color shift, a new attack, a faster pattern. Between phases the boss is staggered for roughly 3 seconds. That stagger window is for damage, not healing. Heal before the phase transition, attack during the stagger. Wasting the stagger on a heal is the most common boss mistake.
Progression Strategy
Route Order and Difficulty Curve
The station is layered: research sectors first, then industrial facilities, then military zones. Each layer introduces one new enemy type and one new environmental hazard. There is no skill tree, so progression is purely mechanical — you get better, not stronger. That means the fastest way through is deliberate practice, not grinding.
- Sector 1 (Research): learn the draw-sheath loop. No bosses here that demand mark mastery, but the drones teach you timing.
- Sector 2 (Industrial): the mark system becomes necessary. Conveyor hazards and grouped enemies reward multi-marks.
- Sector 3 (Military): heavies and turrets force you to choose targets. This is where the "which enemies to mark" decision matters.
Energy Priority Plan
- Before a boss door: full hearts, full energy. No exceptions.
- During a stage: break every crate you pass. Never walk past a shard.
- Mid-fight: spend your last bar on a finishing dash-slash, not an escape you might not need.
- Save the second bar for dodging; save the third for emergencies. Do not hoard all three.
Replayability Path
Boss rush mode unlocks after completing the game once. This is where the mark system shines — clean multi-mark detonations are faster than trading hits, and the mode is built to reward exactly that. If you want the weekend-completion experience, one story run then boss rush is the intended loop.
Step-by-Step Strategy
Stage Flow: How to Clear Any Sector
- Scout the room from the sheathed state. Before engaging, identify every enemy, crate, and turret. Know where the shards are before you need them.
- Clear turrets and ranged enemies first. They dictate the fight's pace. Drones and melee units you can kite; turrets you cannot.
- Break crates as you move between fights. Stock energy before the next encounter, not during it.
- Handle groups by funneling. Enemies cannot pass through you. Back toward a wall or corner and they cluster in front of you. A heavy attack's wide arc hits all of them at once. Watch for ranged units before committing to this.
- Use the multi-mark detonation on clustered groups. Draw through the pack, reposition behind them, sheath. The chain kills clear the room.
- Save at the boss door. Then re-enter with full hearts and full energy. There is no reason to fight a boss at half resources.
The Infinite Dash
The dash has a roughly 0.5-second cooldown. Chain dash, slash, dash, slash and you can cross entire rooms without touching the ground. The timing is tight: press dash, wait a beat, press slash, press dash immediately after. Practice in the first level's open areas. Once it clicks, it becomes your primary traversal tool and your escape button in crowded fights.
Guard Break Combo
A heavy attack stuns shielded enemies for about 2 seconds. During the stun, land three light slashes, then immediately heavy attack again. This keeps humanoid enemies in an infinite stunlock. It works on all humanoid enemies except bosses. It also works on Heavies, which most players assume are immune. It is the fastest way to delete armored threats.
Parry Cancel
You can cancel a parry into a dash. If you mistime a parry and the enemy attack whiffs because you were too early, dash-cancel to skip the recovery animation instead of eating the follow-up. The window is about 4 frames, which is very tight. It matters most against bosses and speedrunners, but even landing it once in a fight can save a life.
Corner Trapping
Because enemies cannot pass through you, backing into a corner clusters them in front of you. Use the heavy attack's wide arc to hit everything at once. This trivializes group fights but leaves you vulnerable to ranged attacks. Only corner-trap after you have confirmed there are no turrets or bombers in the room.
Boss Phase Plan
- First phase: learn, don't rush. Spend the first phase identifying the boss's attack tells. Take one hit minimum, but memorize the patterns.
- Phase transition: when the boss staggers, this is your free damage window. Attack until the stagger ends.
- Second phase onward: the boss gets faster and adds attacks. Fall back to the draw-sheath rhythm. Stay sheathed, bait, punish. Do not try to out-trade a boss.
- Heal management: heal between phases, never during a stagger. If you are below half health entering a new phase, heal immediately at phase start, not when the boss is about to kill you.
Mark-Focused Boss Strategy (Advanced)
Bosses are single targets, so multi-mark detonation seems useless — but the boss's summoned adds are not. When a boss spawns minions:
- Draw through the adds to mark all of them.
- Position so the boss is in the detonation radius.
- Sheath. The add chain-kills and the splash damage clips the boss.
- Repeat each add wave. You convert minion waves into boss damage.
This is the difference between a 6-minute boss fight and a 3-minute one.
Advanced Tips
- The heavy attack is your best friend. Most new players use light attacks exclusively because they are faster. But heavy breaks guards, staggers big enemies, and deals double damage. One heavy hit is worth three light hits. Open with heavy, follow up with lights.
- Energy is a weapon, not a safety net. Spend your last bar on a dash-slash to finish a staggered enemy instead of saving it for an escape you might not need. Dead enemies drop more energy.
- Marks are a positioning tool, not just damage. The detonation's chain kills create space. Detonate from a spot where the resulting clear lets you advance, not from where you happened to stop.
- Aerial maneuvering extends the mark window. You can draw, launch, move through the air, and sheath mid-flight. The detonation triggers from wherever you are — use the air to reach better angles.
- Terminals are lore, but they are also checkpoints. Data terminals scattered through levels explain the world and often mark safe ground. Read them when you need a breather, not mid-fight.
- The camera is zoomed out. The player character reads small on screen. Keep an eye on your character's position relative to off-screen projectiles. Turrets can fire from outside the frame.
- Speed comes from the sheathe. If you feel slow, check your state. You are probably walking around with the blade out. Sheathe between fights and traversal speeds up noticeably.
- Never enter a boss with a full combo queue. The game lets you buffer inputs, but a buffered light attack when the boss starts a new phase will get you killed. Release the buttons, reset, and re-commit.
System Requirements
| Component | Minimum | Recommended |
|---|---|---|
| OS | Windows 7+ | Windows 10 |
| Processor | Dual-core Intel/AMD at 2.8 GHz | Dual-core Intel/AMD at 2.8 GHz |
| Memory | 4 GB RAM | 8 GB RAM |
| Graphics | Nvidia 450 GTS / Radeon HD 5750 | Nvidia GTX 460 / Radeon HD 7800 |
| DirectX | Version 11 | Version 12 |
| Storage | 1 GB available | 2 GB available |
Note: Steam Client support for Windows 7 and 8 ended January 1, 2024, so effectively Windows 10+ is required to run the client itself.
Developer Background
SURA: Shattered Star is the debut project of HanRyang Studio, a small indie team in South Korea. It was developed in approximately two months as a final project at Krafton Jungle Game Lab, the game academy arm of Krafton, the publisher behind PUBG. The game is officially described as a Proof of Concept (POC) intended to validate the batdo/napdo mark system — the studio wants players to experience the combat and leave feedback before committing to full development. That is why it is free, why it is tight, and why it has no filler. The developer has been posting hand-crafted pixel art sprites and gameplay previews on X (@HanRyangStudio) through development.
The release date was moved from July 31 to August 14, 2026 so the team could add story content, cutscenes, and a new chapter. The final build you get will be bigger than the one previewed.
FAQ
Q: Is SURA: Shattered Star free? A: Yes. Completely free with no microtransactions, no loot boxes, no DLC planned at launch.
Q: When does it release? A: August 14, 2026 on Steam. It was originally July 31, but the team delayed two weeks to add story content, cutscenes, and a new chapter.
Q: What platforms is it on? A: Windows only at launch. No macOS or Linux build has been announced.
Q: Does it have controller support? A: Full controller support for Xbox, DualShock, and DualSense, plus keyboard and mouse. The developer published separate gameplay previews for both control schemes.
Q: How long is the game? A: Around 4–6 hours for a first playthrough. The delay added a new chapter, so expect the upper end of that range.
Q: What is the mark system? A: Drawing your sword applies marks to every enemy hit; sheathing detonates all marks at once. Multi-mark detonations with chain kills are the core skill.
Q: What languages are supported? A: Korean, English, Japanese, Simplified Chinese, Traditional Chinese, French, German, Spanish, Russian, Thai, Portuguese-Brazil, and Mongolian.
Q: Can I save anywhere? A: Yes. Save-anytime is fully supported.
Q: What are the minimum specs? A: Windows 7+, dual-core 2.8 GHz CPU, 4 GB RAM, Nvidia 450 GTS / Radeon HD 5750, DirectX 11, 1 GB storage. Very lightweight.
Q: Is there replayability? A: Boss rush mode is available after completing the game once.
Q: My marks feel weak. What am I doing wrong? A: You are detonating too early. Draw through multiple enemies, reposition to a better angle, then sheath. One mark per detonation is minimum value — the skill is in the accumulation.
Final Verdict
SURA: Shattered Star is a focused, free action platformer with a combat system built around one elegant idea: the draw applies potential, the sheath detonates it. The batdo/napdo mark loop is genuinely novel — easy to grasp in the first five minutes, deep enough to practice for hours once you start chaining multi-mark detonations.
Start with the rhythm. Sheathed to move, drawn to strike, sheathed to reset. Then learn the marks: draw through the group, reposition, detonate. Break the crates, save before the doors, and remember that one heavy hit is worth three light ones. It will not give you a skill tree, a crafting bench, or a hundred hours of content. It will give you a sword, a grudge, and a boss at the end of every level that demands you actually learn how to use it.
Last reviewed by Game How To Editorial. We play each game, verify controls against official sources, and update guides when game mechanics change. This guide was updated after the release date change to August 14, 2026.