Daily Pick
One deeply researched guide worth reading today.
A practical route through the systems that matter most, written to help new players make confident decisions quickly.
Zenith Axiom looks like a simple browser shooter and plays like a compounding-interest simulator with a gun. This deep dive goes past the basics into the DPS math behind the shop, the credit economy by phase, faction playbooks, and the run ladder that takes you from minute-2 survivor to minute-12 harvester.
Overview
Zenith Axiom is a fast-paced arcade space shooter by solo developer jubislayer. You pilot a ship through endless waves of increasingly dangerous enemies, earn credits for every kill, and spend those credits in a shop to upgrade four weapon systems. There is no final boss and no ending screen. Survival is the only objective, and your score is how long you last.
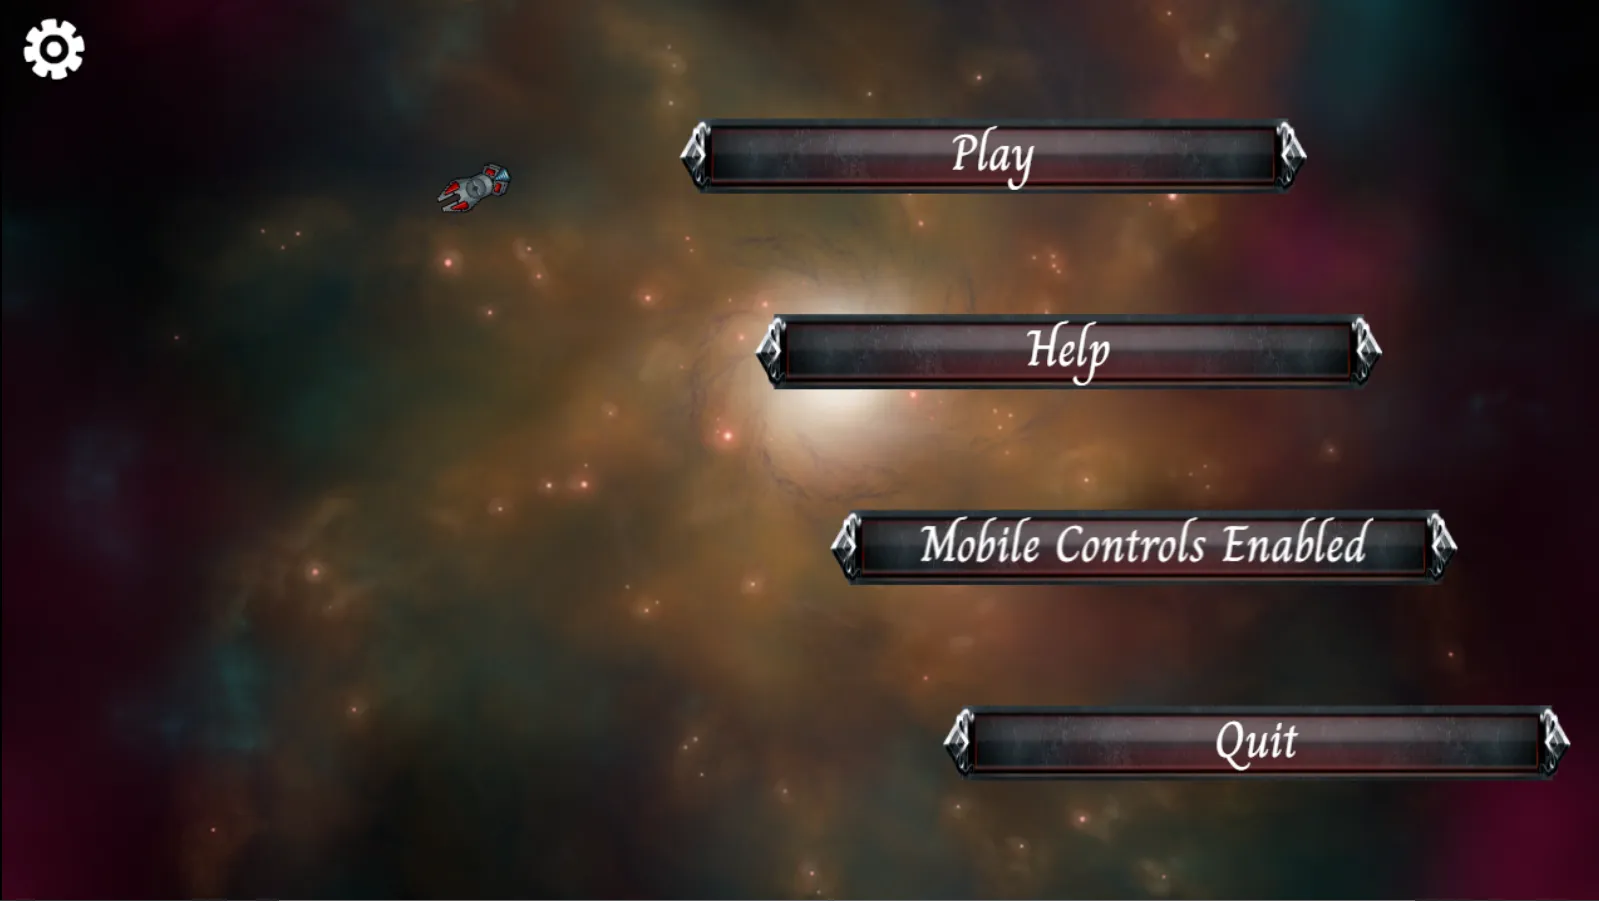
The game runs free in your browser on itch.io, with a mirror on gd.games, plus Android APK and Windows desktop builds (name your own price). The current build is version 0.7.1, and the developer keeps shipping updates, so expect balance changes to land mid-run.
| Fact | Detail |
|---|---|
| Developer | jubislayer |
| Platforms | Browser (itch.io, gd.games), Android (APK), Windows desktop |
| Price | Free (web) / Name your own price (Android, Desktop) |
| Players | Single-player |
| Genre | Arcade / Space Shooter / Survival |
| Build checked | 0.7.1 (GDevelop export) |
| Status | In active development |
The movement system separates Zenith Axiom from the arcade-shooter crowd. Your ship is a physics object with real momentum: it accelerates under thrust, coasts when you release input, and bleeds speed slowly through damping. Stop holding a direction and you keep drifting. Every directional change is a commitment, so positioning becomes a planning exercise rather than a pure reflex test. Players who fight the drift die in the first few minutes. Players who predict it push deep into the run.
Sessions are short. A decent run lasts 15 to 30 minutes, and the difficulty curve is engineered to spike hard as the clock runs.
Getting Started
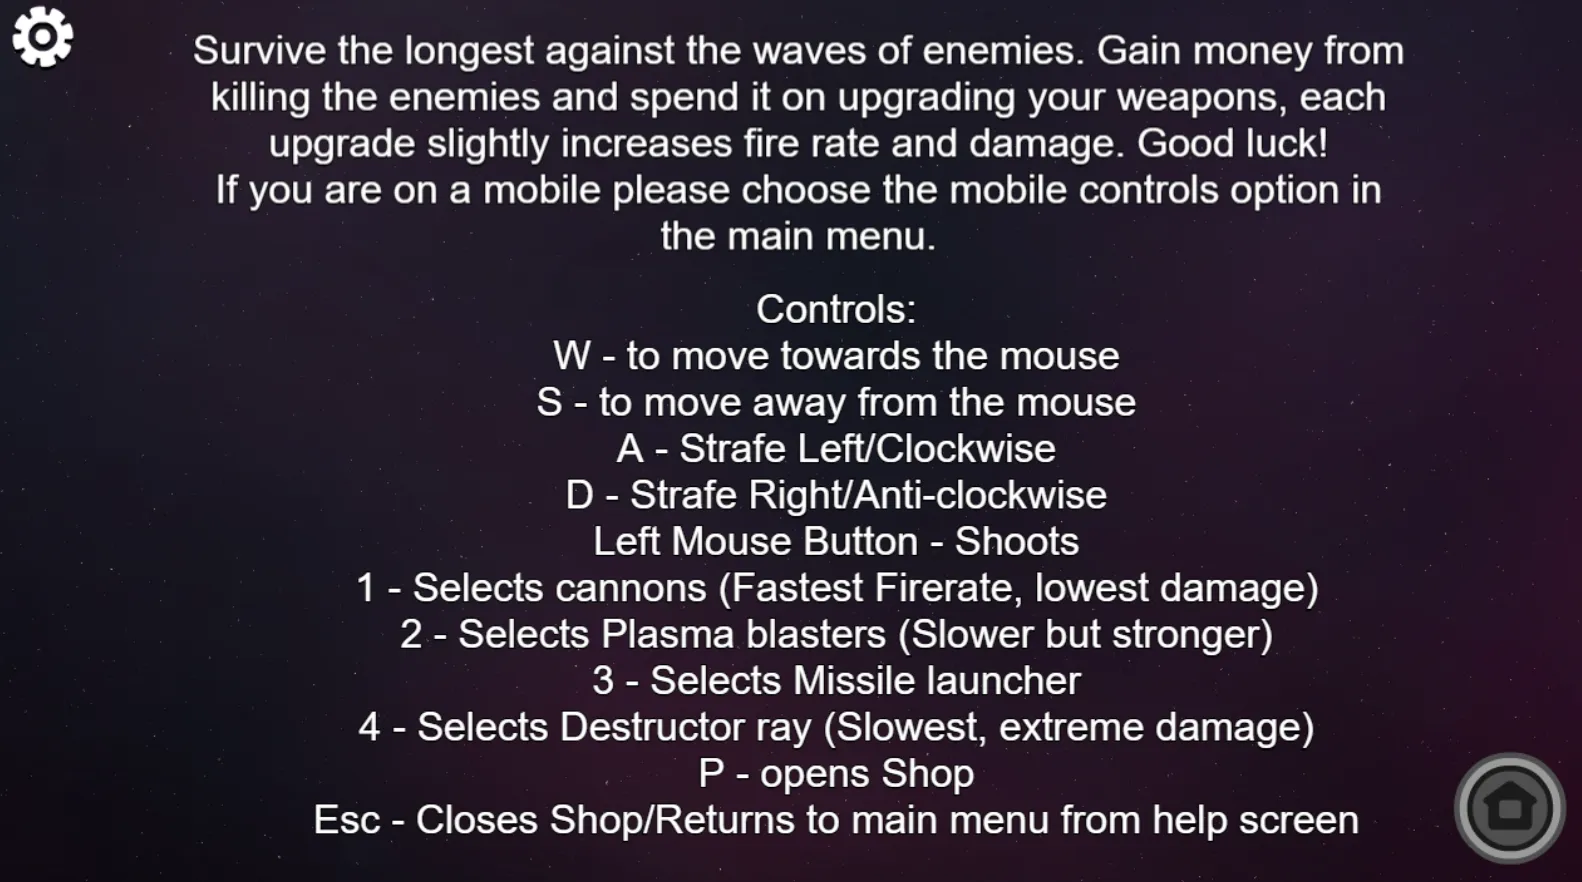
Controls (Desktop, verified in-game)
| Input | Action |
|---|---|
| W | Thrust toward the mouse cursor |
| S | Thrust away from the mouse cursor |
| A | Strafe left (orbit the cursor counter-clockwise) |
| D | Strafe right (orbit the cursor clockwise) |
| Left Mouse Button | Fire current weapon |
| 1 | Select Cannons (fastest fire rate, lowest damage) |
| 2 | Select Plasma Blasters (slower, stronger) |
| 3 | Select Missile Launchers |
| 4 | Select Destructor Ray (slowest, extreme damage) |
| P | Open the Shop |
| Esc / back arrow | Close shop / return to main menu |
On desktop the ship auto-rotates toward the mouse at 240 degrees per second, so aiming is a matter of where you point, not what you press. W always pushes you toward the cursor, S pulls you away, A and D orbit around it. That is a huge difference from a twin-stick shooter: your movement input is relative to your aim, not to the screen. Hold W to chase, tap S to back off, use A/D to circle a target while keeping fire on it.
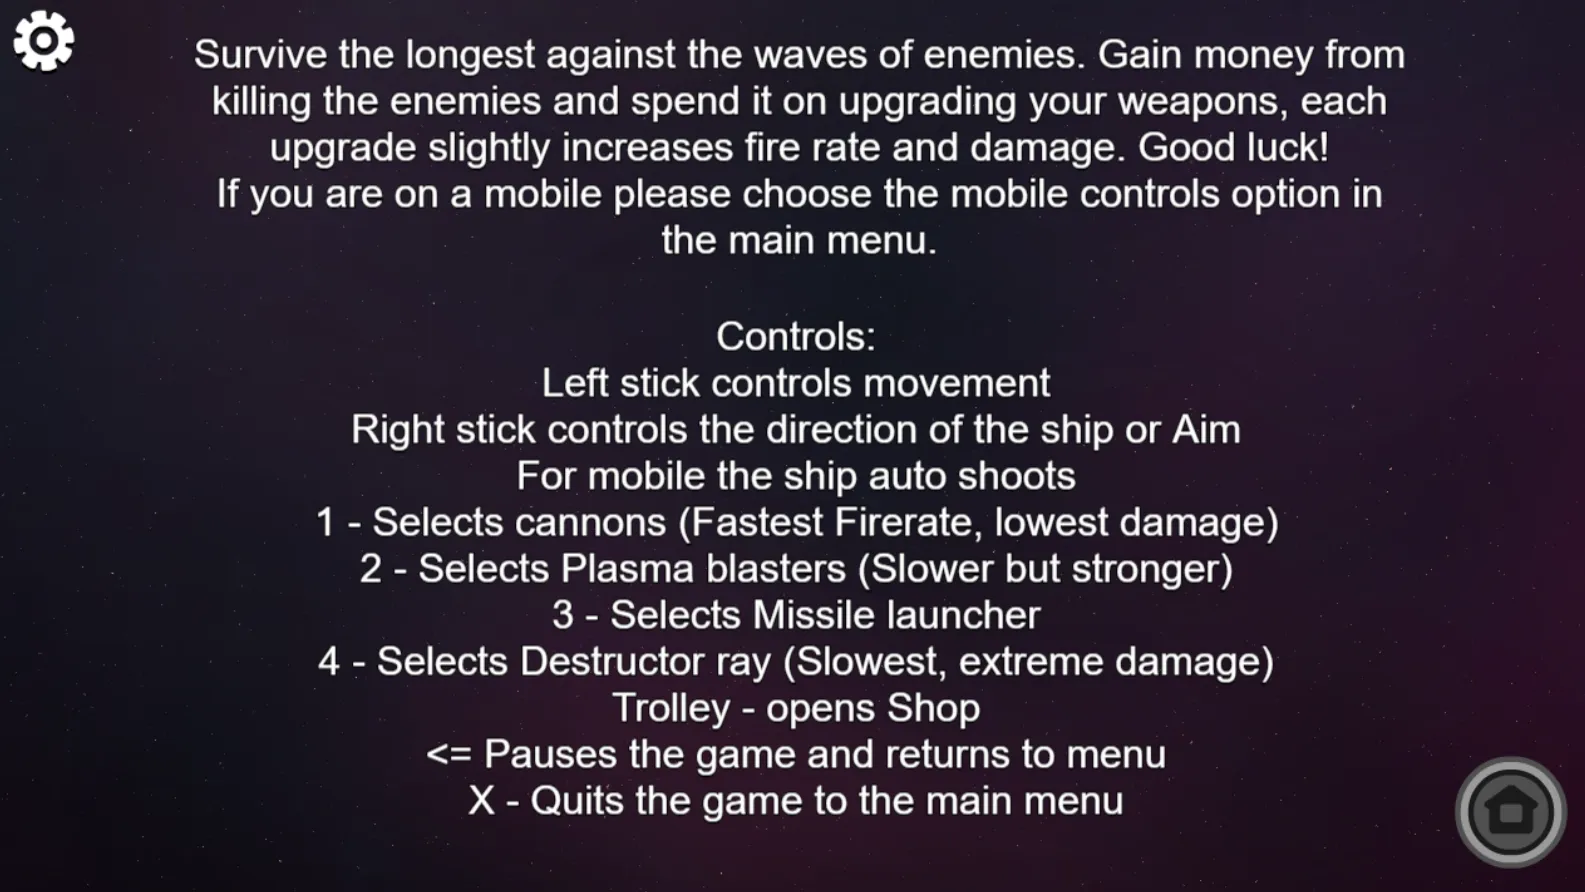
Controls (Mobile)
| Input | Action |
|---|---|
| Left stick | Move ship |
| Right stick | Aim / ship direction |
| (auto) | Ship fires automatically |
| 1–4 | Select weapon |
| Trolley button | Open shop |
| X | Quit to main menu |
| ≤ (back arrow) | Pause and return to menu |
Mobile ships auto-fire, which frees your thumbs for movement, and the ship rotates a full 360 degrees per second instead of 240, so the mobile build actually turns faster. The trade is that you cannot hold fire selectively. You are always committing to engagement range.
First Session: What to Expect
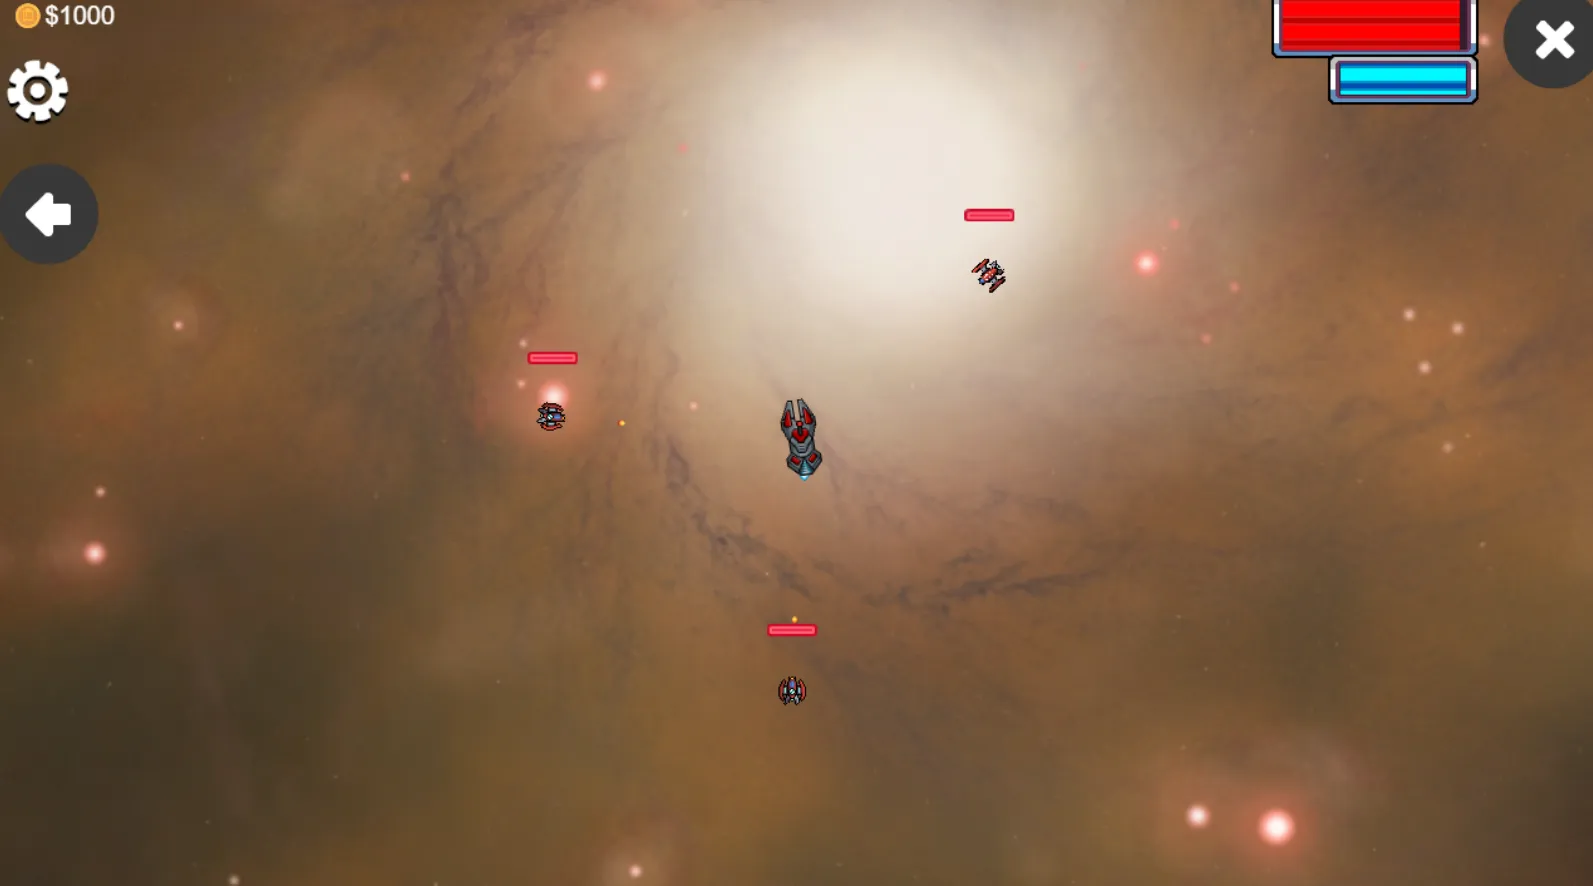
- You start with 1,000 credits and a stock ship. Cannons are selected by default.
- Enemies spawn from off-screen (about 4,000 pixels out), drift in at random angles, and hunt you: they rotate toward your ship, close in, and fire when they get a clean angle within range.
- Kill them for credits. Every enemy pays a fixed bounty based on its class.
- Open the shop (P) anytime to buy upgrades: damage, fire rate, and weapon levels, per weapon.
- There is no ending. The spawn rate ramps forever. Survive as long as you can.
Most first runs end between minute 2 and minute 6. That is normal. The game is a loop: die, learn the class mix, adjust your buying plan, go again.
Beginner Mistakes to Avoid
- Dumping credits into every weapon. Four half-upgraded weapons clear nothing efficiently. Put your first credits into one weapon and make it a workhorse, then spread.
- Holding the center of the screen. The center is a kill box. Enemies spawn from all angles and converge there. Stay near an edge with room to retreat.
- Ignoring Scouts in the first minute. They are cheap kills (50 HP) but fast (they rotate at 720 deg/s). A pack of Scouts closing from two sides ends runs fast. Clear them before they reach you.
- Wasting the Destructor Ray on small fry. It fires once every 7 seconds. Use it on Frigates, Battlecruisers, and Dreadnoughts, not on a Scout.
- Eating ray hits. Faction ray weapons deal 400 damage, which is 40% of your health bar in one shot. Learn to recognize the ray projectile and dodge it on sight.
- Sticking to one weapon all run. Every weapon has a role and a coverage gap. Switching (1–4) mid-fight based on the threat roughly doubles your effective output.
- Fighting the momentum. The ship coasts after you stop thrusting. New players tap opposite directions frantically and fight the physics. Embrace the drift. Predict where your ship will be, not where you want it to be.
Core Mechanics
Your Ship
- Health: 1,000. Enemy contact and enemy projectiles both hurt.
- Contact damage is mild: 15 per collision, but each enemy ship keeps pressing into you, and every overlapping ship gets its own hit in. A three-ship pile-up costs you 45 in one second.
- Damage cooldown: 0.5 seconds. After taking a hit, you get a half-second window before the next point of damage lands. This caps how fast a swarm can burst you down and gives you time to punch out.
- Passive regen: 10 HP per second after 5 seconds without taking damage. Getting out of the line of fire for a few seconds is a real heal. Ten seconds of clean flying buys back 100 HP.
- Speed cap: 300. Thrust only applies while your velocity is below the cap, so top speed is fixed; what you control is direction and acceleration.
- Momentum: physics damping (linear damping 2.0) means you coast and decelerate gradually. Short taps give micro-drifts; held keys commit you to a vector.
The Four Weapon Systems (verified base stats)
| Weapon | Damage / shot | Fire interval | Projectile speed | Base upgrade cost |
|---|---|---|---|---|
| Cannons | 20 | 0.3 s | 400 | 10 |
| Plasma Blasters | 30 | 0.45 s | 400 | 10 |
| Missile Launchers | 60 | 2.0 s | 500 | 100 |
| Destructor Ray | 300 | 7.0 s | 1,000 | 200 |
Cannons are your default and the weapon the ship starts with. Rapid fire with a 0.3 s interval and 20 damage per shot means a 50 HP Scout dies in three hits (about 0.9 s of fire) and a 100 HP Fighter in five. Cheap to upgrade (10 credits base) and forgiving when you miss. Shots are single-target: the shot vanishes when it connects, so no penetration. Late-game armored hulls shrug them off, though.
Plasma Blasters hit for 30 every 0.45 s, roughly one and a half times the cannon's damage-per-shot for a slower cadence. Two shots kill a Scout, four kill a Fighter. Bullet speed matches Cannons at 400, and like cannons they are single-target. They punish missed shots less than the missile or the ray, so they are the upgrade path for players still working on aim.
Missile Launchers deal 60 damage on a 2.0 s interval. One missile one-shots Scouts and two-shots Fighters. On impact the missile damages every ship overlapping it in that instant, then removes itself, so a missile fired into a clump of three Scouts kills all three and a missile fired into a Frigate-and-Scout pair damages both. The cost is a slow projectile (500) and a long reload: if a missile misses, you have a 2-second gap with no output.
Destructor Ray is the panic button: 300 damage every 7.0 s at projectile speed 1,000, and it is the only piercing weapon in your arsenal. Every enemy ship the beam overlaps takes the full 300 at the same time, and the beam does not stop or disappear when it hits. That makes it a line-clearing tool, not just a single-target nuke: a well-aimed beam through a conga line of Frigates kills all of them for one cooldown. It one-shots a Fighter, Torpedo Ship, or Frigate, and it is your only practical way to chew a Dreadnought (3,000 HP) in reasonable time. Never spend it on a single Scout.
Damage per Second: Realistic Early-Game Numbers
| Weapon | DPS vs single target | Time to kill Scout (50 HP) | Time to kill Fighter (100 HP) |
|---|---|---|---|
| Cannons (base) | 66.7 | 0.9 s | 1.5 s |
| Plasma Blasters (base) | 66.7 | 0.9 s | 1.8 s |
| Missile Launchers (base) | 30 + overlap hits | 2.0 s (overkill) | 4.0 s (2 shots) |
| Destructor Ray (base) | 42.9 burst | 7.0 s (overkill) | 7.0 s (overkill) |
Cannons and Plasma have the same single-target DPS at base, so the real deciding factor is feel and upgrade cost. Cannons are the budget pick, Plasma the slightly punchier one. Missiles trade single-target DPS for overlap clearing. The Ray is pure burst and the only weapon that hits everything in a line at once.
The Shop and Upgrade Math (verified)
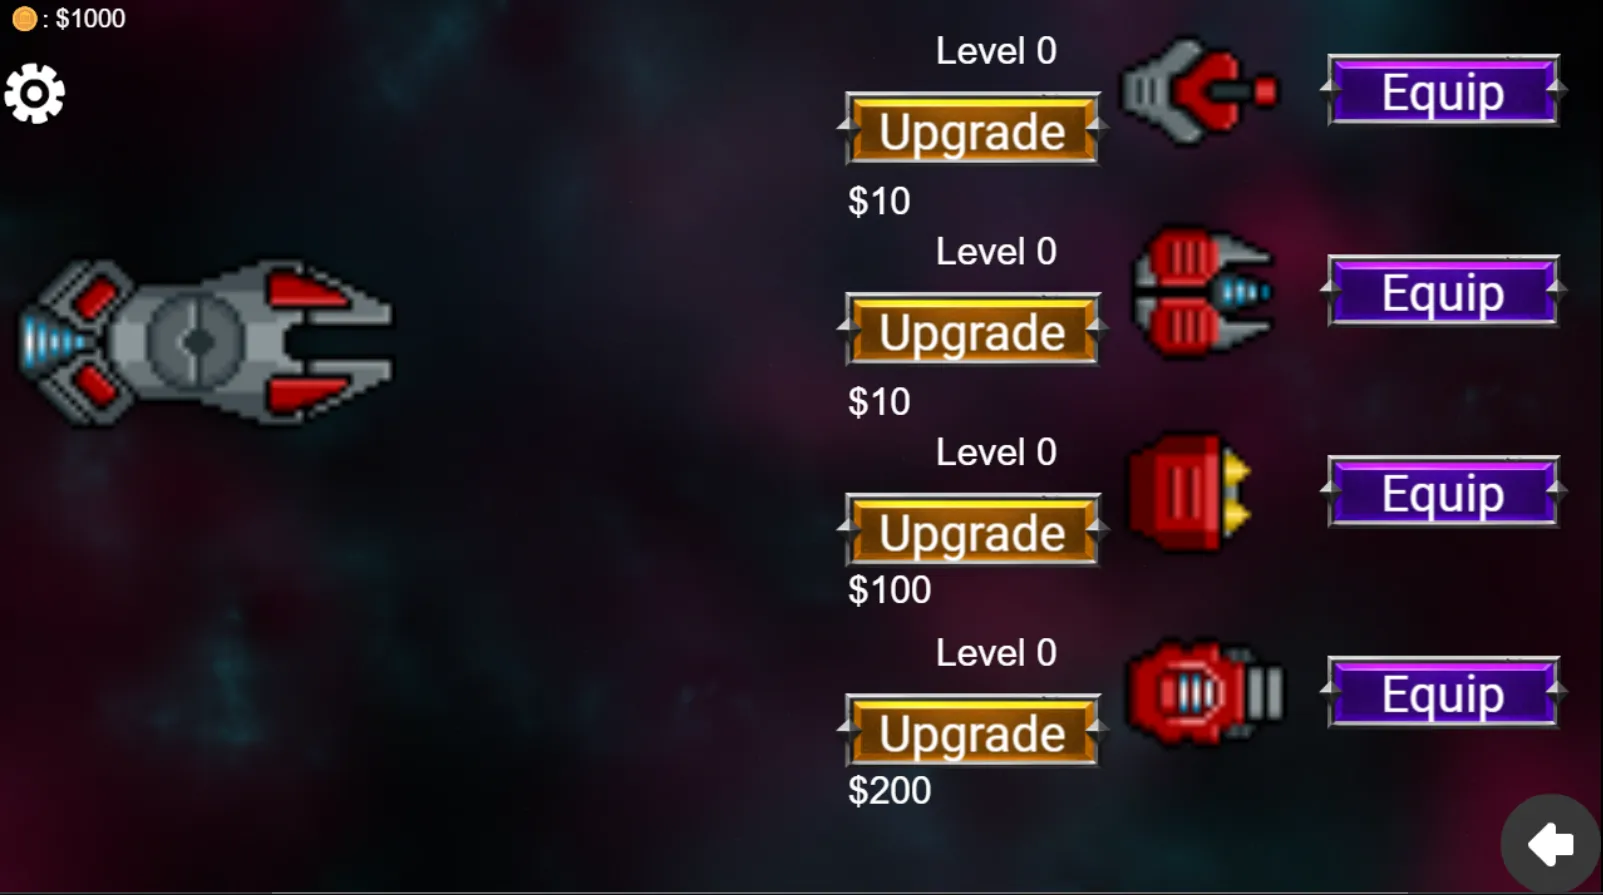
The shop (P) lists all four weapons with a level and a price. Each purchase:
- Subtracts the displayed cost from your credits (the buy is blocked if you cannot afford it)
- Multiplies that weapon's cost by 1.01 (costs creep up slowly, not exponentially)
- Multiplies its damage by 1.01
- Divides its fire interval by 1.001
- Adds 0.1 to its displayed level
Base costs per weapon: Cannons 10, Plasma 10, Missiles 100, Ray 200. Because the cost multiplier is only 1.01 per buy, a Cannon that starts at 10 credits stays affordable for a long chain of upgrades. Ten buys cost roughly 105 total, one hundred buys roughly 1,300 total. There is no level cap, and the shop shows both the level ("Level X.X") and the per-buy attack speed bump ("AS: 0.1" per purchase line). Early on, that makes Cannons the strongest compounding investment per credit.
You can also re-equip any weapon from the shop by clicking its display panel, which matters if you switch weapons mid-run and want to confirm what is loaded before the next fight.
Enemy Roster (verified from build 0.7.1)
Three factions (Klaed, Nairan, Nautolan) share six ship classes, picked at random per spawn. The faction dictates the weapons; the class dictates the stats.
| Class | HP | Rotation speed | Move force | Fire interval | Bounty |
|---|---|---|---|---|---|
| Scout | 50 | 720 deg/s | 200 | 5 s | +10 |
| Fighter | 100 | 360 deg/s | 100 | 3 s | +20 |
| Torpedo Ship | 200 | 180 deg/s | 70 | 5 s | +50 |
| Frigate | 300 | 180 deg/s | 100 | 7 s | +100 |
| Battlecruiser | 1,000 | 90 deg/s | 30 | 10 s | +250 |
| Dreadnought | 3,000 | 45 deg/s | 10 | 15 s | +1,000 |
Scouts are the swarm: fragile, absurdly quick to turn, and they hunt you directly. Fighters are the baseline threat. Torpedo Ships and Frigates are mid-tier: more HP, slower, worth real money. Battlecruisers are the first serious wall. 1,000 HP demands focused fire, so this is where the Destructor Ray starts to earn its keep. Dreadnoughts are the boss class: 3,000 HP, slow, worth 1,000 credits. They are the biggest single payout in the game and the biggest single risk.
One critical faction quirk: the Klaed Dreadnought regenerates 10 HP per second after 2 seconds without taking damage. The Nairan and Nautolan Dreadnoughts have no regen at all. If you break off a fight with a Klaed Dreadnought at half health, it heals back up while you are gone. Against the Klaed version you either commit to the kill or accept that your progress resets; against the other two you can safely disengage and re-engage later.
Enemy Weapons and Damage (verified)
| Projectile | Damage | Notes |
|---|---|---|
| Standard bullets / spinning bullets / light rockets | 20 | Faction filler fire; volume is the threat |
| Nautolan wave / enemy plasma | 30 | Medium chip damage |
| Klaed torpedo / Nairan torpedo / heavy rocket | 60 | Worth dodging even mid-fight |
| Klaed wave / Nairan bolt / Nautolan bomb | 100 | Big single hits; bombs also explode for 15 AOE on everything nearby, including other enemies |
| Faction rays (all three factions) | 400 | 40% of your health per hit. The single most dangerous projectile in the game |
Two structural facts keep this table honest. First, enemies only open fire when they are facing you within a 30-degree cone AND within 1,000 pixels, so breaking line of sight or orbiting out of their facing window stops the damage even if you stay close. Second, every projectile flies at a fixed speed per class: Fighter and Scout shots at 200, Frigate shots at a lazy 100, Torpedo Ship shots at 300, Battlecruiser shots at a comical 50, and Dreadnought shots at a blistering 1,000. Battlecruiser fire is trivially dodgeable at any distance; Dreadnought fire barely gives you reaction time and should be treated like a hitscan threat.
Spawn System (verified)
There are no discrete waves. Enemies spawn on a timer that accelerates as the run progresses:
- Spawn interval formula: max(0.2, 5 − run_time / 100) seconds
- At the start: one spawn roughly every 5 seconds
- After 2 minutes: roughly every 3.8 seconds
- After 5 minutes: roughly every 2 seconds
- After 8 minutes: the 0.2-second floor: a constant stream
Each spawn roll picks a class by weight: Fighter 30%, Scout 40%, Frigate 10%, Torpedo Ship 10%, Battlecruiser 6%, Dreadnought 4%. Spawns appear on a ring about 4,000 pixels out from screen center and drift in from a random angle.
The practical result: the first two minutes are a gentle trickle of Scouts and Fighters. By minute five, small packs arrive constantly. Past minute eight, evasion is the whole game and every credit you have not spent is a liability.
Progression Strategy
The Credit Path That Works
You start with 1,000 credits. Spend them before the ramp bites.
Minute 0-1  → Buy Cannon damage to ~40/shot (first 5-6 buys)
Minute 1-2  → Buy Cannon fire rate (2-3 buys)
Minute 2-3  → Bank ~300 credits for the Frigate influx
Minute 3    → First Missile or Plasma upgrade (whichever fits your aim)
Minute 5    → Destructor Ray online for Battlecruisers
Minute 8+   → Everything into one weapon; evasion first, damage second
This path keeps you ahead of the curve. The early Cannon investment turns the 40%-Scout early game into a credit printer, which funds the mid-game weapons before the spawn interval tightens.
What to Upgrade First
- Cannons damage. Raw kill speed compresses the early game and banks credits faster.
- Cannons fire rate. Once damage per shot is respectable, cadence doubles your sustained DPS.
- A second weapon. Missiles for groups or Plasma for accuracy.
- Destructor Ray damage. Only once Battlecruisers and Dreadnoughts are showing up; the Ray is a boss tool, not a wave tool.
- Missiles/Ray fire rate last. The multipliers are small (1.001 per buy) and the credits are better spent elsewhere.
Why Focused Spending Beats Spread Spending
One weapon at level 3 with damage and fire-rate buys will outperform two weapons at level 1.5 each, because the per-buy multipliers compound on one pool. Concentrating your first 300-500 credits into Cannons gives a single high-damage, high-rate tool that clears everything the early game throws at you. Spreading the same credits makes every weapon mediocre exactly when the spawn interval starts accelerating.
Step-by-Step Strategy
Phase 1: The Opening (Minute 0–2)
- Select Cannons (1). Fast, cheap, perfect for the Scout/Fighter flood.
- Spend immediately. Open the shop (P) and buy Cannon damage twice, then fire rate once. Do not hoard.
- Learn the spawn angle. Enemies drift in from off-screen at a random angle but always converge on you. Note which direction they enter from and pre-position toward the open side.
- Practice wide arcs. Circle the screen edges. Wide arcs give more reaction time than tight circles, and your momentum carries you smoothly.
- Kill Scouts on sight. They are 40% of spawns and the only thing fast enough to punish you this early.
Opening sequence:
1. Spawn → drift toward bottom edge
2. First enemy appears → identify class
3. Scout → burst it down (3 hits with base Cannons)
4. Circle clockwise along the edge, firing at anything inbound
5. Minute 0-1 → back to shop, two more Cannon damage buys
6. Keep moving; never sit still for more than a second
Phase 2: The Mid Game (Minute 3–5)
- Watch for Torpedo Ships and Frigates. They pay 50 and 100 credits respectively. A single Frigate kill funds two Cannon upgrades.
- Bring a second weapon online. If groups of 3+ are common, that is Missile time. If you prefer surgical removal of Frigates first, go Plasma.
- Use the Destructor Ray as a line-clear, not just a nuke. The beam pierces everything in its path, so wait until two or more Frigates line up and delete the whole column with one shot. That is 200+ credits per 7 seconds instead of 100.
- Bank a cushion. Keep 200-300 credits unspent for the Battlecruiser phase, when you will want to move into the Ray and a heavy weapon in one shopping trip.
Mid-game buying sequence (optimal):
Minute 3: Buy Missile damage once (~100 credits)
Minute 3.5: Buy Cannon fire rate again
Minute 4: Buy Ray damage once (~200 credits)
Minute 4.5: Buy Plasma damage once
Minute 5: Rebuy whatever is cheapest; keep a 200-credit float
Phase 3: The Late Game (Minute 6+)
- Stay mobile constantly. One stationary second at this point is a hit. Enemy rays deal 400 damage.
- Prioritize threats: Scouts (fastest, closest) → Fighter packs → Torpedo/Frigate → Battlecruiser → Dreadnought.
- Swap weapons per threat. Cannon or Plasma for singles, Missiles for clumps, Ray for anything with 1,000+ HP.
- Use the perimeter, cut through center. Circle the edges between attacks, then cut across when a shot is clear. Enemy AI drifts toward where you were, not where you are.
- Break the enemy firing solution. Enemies only shoot when facing you inside a 30-degree cone at under 1,000 pixels. Orbiting sideways out of that cone stops incoming fire even without killing anything.
- Keep the Ray on a mental cooldown timer. Every 7 seconds you can delete one high-value target or a whole line of mediums. Miss that window and a Battlecruiser lives 10 more seconds.
- Use momentum offensively. A held key released mid-motion slides you past a projectile stream while you keep firing. Bait Scouts into overshoot and they line up for the missile.
8 Actionable Combat Sequences
Sequence 1: Clean Opening
1. Select Cannons
2. Shop once immediately (2 damage buys, 1 fire-rate buy)
3. Kill every Scout as it spawns (3 hits each)
4. Arc counter-clockwise along the screen edge
5. Re-shop at minute 1 for the second wave of damage
Sequence 2: Group Clearing with Missiles
1. Kite a pack of 3+ enemies into a loose cluster (2-3 seconds)
2. Switch to Missiles (3)
3. Fire at the center of the cluster
4. One missile damages everything overlapping it (60 + overlap hits)
5. Switch back to Cannons/Plasma for stragglers
Sequence 3: Frigate Line Delete
1. Identify 2+ Frigates flying in a line
2. Switch to Destructor Ray (4)
3. Fire through the line → every ship in the beam takes 300
4. Collect 100+ credits per ship hit
5. Repeat on cooldown (7 seconds)
Sequence 4: Battlecruiser Protocol
1. Switch to Ray (4). It does 300 of the 1,000 HP
2. Fire ray, then immediately switch to Plasma (2)
3. Keep distance with S (thrust away from cursor) while firing
4. Circle with A/D to stay outside its 30-degree firing cone
5. Its shots travel at speed 50; sidestep them at any range
6. When the Ray is back off cooldown, finish with a second blast
Sequence 5: Dreadnought Grind
1. Recognize the 3,000 HP boss class (slow, huge, 1,000-credit bounty)
2. Check the faction: Klaed DN regens 10 HP/s after 2s; the others do not
3. Open with the Ray. First 10% of its HP gone instantly
4. Switch to your highest-DPS weapon (Cannon if leveled, else Plasma)
5. Kite in wide circles; its shots fly at speed 1,000, so respect them like hitscan
6. Every 7 seconds, re-apply the Ray
7. A leveled Cannon does ~100+ DPS; expect a 20-30 second fight
8. Against the Klaed version, do not disengage halfway: it heals back
Sequence 6: Swarm Evasion
1. When 6+ enemies close in, stop shooting
2. Hold W toward the open side of the screen, then release
3. Coast through the gap while enemies converge on your old position
4. Re-engage once the pack spreads
5. You heal 10 HP/s while you are out of the fight (after a 5s damage timeout)
Sequence 7: Weapon Swap Dance
1. Primary (Cannons/Plasma): hold to sustain fire
2. 3+ enemies cluster → 3 (Missiles) → one shot → back
3. Frigate/Battlecruiser visible → 4 (Ray) → blast → back
4. Master the rhythm and you never stop dealing optimal damage
Sequence 8: Endgame Desperation
1. When the screen is 70%+ enemies and projectiles, stop trying to kill
2. Focus on survival: wide perimeter laps, S-thrust backouts
3. Use the piercing Ray to carve a path in a direction you want to escape to
4. Only kill what is directly between you and open space
5. Stay alive long enough for the swarm to thin, then re-engage
Advanced Tips
Movement Techniques
Your ship rotates to the cursor at 240 deg/s (360 on mobile) and accelerates under thrust with a speed cap of 300. The skill is in using momentum as a tool.
| Technique | How To | When To Use |
|---|---|---|
| The Orbit | Hold A or D while aiming at a target | Sustained fire while staying out of the enemy's 30-degree facing cone |
| S-Backout | Hold S (thrust away from cursor) | Backing out of a dead-end |
| Coast Slide | Release W after 2 sec and keep firing | Drifting through a projectile stream |
| Wide Lap | Circle the screen edge at max speed | Swarm evasion, healing up |
| Diagonal Cut | W toward a corner then cut across | Crossing the map while confused |
The Coast Slide is the most underrated technique. Hold W for two seconds, release it, and your ship keeps drifting at speed while you fire. Projectiles aimed at your previous position miss. You get full firing accuracy during the coast because aiming is mouse-only.
The Orbit doubles as a defensive tool. Because enemies need a 30-degree facing window to shoot, a tight orbit around a Frigate keeps it perpetually turning and mostly silent.
Enemy Pattern Recognition
Read the first spawns of the run:
- All Scouts → Swarm pressure. Fast turns, low HP. Kill them fast, stay mobile.
- Scouts + Fighters → Standard mix. Kill Scouts first, then Fighters.
- Frigate appears → Mid-game has begun. The Ray is worth switching to on cooldown.
- Battlecruiser spawn → The first real DPS check. Its shots crawl at speed 50, so the danger is its 1,000 HP, not its gun.
- Dreadnought spawn → Boss window. Its shots fly at speed 1,000. There are 1,000 credits on the table, but only if you survive the 20-30 second grind. Check the faction before committing: Klaed heals, the others do not.
Threat Economics
Every enemy class has a cost-benefit profile. Scouts pay 10 credits and die in under a second to leveled Cannons. A Dreadnought pays 1,000 credits but takes 20-30 seconds of focus fire while the rest of the swarm keeps building. Mid-run, the best credit rate is farming Frigates with the piercing Ray: they spawn at 10%, they die to one beam, and each pays 100. A Ray on cooldown aimed at Frigate formations out-earns a Dreadnought grind with far less risk.
Score-Run / Credit Strategy
- Maximize bounties, not kills. A Dreadnought pays 1,000 credits, a hundred Scouts pay the same and take far longer. Target the high-value classes when you can do so safely.
- Never die with a big bank. Credits spent are power; credits held are potential that dies with you. Before a dangerous engagement, dump your float into the cheapest useful upgrade.
- Learn the minute-8 wall. That is when the spawn interval hits the 0.2-second floor. Everything before it is preparation: your weapon levels, your positioning habits, and your Ray discipline.
Practice Routine
Five-minute drills that improve survival faster than full runs:
- Coast drill (2 min): Hold W, release, track where the ship drifts. Repeat until you can place the coast exactly.
- Scout drill (1 min): Restart until you clear the first minute without taking a hit. Goal: every Scout dead within 2 seconds of entering screen.
- Swap drill (1 min): Force yourself to cycle 1→3→4→2→1 every few seconds during minute 2, even when unnecessary. Build the habit.
- Frigate drill (1 min): Play to minute 3 and Ray-delete every Frigate on cooldown. Goal: never miss a Frigate window, and line up two Frigates per shot when possible.
Common Mistakes: The 6 Killers
| Mistake | Why It Kills You | Fix |
|---|---|---|
| Hoarding starting credits | The early game is winnable with stock Cannons; the mid game is not | Spend 200-300 credits in the first minute |
| Sitting in the center | Enemies converge there; rays hit for 400 | Stay on the perimeter |
| Ignoring Scouts | 720 deg/s turn rate makes them deadly in packs | Kill them first, always |
| Using the Ray on small fry | 300 piercing damage on a 10-credit Scout wastes your 7 s cooldown | Only on Frigates and above, ideally in lines |
| Standing in a ray's path | 400 damage is 40% of your health; two hits plus chip damage is death | Break the 30-degree facing cone; orbit, never face-tank |
| Not switching weapons | Cannons clear groups poorly; Missiles clear singles poorly | Cycle 1–4 and match the threat |
FAQ
Where can I play Zenith Axiom? Free in your browser at jubislayer.itch.io/zenith-axiom, with a mirror on gd.games. Android APK and Windows desktop versions are also on the itch.io page.
What are the controls? W/S/A/D move relative to the mouse cursor (toward, away, strafe left, strafe right). Left mouse fires. Keys 1–4 select the four weapons. P opens the shop, Esc closes it.
What are the four weapon systems? Cannons (20 damage, 0.3 s interval), Plasma Blasters (30 damage, 0.45 s), Missile Launchers (60 damage, 2.0 s, hits everything overlapping on impact), and Destructor Ray (300 damage, 7.0 s, pierces every enemy in the beam). These scale with shop upgrades.
How much money do you start with? 1,000 credits. Spend them early. Enemy bounties (10 to 1,000 credits by class) flow in as you kill.
Is there an ending? No. It is an endless survival game. The spawn interval compresses from 5 seconds toward 0.2 seconds as the run goes on.
How many enemy types are there? Three factions (Klaed, Nairan, Nautolan) share six classes: Scout (50 HP), Fighter (100 HP), Torpedo Ship (200 HP), Frigate (300 HP), Battlecruiser (1,000 HP), and Dreadnought (3,000 HP).
What is the most dangerous enemy attack? The faction ray weapons. They deal 400 damage, 40% of your health pool, in one hit. Fight them by breaking the shooter's facing angle: enemies only fire inside a 30-degree cone at under 1,000 pixels.
Do all Dreadnoughts regenerate health? No. Only the Klaed faction Dreadnought regenerates (10 HP/s after 2 seconds without damage). The Nairan and Nautolan versions stay damaged permanently, so you can chip them down across multiple engagements.
Can I play on mobile? Yes. The Android version and the web build support touch controls: left stick moves, right stick aims, and the ship auto-fires. The mobile ship also rotates faster (360 deg/s vs 240 on desktop).
Does the ship regenerate health? Yes. It regens 10 HP per second after 5 seconds without taking damage. Backing out of a fight is a real heal.
Is the game free? The web version is completely free. Android and desktop are name-your-own-price, including $0.
Who made the assets? Ship assets by zintoki, sound and music by alkakrab, enemy assets by Foozle, backgrounds by Screaming Brain Studios. No generative AI was used.
Challenge Goals
| Goal | Target | Reward |
|---|---|---|
| Novice | Survive 2 minutes | Learn the spawn rhythm |
| Competent | Survive 5 minutes | Master one weapon |
| Skilled | Kill a Battlecruiser | Weapon-switching discipline |
| Expert | Survive 8+ minutes (the wall) | Optimal credit management |
| Master | Kill a Klaed Dreadnought without it healing a single tick | Perfect movement + uninterrupted aggression |
Start with Cannons and spend early. Once you can reach minute 5 consistently, add Missiles for group work and the Ray for Frigate lines. The game reveals its depth as the spawn interval tightens. What looks like a simple shooter has real layers in credit compounding, weapon matchups, and momentum-based movement.
Quick Reference Card
CONTROLS:
  W = thrust toward mouse    A = strafe left
  S = thrust away from mouse D = strafe right
  LMB = fire   1-4 = select weapon   P = shop   Esc = close

WEAPONS (base):
  Cannons 20 dmg / 0.3s   Plasma 30 dmg / 0.45s
  Missiles 60 dmg / 2.0s overlap   Ray 300 dmg / 7.0s PIERCES

UPGRADE MATH:
  cost x1.01, damage x1.01, interval /1.001, level +0.1 per buy
  Base costs: Cannon 10, Plasma 10, Missiles 100, Ray 200

ENEMY BOUNTIES:
  Scout 10, Fighter 20, Torpedo 50, Frigate 100,
  Battlecruiser 250, Dreadnought 1000

ENEMY DAMAGE TO YOU:
  bullets 20 | waves/plasma 30 | torpedoes 60 | bombs/bolts 100 | rays 400
  ship contact 15 (0.5s damage cooldown caps burst rate)
  Enemies fire only within 30deg facing + 1000px range

SPAWN RAMP:
  interval = max(0.2, 5 - minutes*100/60/100) seconds
  Minute 0-2: trickle   Minute 5: ~2s   Minute 8+: 0.2s floor

THREAT PRIORITY:
  1. Scouts (fastest)  2. Fighters  3. Torpedo/Frigate
  4. Battlecruiser  5. Dreadnought (use Ray on 3-5)
  Klaed DN regens 10 HP/s after 2s; others do not

MOVEMENT:
  Default: wide perimeter laps
  Evasion: coast slide (hold W, release)
  Boss: orbit with A/D, S-backout on pressure
  Heal: 10 HP/s after 5s out of combat
The DPS Curve: How Upgrades Compound
Every shop purchase multiplies a weapon's damage by 1.01 and divides its fire interval by 1.001. Neither number impresses alone. The compounding across a long buy chain does. This section models what your damage actually looks like as the run progresses, using the verified base stats.
Derived DPS by Buy Count (Cannons)
Each Cannon purchase costs 10 credits at first (creeping up 1% per buy). Damage per shot after N buys is 20 × 1.01^N, and the fire interval is 0.3 / 1.001^N seconds. DPS is the ratio:
| Total Cannon buys | Damage/shot | Interval | Single-target DPS | Total credits spent (approx) |
|---|---|---|---|---|
| 0 | 20 | 0.300 s | 66.7 | 0 |
| 10 | 22.1 | 0.297 s | 74.4 | ~105 |
| 25 | 25.6 | 0.293 s | 87.2 | ~255 |
| 50 | 32.9 | 0.285 s | 115.3 | ~530 |
| 100 | 54.0 | 0.271 s | 199.1 | ~1,300 |
| 200 | 145.7 | 0.246 s | 592.7 | ~3,800 |
Read the table right and it changes how you shop. The first 25 buys (about 255 credits) lift Cannon DPS by a modest 31%. Buys 50 through 100 nearly double your DPS again for roughly 770 credits. Because damage compounds multiplicatively while enemy HP per class is fixed, the value of every credit spent on Cannons rises the longer you stay alive. Dying at minute 3 with 500 unspent credits is not conservatism, it is burning compounding interest.
When Plasma Overtakes Cannons
At base, both weapons deliver 66.7 DPS. Plasma hits harder per shot (30 vs 20) but fires slower (0.45 s vs 0.3 s). After identical buy counts, Plasma's DPS runs about 50% higher than Cannons because its higher per-shot damage compounds the same 1.01 multiplier from a larger base.
| Weapon | DPS at 10 buys | DPS at 50 buys | DPS at 100 buys |
|---|---|---|---|
| Cannons | 74.4 | 115.3 | 199.1 |
| Plasma Blasters | 111.6 | 172.9 | 298.7 |
Plasma is the better long-term investment by raw numbers. Cannons keep two edge cases: they start 50% cheaper-feeling because the first buys cost the same 10 credits but arrive faster in practice (the first three Scout kills fund a buy), and their faster interval means more consistent hit registration on fast-moving Scouts, where a 0.45 s gap between shots is a miss window. The practical rule: level whichever one you actually land hits with. A missed Plasma shot is 0% DPS.
The Other Two Weapons Do Not Compound the Same Way
Missiles (100 base cost) and the Ray (200) multiply the same way, but their slow intervals mean the fire-rate reduction barely matters until very high buy counts. At 50 buys, Missile DPS rises from 30 to about 52 against a single target, and the Ray's from 42.9 to about 74. The Ray is never a DPS purchase: its value is the 300-damage piercing line, and the upgrade path exists to raise that line's damage from "one-shots Frigates" to "one-shots Battlecruisers" (which needs 1,000/300 ≈ 3.33, or about 122 buys) and eventually to chunk Dreadnoughts for a third of their bar per shot.
What this means for your build:
Credits 0-300    → Cannons or Plasma only (your main DPS engine)
Credits 300-600  → Secondary weapon online + first Ray purchase
Credits 600+     → Ray damage until it one-shots the biggest class on screen
                   (100 buys ≈ 1,300 credits gets you to Battlecruiser one-shot range)
Credits 1,300+   → Everything else: second DPS weapon, fire rate, float
The Credit Economy: Income vs Spend Rate
Bounties are fixed per class, but spawn weights shift your income by phase. Expected credits per spawn multiply the class weights by their bounties:
Expected bounty per spawn (base weights):
  Scout 40% × 10        = 4.0
  Fighter 30% × 20      = 6.0
  Frigate 10% × 100     = 10.0
  Torpedo 10% × 50      = 5.0
  Battlecruiser 6% × 250  = 15.0
  Dreadnought 4% × 1000   = 40.0
  Total ≈ 80 credits per spawn, IF you kill everything
Nobody kills everything. A realistic kill rate is 60-80% of spawns early (Scouts and Fighters die fast; heavies take focus fire) and 40-60% after minute 6 (evasion eats your output). Working income numbers:
| Phase | Spawns/minute | Realistic kill share | Income/minute |
|---|---|---|---|
| Minute 0-2 | ~14 | 70% | ~780 |
| Minute 2-5 | ~19 | 65% | ~990 |
| Minute 5-8 | ~26 | 50% | ~1,040 |
| Minute 8+ | ~300 (0.2 s floor) | 15-25% (survival mode) | ~3,600+ (heavies still die to the Ray) |
Two conclusions fall out. First, minutes 2 through 8 are your real earning window, and the Ray-on-cooldown Frigate lines are what hold that number up. Second, after minute 8 your income comes almost entirely from whatever you can delete during evasion gaps. A Ray that one-shots Battlecruisers turns the late game from starvation into harvest, because Battlecruisers pay 250 each and drift stupidly.
The spend rule that follows: maintain a 200-300 credit float, never more. Every credit above 300 sitting in the bank during minutes 2-8 is DPS you did not buy, and DPS is the only stat that earns credits.
Weapon Tier List by Phase
| Weapon | Early (0-3 min) | Mid (3-6 min) | Late (6+ min) | Verdict |
|---|---|---|---|---|
| Cannons | A | B | B | Cheapest engine, forgive misses, fall off vs armor |
| Plasma Blasters | A | A | A | Best single-target compounder, aim-check included |
| Missile Launchers | B | A | A | The only AoE overlap damage; clump deletion |
| Destructor Ray | C | S | S | Boss tool and line-clear; useless before heavies spawn |
Rationale: early spawns are 70% Scouts and Fighters, which Cannons and Plasma delete in under 2 seconds. Missiles waste their 2-second cooldown on a 50 HP Scout. The Ray wastes 7 seconds on anything that dies to three Cannon shots. Mid game introduces Torpedo Ships (200 HP) and Frigates (300), where one-shot thresholds start mattering: a Missile one-shots Scouts and two-shots Fighters, and the Ray starts deleting Frigate lines. Late game, the spawn floor means clumps are constant, and the Ray plus Missiles are the only tools that scale to the crowd while Plasma handles whatever peels toward you.
The standard endgame kit: Plasma (or Cannons) at 50+ buys as the engine, Missiles online for clumps, Ray at 100+ buys for one-shot Battlecruisers and Dreadnought chunks. Anything less and minute 8 becomes a holding pattern instead of a harvest.
Faction Playbook
Three factions share six classes but fire different weapons. Faction tells matter because the damage table is not uniform.
| Faction | Signature fire | The threat | The tell |
|---|---|---|---|
| Klaed | Torpedoes (60), waves (100), regenerating Dreadnought | The only Dreadnought that heals (10 HP/s after 2 s) | Torpedo launch flash; Dreadnought with a repair shimmer |
| Nairan | Torpedoes (60), bolts (100) | Highest density of 100-damage shots mid game | Wide slow bolts you can thread between |
| Nautolan | Waves (30), bombs (100 + 15 AoE) | Bombs damage enemies too; the only friendly-fire pressure on the board | Spherical bomb sprite drifting at speed 200-ish |
Faction-specific rules:
- Klaed Dreadnoughts demand commitment. Either finish the 3,000 HP grind or leave it alone entirely. Chip damage you walk away from is erased at 10 HP/s. If your DPS cannot close the fight inside one Ray cycle (7 s) plus change, bank the 1,000-credit bounty for later and let it patrol.
- Nairan bolts punish lazy orbiting. Their 100-damage shots are wide but slow; the standard perpendicular cut (thrust across the bolt's path rather than away) dodges without giving up position. Keep orbiting straight through a bolt fan and you eat 100.
- Nautolan bombs are a weapon you steal. Their 15-point AoE hits enemy ships, so kiting a Frigate line through a Nautolan bomb burst softens everything in it for free. When a Nautolan is on the field, path your kites through its bombs.
The Run Ladder: Checkpoints by Time Goal
Survival runs have natural checkpoints. Hit each one and the next bracket opens; miss one and the run usually ends within a minute of the miss.
Novice: survive 2 minutes.
Minute 0-1: Cannons selected, 2 damage buys + 1 rate buy immediately
            Perimeter laps, kill every Scout on sight
Checkpoint: 100+ credits banked, zero hits taken is ideal
Minute 1-2: 2 more damage buys; watch for the first Fighters
The common death: sitting center or hoarding the starting 1,000
Competent: survive 5 minutes.
Prerequisites: one weapon at 25+ buys by minute 3
Minute 2-3:   Torpedo Ships arrive (50-credit bounties); switch to
              Plasma for surgical kills or stay Cannons for volume
Minute 3-4:   First Missiles or Ray purchase
Minute 4-5:   Ray on cooldown for every Frigate line
Checkpoint: 500+ lifetime credits earned, second weapon online
The common death: Frigate + Scout convergence; Scouts first, always
Skilled: kill a Battlecruiser.
Prerequisites: Ray purchased, 300+ credit float
Sequence:     Ray (300) → swap to best DPS → orbit outside its 30° cone
              → its shots crawl at speed 50 → second Ray when off cooldown
              → 1,000 HP falls in 10-15 s with a leveled Plasma
Checkpoint:   +250 credits, Ray repeatable on every cruiser after
The common death: face-tanking while the Ray is on cooldown
Expert: survive 8+ minutes (the wall).
Prerequisites: 50+ buys on main weapon, Ray at one-shot Battlecruiser
              threshold OR Missiles for clump control
Minute 6-8:   spawn interval compresses 2.4 → 0.4 s; threat priority
              tightens to Scouts → Fighters → everything else
Minute 8:     the 0.2 s floor. Screen control via the Ray's piercing
              line becomes survival, not damage
Checkpoint:   2,000+ lifetime credits; three of four weapons leveled
The common death: stopping to grind a Dreadnought while the swarm builds
Master: the deep run (12+ minutes).
Prerequisites: Ray one-shots Battlecruisers (~100 buys), engine weapon
              at 100+ buys (≈200 DPS single-target)
The doctrine:  the map is a resource you mine during evasion windows.
              Cut across the map when the cone is clear, Ray-delete
              anything armored on the path, never reverse course.
Checkpoint:   there is no wall after minute 8, only your attention span
The common death: one ray hit (400) caught during a Dreadnought grind
Mobile-Specific Strategy
The mobile build changes two variables: the ship rotates at 360 deg/s instead of 240, and firing is automatic. Both push the same strategic direction.
Auto-fire is a commitment device. You cannot hold fire selectively, so range discipline replaces trigger discipline. Stay outside engagement range of anything you are not killing, because your ship is always shooting and always reveal your intent. Approaches are straight lines toward the kill, not wide sweeps.
Faster rotation makes orbit tech stronger. The Orbit (strafing around a target while it fails to keep its firing cone on you) is strictly better on mobile; enemies with 90-180 deg/s rotation rates physically cannot track you. Use orbit-kiting on Battlecruisers and Frigates more aggressively than the desktop guide suggests.
What you lose: the Coast Slide depends on thrust control, and thumb-real-estate makes fine W/S/A/D rhythm harder. Compensate with shorter movement strokes and more pointing: on mobile, aiming is moving for everything except the sticks.
Mobile build order: identical credit path, but weight fire-rate buys one step higher. Auto-fire never stops, so interval reductions apply to every frame of the game instead of only your held-fire windows.
Advanced FAQ Additions
Why did three enemies kill me in one second? Contact damage is 15 per collision with a 0.5-second cooldown between damage ticks, but each overlapping ship gets its own tick. Three ships stacked on you deal up to 90 per second. Swarm contact is a death timer, not chip damage.
How do I dodge a Dreadnought shot? Treat it as hitscan: 1,000 projectile speed crosses a typical screen in under half a second. Pre-break the line of sight (orbit out of the 30-degree cone) rather than reacting to the muzzle flash. Everything slower is genuinely dodgeable: Battlecruiser shots at speed 50 cross a screen in about 10 seconds.
Does my health regen while firing? Yes, as long as you have not taken damage in the last 5 seconds. Ten seconds of clean flying buys back 100 HP. The regen window is why disengaging is a real tactic: 20 seconds of evasion restores 200 HP, more than most mistakes cost.
Which upgrade line is a trap? Fire rate on Missiles and the Ray before damage. A 1.001 divisor per buy moves a 2.0 s interval to 1.996 s; you will never feel it. The same credits into damage turn one-shot thresholds into two-shot thresholds, which is the change that actually kills things faster.
What is the actual best use of the first 1,000 credits? Ten Cannon or Plasma damage buys (about 105 credits) plus fire rate, repeated as income allows, with a 200-300 float. Do not open Missiles or the Ray before minute 3; their thresholds do not exist yet in the spawn pool.
Score-Posting Doctrine
Chasing a personal best changes the risk calculus in three ways:
- Bounties-per-minute beats total kills. A Frigate line deleted by one Ray shot earns 200-300 credits in 7 seconds. The same 7 seconds of Scout-hunting earns 70. Route your attention by credits, not by threat annoyance.
- The Dreadnought decision is a time-value calculation. 1,000 credits for 20-30 seconds of focus fire is a good trade before minute 6, a losing trade after minute 8 (when the swarm grows every second you stand still and your evasion budget shrinks). Post-score runs usually skip late Dreadnoughts entirely.
- Die with an empty wallet. Before any engagement that might kill you, dump the float above 300 into the cheapest useful upgrade. Banked credits score nothing; weapon levels persist to your next run only through your own skill, so convert everything, always.