
Daily Pick
One deeply researched guide worth reading today.
A practical route through the systems that matter most, written to help new players make confident decisions quickly.
Overview
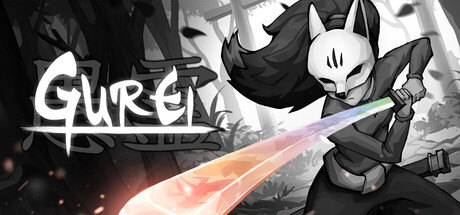
Gurei is a hand-drawn 2D boss-rush action game by Lobo Sagaz studio, published by Astrolabe Games. You play as Rei, a human spirit bound to defeat ten mystical Kami in a surreal castle between worlds. Each victory adds a new ability to your kit and makes every remaining boss harder. Launched July 22, 2026 on Windows, PlayStation 5, and Nintendo Switch at $14.39 (launch price, $15.99 standard). "Very Positive" on Steam with 88 positive reviews out of 92 at the time of writing. 42 achievements.
Unlike a traditional action game where difficulty is fixed, Gurei's dynamic scaling turns the boss order into a tactical puzzle. The same Kami fought as your first encounter might have 2 moves and no phases — faced as your eighth, it has 6 moves, 3 phases, and arena hazards. Every route is viable. No two runs play the same.
| Stat | Value |
|---|---|
| Developer | Lobo Sagaz studio |
| Publisher | Astrolabe Games |
| Release | July 22, 2026 |
| Price | $14.39 (launch), $15.99 standard |
| Platform | Windows, PS5, Nintendo Switch, Steam Deck Verified |
| Genre | 2D action boss-rush, Souls-like |
| Playtime | 5–10h first run, 15–20h completionist |
| Difficulty | Hard — "unforgiving" but fair |
| Bosses | 10 Kami + secret encounters |
| Achievements | 42 |
| Rating | Very Positive (Steam) — 88 positive of 92 reviews |
| Possible Routes | 3,628,800 (10!) |
Story & Setting
The Kami inhabit a surreal castle that exists between the human world and the spirit realm. Rei, a human spirit bound by duty, must defeat these mystical entities of nature to absorb their power and uncover what happened here. Each Kami has a distinct personality based on its animal theme — the Catfish is slow and deliberate, the Dove is fast and flighty, the Bull is stubborn and direct.
Carry a little piece of every Kami you defeat. They follow Rei around after their defeat, perched on her shoulder or trailing behind, offering commentary on the world, the other Kami, and the situation. Their remarks range from useful gameplay hints to pure personality-driven banter. One might warn you about an upcoming boss's weakness. Another might mock your platforming. The writing leans into this — each Kami feels like a character, not just a moveset.
Defeating Kami also unlocks NPCs scattered through the castle. These characters from Japanese mythology provide side objectives, lore context, and unique animations. Some offer shortcuts. Others hint at secrets. The castle starts empty and fills up as you progress, giving a tangible sense of forward momentum even between boss fights.
The Hub World
Spawn in a circular chamber with branching paths. The game gives you zero direction. That's deliberate — every path leads to a boss, and finding which one suits your current skill level is part of the challenge.
The hub is compact but layered. Paths loop around, intersect, and hide shortcuts that unlock as you gain abilities. Golden flames mark boss arena entrances. Bird statues serve as orientation landmarks. Save points sit just before every boss room, letting you swap your equipped abilities freely.
Pro tip: Spend your first 10 minutes just mapping the hub. Die to a few bosses on purpose. Knowing where every boss entrance is lets you plan routes without wasting time backtracking.
Getting Started — First 30 Minutes
Your first run is research, not a real attempt. Treat it that way.
Your starting kit:
- Sword (light + heavy attacks)
- Dodge (has invincibility frames)
- Jump (can also enemy stomp)
- Dash (no i-frames, covers ground fast)
- Wall movement (climb and wall jump)
No health upgrades. No abilities. No second chances.
First route: Head left from hub, descend at the end, go right, follow the path. This leads to the Catfish Kami — a shield-wielding boss with two attacks (shield bash, ground stomp). The Catfish is the most forgiving introduction because its attacks are slow and telegraphed. Break its shield with aggressive play to stun it and deal massive damage. Your reward is the Shield Upgrade — a defensive tool that carries you through the next several fights.
Critical beginner mistake: Treating every boss like a DPS race. Gurei punishes greed harder than most games. A single boss has enough health that two or three greedy combos will kill you before you kill it. The correct rhythm is: dodge → punish (2–3 hits) → disengage → observe → repeat.
Death is a learning tool. When you die, you restart the current boss at full health. You don't lose abilities you've earned. Your lives (gained from boss victories) reset on death but the abilities persist. Die enough times to exhaust your lives and the run ends — but you keep the knowledge of attack patterns.
Core Mechanics
Dynamic Difficulty Scaling
This is Gurei's signature system and the most misunderstood mechanic.
Every Kami has a base stat block. Each boss you defeat applies a multiplier to the remaining Kami: +15–20% health, +10–15% damage output, and — crucially — new attack patterns unlock at certain thresholds. A boss fought as your 3rd encounter might have 2 phases and 3 attacks. The same boss as your 7th encounter has 3 phases, 6 attacks, and arena hazards.
The scaling is not linear per-boss. It tiers:
- Fights 1–3: Base movesets. No phase transitions. 1–2 specials each.
- Fights 4–6: Phase 2 activates around 50% HP. New specials appear. Bosses move 15–20% faster.
- Fights 7–9: Phase 3 added. Bosses gain arena-wide attacks. Some teleport. Attack chains extend by 1–2 hits.
- Fight 10 (final boss): Full moveset, 4 phases, dramatically increased aggression.
Practical implication: Saving an "easy" boss for last turns it into a nightmare. The Snake Kami with its simple combo chains becomes a frame-perfect gauntlet if faced as fight #9. Plan your route so the hardest-to-read bosses are faced early, while the simple-but-tanky ones go late.
Lives System
You start with a small number of lives (the count depends on difficulty but the game never displays a hard number). Each boss victory adds +1 life. Running out of lives ends the run and sends you back to the title screen. All abilities earned in that run are lost.
Lives are shared across bosses. You can die to the same boss 5 times as long as you have lives banked. Once you clear a boss, the lives spent on that attempt are consumed but the win is saved.
Strategy: If you're on your last life against a boss, consider switching to a different one. A fresh fight with a different moveset gives you better odds than banging your head against the same wall.
Sacrificial Scout Runs
The life cost of a failed attempt is always 1, regardless of how far into the fight you got. This makes "sacrificial scout runs" viable — throw one attempt to study the boss's full moveset, then win on attempt 2. This is especially useful for the Raven (3 phases) and the late-game variants where attack patterns multiply.
Ability Loadout
Defeated Kami grant abilities. You can equip a subset at save points. The game lets you swap abilities freely between bosses. Finding the right loadout transforms a hard fight into a manageable one.
| Ability | Source (Kami) | Use Case |
|---|---|---|
| Shield | Catfish | Best defensive tool. Absorbs one hit. Essential for projectile-heavy bosses. |
| Healing | Frog | Limited uses per save point. Heal when below 60%, not when near death. |
| Clone | Monkey/Clone | Creates a decoy. Distracts bosses so you can heal or setup. |
| Revive | Cat/Turtle | Timed second chance. Triggers on death. Must kill boss before timer expires. |
| Scythe Finisher | Snake | Massive damage on staggered enemies. Best execute tool. |
| Air Dash | Sword/Peafowl | I-frames on a cooldown. Better than dodge for phase 3+ bosses. |
| Arrow | Dove | Long-range poke. Lets you damage bosses during their attack cycles safely. |
| Counterattack | Raven | Triggered when hit. Deals return damage. Strong against multi-hit combos. |
| Spear | Beetle | Long-range melee. Hits hard. Slower than sword but safer reach. |
| Ground Slam | Bull | AOE knockdown. Interrupts group encounters and staggers large bosses. |
S-tier abilities: Shield, Healing, Clone, Air Dash A-tier: Scythe Finisher, Arrow, Spear B-tier: Revive, Ground Slam, Counterattack
Ability synergy combos:
- Clone + Healing: The strongest defensive combo. Clone draws aggro while you heal. Against any boss with adds (Frog, Clone itself, Dove's platform phase), this resets the fight state.
- Shield + Air Dash: The ultimate survival kit. Shield blocks one hit, Air Dash phases through everything else. Take this into any boss you haven't fought before.
- Arrow + Spear: Full ranged kit. Kite bosses from a distance. Works against Bull, Catfish, and slow-phase Raven.
Hub Navigation — Where to Find Every Boss
The hub doesn't give you directions. These do.
| Boss | How to Reach | Steam Achievement Name |
|---|---|---|
| Catfish (Shield) | Head left from hub, descend at the end, go right | The Catfish |
| Frog (Healing) | Head left from hub, jump up instead of descending, continue left, descend twice, turn right | (Hidden) |
| Monkey/Clone | Head right from hub, dash through the hurdle, head left after jumping down | The Monkey |
| Cat/Turtle (Revive) | Left from hub, jump up, use platforms to ascend, right at the bird statue, cross the bridge | The Cat |
| Snake (Scythe) | Same path as Frog but don't turn right — continue left to the very end | The Snake |
| Dove (Arrow) | Same path as Cat/Turtle but jump down before the bridge, head right | The Dove |
| Sword/Peafowl (Air Dash) | Left from hub, jump up at the end, continue left, immediately jump up after entering next room, ascend to top, head right (look for golden flames) | The Peafowl |
| Raven (Counterattack) | Left from hub, jump up, continue left, ascend but stay below the third platform, continue left | The Raven |
| Beetle (Spear) | Just left of Raven's arena — you'll find it immediately after | The Beetle |
| Bull (Ground Slam) | Head right from hub | The Bull |
Save points sit immediately before each boss arena. Use them to adjust your loadout based on what you're about to face.
Route Planning — Optimal Boss Order
There is no single "correct" order because the dynamic scaling changes every variable. But there are three proven routing philosophies.
Balanced Route (Recommended for First Clear)
Focus on getting defensive and sustain abilities early, then gradually add damage.
| Order | Boss | Ability Earned | Rationale |
|---|---|---|---|
| 1 | Catfish | Shield | Best defensive tool. Slow boss, easy to learn. |
| 2 | Frog | Healing | Sustains you through mistakes. Critical for longer runs. |
| 3 | Monkey/Clone | Clone | Distraction lets you heal mid-fight. Pairs with Healing. |
| 4 | Cat/Turtle | Revive | Safety net. The boss is a patience check — don't attack, just dodge. |
| 5 | Snake | Scythe Finisher | First real difficulty spike. Scythe gives you an execute option. |
| 6 | Dove | Arrow | Fast boss. Arrow lets you damage without committing. |
| 7 | Sword/Peafowl | Air Dash | Air Dash has i-frames. Worth the cooldown. |
| 8 | Raven | Counterattack | Three-phase endurance fight. Good test of your kit. |
| 9 | Beetle | Spear | Parry duel. Spear reaches beyond Beetle's sword swings. |
| 10 | Bull | Ground Slam | Tanky, slow, predictable. By now your kit is complete. |
Speedrun Route
Prioritize mobility and damage abilities. Sacrifices survivability for kill speed.
Catfish → Snake → Sword → Dove → Clone → Frog → Raven → Beetle → Turtle → Bull
This route gets Air Dash, Scythe Finisher, and Arrow in the first 4 fights — all high-damage tools. The tradeoff: no healing until fight 6. If you can no-hit the first five bosses, this is 20–30% faster than the balanced route.
Completionist Route (Achievement Hunting)
The "All Kami, All Routes" achievement requires varied play. A recommended completionist path:
First run: Balanced route (above). Second run: Reverse order (Bull → Beetle → Raven → Sword → Dove → Snake → Turtle → Clone → Frog → Catfish). Third run: Speedrun route.
Each route changes which bosses have extra phases and which remain simple. The achievement tracks diversity in ordering, not specific combinations.
Boss-by-Boss Breakdown
Catfish (Shield Kami — Steam: "The Catfish")
Slow, telegraphed. Two attacks: shield bash (horizontal arc, dash away) and ground stomp (shockwave, jump over). The Catfish alternates between shielding and attacking. When its shield is up, your sword bounces off — stop attacking and wait for the shield to drop. Break the shield after sustained damage to stun it for 5 seconds.
Opening strategy: Jump over the first stomp. Land 3 light attacks. When shield goes up, back off. Repeat. Don't get greedy.
Frog (Insect Kami)
Swarm fight. Flying insects swoop in patterns. Spiders charge attacks. Prioritize fliers — they're faster and harder to dodge. Spiders can be interrupted with a single light attack. This fight is about crowd control, not damage. Stay mobile. The arena is small, so keep one wall at your back.
Tip: The flying insects telegraph their charges. Watch for the glow — that's your cue to dodge sideways, not backward.
Monkey/Clone (Mimic Kami — Steam: "The Monkey")
The Clone summons copies of itself. The original is slightly larger. Focus the original — killing it ends the fight even if clones remain. Dodge the summon animation (boss raises its arms) to avoid the attack that spawns them. When clones are out, use area attacks (charged heavy, ground slam if you have it) to clear them.
If you brought the Spear from Beetle: The reach lets you hit the original through its clones. Spear charged heavy pierces through multiple enemies.
Cat/Turtle (Self-Damage Kami — Steam: "The Cat")
Trick boss. The Cat's health bar depletes on its own over time. Your only job is to survive. The Cat teleports and attacks from above. Dash when it disappears. Block its dive with the Shield ability. If you have Healing, use it between teleport cycles. This is the only fight where defense is the offense.
Crucial detail: The Cat teleports to one of three fixed positions in the arena. After a few attempts, you'll learn the pattern and can pre-position. Don't chase — let it come to you.
Reward: Revive gives you a timed second chance. When you die, a 10-second timer starts. Kill the boss before it runs out or you die for good. The timer is generous for most bosses but tight against the Dove and late-game Raven.
Snake (Combo Chain Kami — Steam: "The Snake")
Snake attacks in sequences of 2–3 hits. The final hit is a heavy slam. Dodge the first two, create distance on the third, then punish during the recovery. The Snake's tells are subtle — watch its head. When it rears back, it's about to strike. When it coils, it's about to lunge.
Getting hit once means eating the whole combo. If the Snake lands a hit, dodge immediately — don't try to trade. Its chains extend if they connect.
Reward: The Scythe Finisher triggers on staggered enemies. After landing 8–10 hits on any boss, they stagger. Use the Scythe for ~40% of their health bar in one move. The timing window is about 2 seconds, so don't hesitate.
Dove (Fast Arrow Kami — Steam: "The Dove")
Dove is the first speed check. It teleports, fires spread arrows, and drops AOE zones. The arena has low platforms you can stand on to avoid ground-level arrow spreads. Dash toward Dove when it teleports — it usually appears diagonally from you. Stay aggressive. Stopping lets it dictate range.
Platform strategy: The platforms aren't just for avoiding arrows. Wall jump between them to reset your air dodge. Stay airborne and most of Dove's ground-based attacks miss entirely.
Reward: Arrow gives you a chargeable ranged attack. Charge it between boss attack cycles, fire during recovery. Singles out far-away threats. Fully charged arrows do triple damage and pierce.
Sword/Peafowl (Weapon Kami — Steam: "The Peafowl")
A boss that attacks with floating swords and saw blades. The arena has weapons embedded in the floor. Hit them to deflect projectiles back at the Sword kami. This fight rewards positioning more than dodging. Stay near a weapon cluster. When the Sword charges its AOE (glowing red), use Air Dash (i-frames) to escape.
Deflection is your main damage source. Don't try to hit the boss directly until you've cleared its floating weapons. Each deflected sword deals damage to the Peafowl and removes one floating hazard from the arena.
Reward: Air Dash is the best mobility tool. Has full i-frames on a 3-second cooldown. Use it to dodge through attacks you can't jump over. Combos with wall jumps for near-permanent aerial evasion.
Raven (Three-Phase Boss — Steam: "The Raven")
Raven is the endurance test. Three phases, each adding one new attack to the sequence. Phase 1: dash + peck combo. Phase 2: adds feather spread (projectile). Phase 3: adds ground-spike AOE. Raven teleports after every 3 attacks. Track the teleport destination — it always lands in one of 3 fixed spots (far left, center, far right).
Strategy: In phase 1, play aggressive. In phase 2, play reactive (dodge feathers, then punish). In phase 3, play survival — use Shield and Clone to stay alive while chipping.
Teleport tracking trick: Raven telegraphs its landing spot with a shadow that appears 0.5 seconds before it lands. Pre-position yourself to punish the landing. You can get 2 free hits every teleport cycle.
Beetle (Parry Duel — Steam: "The Beetle")
A sword duel. Beetle's attacks are fast and wide. Dashes don't reliably escape them. The fight is won by parrying — time your attack to clash with Beetle's swing. A successful parry stuns the Beetle for 3 seconds. Build the stagger bar (visible as a yellow glow around Beetle's health) to trigger an extended stun.
Skip strategy: You don't need to deplete Beetle's health. Building the stagger bar to 100% ends the fight. Use heavy attacks (more stagger damage) and Spear (if you have it) for reach. A charged heavy → parry → charged heavy loop fills the bar in about 20 seconds.
Beetle's tells: It raises its sword overhead for a downward slash (easy parry). It holds the sword to its side for a horizontal sweep (harder parry, wider window). It glows before its charge attack (don't parry — dodge sideways).
Bull (Ground Slam Kami — Steam: "The Bull")
Slow, tanky, predictable. Bull has three attacks: charge (dodge sideways), ground slam (jump), belly flop (run away). Each attack has a 2-second windup animation. Punish after every attack. Bull has the most HP of any boss but the least complex moveset.
Dodge into the slam, not away from it. When Bull slams down, dodge toward it. You'll end up behind it with a 3-second window to unload a full combo.
Final boss variant: If Bull is your 10th fight (last before credits), it gains a charge variant that homes on you. Dodge at the last second, not when it starts moving.
Advanced Tips
Animation cancelling. You can cancel the recovery frames of heavy attacks by dodging. Hit → dodge → hit deals more DPS than hit → wait → hit. Master this and your effective damage output increases 30%.
Wall jump cancels. Jumping off walls resets your air dodge. In platforms-heavy arenas (Dove, Raven), chain wall jumps to stay airborne indefinitely. Most ground-based attacks miss entirely. Combine with Air Dash for the ultimate evasion strategy.
Loadout swapping mid-run. Save points are placed before every boss. The game lets you swap abilities freely. Don't commit to a loadout — adjust based on the boss. Shield is mandatory for Sword/Peafowl and Dove. Healing is mandatory for Bull. Everything else is preference.
The first hit advantage. On most bosses, you can land 2–3 hits before their AI activates (roughly 1 second into the fight). Use charged heavy for a free opening. This doesn't work on the Cat (which starts teleporting immediately) or the Raven (which starts with a dive).
Life banking. If you're confident against a boss, you can intentionally die to it once to bank extra damage knowledge while only losing one life. The life cost of a failed attempt is always 1, regardless of how far into the fight you got. This makes "sacrificial scout runs" viable — throw one attempt to study the boss's full moveset, then win on attempt 2.
Dash is for distance, dodge is for safety. Dash has no i-frames. It covers ground fast but you take full damage during travel. Use dodge (Space) for evasion. Use dash (Shift) only for closing distance or escaping AOE zones after the explosion.
Common Mistakes
1. Hoarding healing. The healing ability is limited-use per save point. Players save it "for emergencies" and die at 70% HP because two hits would kill them. Use Healing when you're at 60% or below. The recharge at the next save point is fast enough that you'll have it again.
2. Taking the same route every run. If you always fight Catfish first, you never learn how to fight late-game Catfish. Late-game bosses have harder but more predictable patterns. Learning them improves your fundamentals. Mix it up even on successful runs.
3. Ignoring the clone ability. Clone seems weak — it's a distraction that doesn't deal damage. But Clone + Healing is the strongest defensive combo in the game. Clone draws aggro. Healing tops you off. Against any boss with clearable adds (Frog, Clone itself, Dove's platform phase), this combo lets you reset the fight state.
4. Using dash instead of dodge. Dash has no i-frames. You take full damage during travel. Use dodge for evasion. Use dash only for closing distance or escaping AOE zones after the explosion.
5. Over-committing on the Snake. The Snake's combo chains extend if it hits you. Getting hit once means you get hit 2–3 times before you can escape. If you take a hit, dodge immediately — don't try to trade.
6. Treating the Cat/Turtle like a normal fight. The Cat's health depletes on its own. You don't need to attack. New players waste lives trying to speed up the fight by being aggressive, which just gets them killed. Relax. Survive. Let the clock do the work.
7. Forgetting to swap loadouts. Each save point lets you re-equip abilities. If you went into the Raven with a full ranged kit (Arrow, Spear) and no defensive tools, you're going to have a bad time. The 30 seconds it takes to backtrack and swap is worth it.
Player-Verified Tactics
What the community learned in the first month of play.
The Cat first is busted. Start there. Several early reviews called the Cat the strongest first pick. Its self-draining health fight is a pure survival check, and the Revive reward turns every later mistake into a second chance. If the Balanced Route's Catfish opener feels too slow, swap the order: Catfish → Cat → Frog is the tankiest opening in the game.
The game is about learning, not grinding. Reviews with 15+ hours describe the same arc: hard wall around the halfway point, then a sudden click where every boss becomes readable. The dynamic difficulty stacks patterns in tiers, so the moves you fail against in run one are the ones you punish in run three. Expect the wall. It breaks.
Late-game is where players quit. The loudest negative reviews all say the same thing: limited lives plus escalating scaling means the back half can feel like a punishment spiral, especially the final stretch. The fix is route discipline: do not face your worst matchup late. If the Snake's combo chains wreck you, fight it fourth, not ninth. The scaling is the boss, not the boss.
Fight the Frog early for crowd control. The Frog is the only add-heavy fight, and its reward, Healing, is the run's best sustain. Players who skipped it until late describe the encounter as overwhelming; faced early it teaches the crowd-control fundamentals every phase-3 fight needs.
The first hit is free. Most bosses idle for about a second at fight start. A charged heavy lands before their AI wakes. The Cat teleports immediately and the Raven opens with a dive, so skip the opener against those two.
One failed attempt costs one life, no matter how far you got. That makes scouting runs strictly better than guessing. If a boss has you at 10% health and unknown moves, let it kill you, memorize the sequence, and come back clean. The knowledge persists across runs even when the run's lives do not.
The true ending exists and it earns its rarity. The "Honor?" achievement ("Fulfill your duty") sits at 7.2% and players describe a harder final gauntlet once you unlock the real path. Do not assume the first credits are the end of the story.
Secrets & True Ending
Gurei hides its secrets well. Here's what's known so far.
Caterpillar locations. Scattered through the castle are caterpillar spirits. They're small, glow faintly, and blend into the environment. Collecting all of them unlocks an optional encounter. Look in the corners of hub areas, behind false walls, and on platforms that seem out of reach. The reward is tied to the "Honor?" achievement.
NPC unlocking. Every boss you defeat has a chance to unlock an NPC somewhere in the castle. These NPCs provide lore, side objectives, and occasionally upgrades. Talk to every NPC you find — some give permanent stat boosts or hints about boss weaknesses. The game tracks how many you've found, but doesn't mark them on the map.
The Peafowl connection. The Sword Kami shares its arena with Peafowl imagery. The floating swords and saw blades are a visual callback to peacock feathers. This boss gives you the Air Dash — the most transformative mobility tool in the game. Getting it early changes how you approach every subsequent fight.
Hidden shortcuts. Some boss arenas have shortcuts that only unlock after you've defeated their Kami. These loop back to the hub and make subsequent runs faster. The shortcuts are always behind the boss arena, marked by a subtle visual change (fading barrier, newly lit torch, opened gate).
Controls & Settings
Keyboard + Mouse (default):
- WASD: Movement
- Mouse: Camera/Aim
- Left Click: Attack
- Right Click: Dodge
- Space: Jump / Enemy Stomp
- Shift: Dash
- E: Interact
Controller: Full support for Xbox, PlayStation, and DualSense. All actions are remappable in the controller settings. Keyboard remapping is partial — some core actions are hard-bound.
Settings worth changing:
- Camera sensitivity: Default is slow. Bump it to 70-80% for faster tracking.
- Controller deadzone: Reduce to minimum if you're using a controller. The default deadzone makes precise dodges feel sluggish.
- Vibration: Turn off. The constant rumble during boss fights is more distracting than helpful.
Performance: Steam Deck Verified at 60 FPS native resolution. No tinkering needed. On lower-end Windows machines, the hand-drawn animation runs smoothly even on integrated graphics — the game is not demanding.
FAQ
Q: What's the minimum number of bosses to see credits? A: 10. All main Kami must be defeated. The castle shortcuts and optional encounters are not required.
Q: Is there a New Game Plus? A: Not at launch. The developer has discussed it as a post-launch possibility. For now, the dynamic scaling system provides natural replayability — each route order gives a fundamentally different experience.
Q: How does difficulty compare to Hollow Knight or Dark Souls? A: Boss difficulty is similar to Hollow Knight's late-game DLC fights (Pantheon of Hallownest tier). The dynamic scaling means your first clear is easier than Pantheon, but a max-difficulty run (all 3 phases on every boss) rivals Radiance-level challenge.
Q: Can I rebind controls? A: Yes. Full controller remapping is supported. Keyboard rebinding is partial — some actions are hard-bound.
Q: Does the game run on Steam Deck? A: Verified. 60 FPS at native resolution. No tinkering needed. The studio announced Deck verification officially, and the game launched simultaneously on PS5 and Nintendo Switch on the same day, so handheld performance is a first-class concern.
Q: Are there difficulty settings? A: No. The dynamic difficulty system is the only scaling. Your route choice determines effective difficulty.
Q: How many achievements are there? A: 42. The ten Kami kills are the most common (56–79% unlock). The mid-tier "The X" achievements track NPCs and side objectives. The true ending achievement "Honor?" sits at 7.2%, and the two hardest challenges, Mastery and Acceptance, sit at 3.2% and 2.8%. Full table in the achievement section above.
Q: Do I need to play multiple runs? A: Yes, if you want the full experience. The game is designed for replayability. Each run with a different boss order gives you new dialogue from the Kami, different difficulty curves, and different achievement progress.
Q: Does the game autosave? A: Yes. Progress toward achievements and unlocked abilities persists between runs. Only your current run's lives and position reset on death.
Q: Is there multiplayer or co-op? A: No. Single-player only.
Q: How long is each boss fight? A: 2–5 minutes for early bosses, 5–10 minutes for late-game variants. The Raven and late-game Bull can push 15 minutes on a first attempt.
Achievement Hunting Tips
All 42 achievements, with global unlock rates. The ten Kami kills are the most common, which tells you most players stop after one clear. Everything below "The Beetle" is where the real hunting begins.
| Achievement | Unlock Rate | Likely Trigger |
|---|---|---|
| The Catfish | 79.4% | Defeat the Catfish Kami |
| The Monkey | 69.5% | Defeat the Monkey Kami |
| The Snake | 68.2% | Defeat the Snake Kami |
| The Cat | 67.3% | Defeat the Cat Kami |
| The Raven | 66.7% | Defeat the Raven Kami |
| The Peafowl | 65.1% | Defeat the Peafowl Kami |
| The Bull | 64.6% | Defeat the Bull Kami |
| The Dove | 59.9% | Defeat the Dove Kami |
| The Frog | 59.7% | Defeat the Frog Kami |
| The Beetle | 56.2% | Defeat the Beetle Kami |
| The Girl | 38.8% | Meet a specific NPC in the castle |
| The Runner | 31.1% | NPC or side-objective completion |
| The Fan | 28.4% | NPC or side-objective completion |
| The Lady | 28.3% | NPC or side-objective completion |
| The Pillar Man | 19.5% | NPC or side-objective completion |
| The Eyes | 17.4% | NPC or hidden interaction |
| The Insurgent | 16.9% | Side objective |
| The Weasels | 15.6% | Side objective |
| The Giant | 14.5% | Side objective or secret |
| The Dog | 14.4% | Side interaction |
| The Boy | 14.2% | Side objective |
| The Statues | 13.6% | Secret interaction |
| The Grudge | 11.9% | Side objective |
| The Drunkard | 11.8% | Side objective |
| The Raccoon Dog | 10.8% | Side objective |
| The Scarer | 10.4% | Side objective |
| The Vengeful Entertainer | 10.2% | Deeper side objective |
| The Wrathful Demon | 10.2% | Deeper side objective |
| The Enigmatic Ascetic | 9.7% | Deep secret |
| The Dummy | 8.7% | Secret interaction |
| The Rabbit | 8.4% | Secret encounter |
| The Priestess | 8.4% | Endgame side objective |
| The Mighty Vessel | 8.2% | Endgame side objective |
| The Enlightened Deity | 7.5% | True-ending path |
| The Merciless Reaper | 7.3% | Endgame challenge |
| Honor? | 7.2% | "Fulfill your duty." The true ending |
| The Guiding Banner | 7.2% | Endgame completion |
| The Honored Blade | 6.7% | Hard-mode or challenge clear |
| The Elusive Flame | 6.6% | Challenge clear |
| The Ingenious Pretender | 6.0% | Specific route or condition |
| Mastery | 3.2% | Full mastery challenge |
| Acceptance | 2.8% | Rarest. The ultimate completion |
Hunting strategy:
The 10 Kami kills come naturally. Any route that reaches the credits hands you all ten between 56% and 79% unlock rate. Skip none of them.
Honor? is the true ending. Its description reads "Fulfill your duty." Players who reached it describe a dramatically harder final stretch and a different ending sequence. Plan a dedicated run for it after your first clear.
NPC achievements need active exploration. The Girl, Runner, Fan, Lady, Pillar Man, and the rest of "The X" cluster between 38.8% and 6.0%. Defeating Kami unlocks NPCs scattered through the castle. Backtrack after every boss kill — the castle changes each time, and talking to everyone is how the side-objective chain advances. The game does not mark them on the map.
The bottom four are the true challenges. Mastery (3.2%), Acceptance (2.8%), The Honored Blade (6.7%), and The Elusive Flame (6.6%) sit far below everything else. They track challenge clears, not story progress. Expect to run the gauntlet with specific conditions, likely tied to the hardest route orders.
Route diversity feeds multiple achievements. The developers confirmed 3,628,800 possible orders. Use the Balanced, Reverse, and Speedrun routes from the routing section above as three distinct orders; the game tracks your history across runs.
Demo players start ahead. The removed demo offered only 6 combinations, but the save-anywhere structure means early progress carries forward if you bought at launch.



