Daily Pick
One deeply researched guide worth reading today.
A practical route through the systems that matter most, written to help new players make confident decisions quickly.
Overview
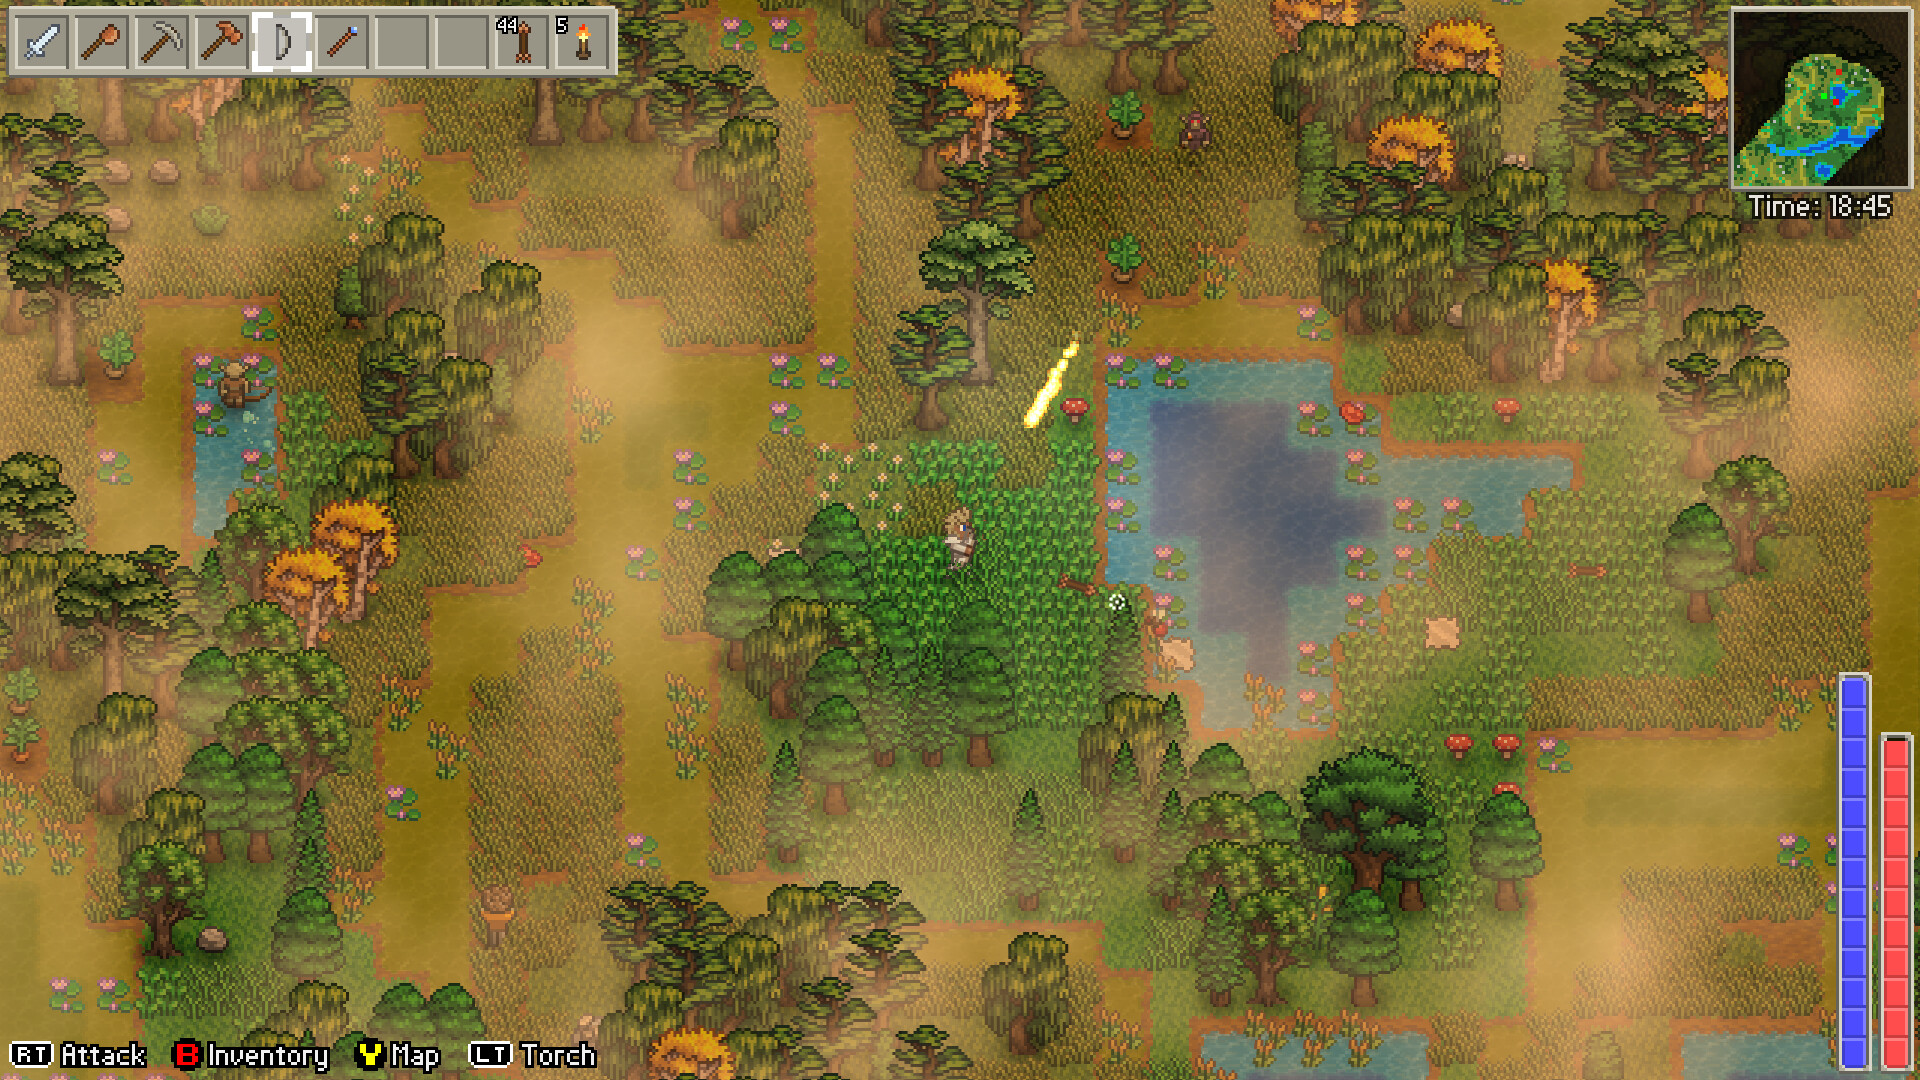
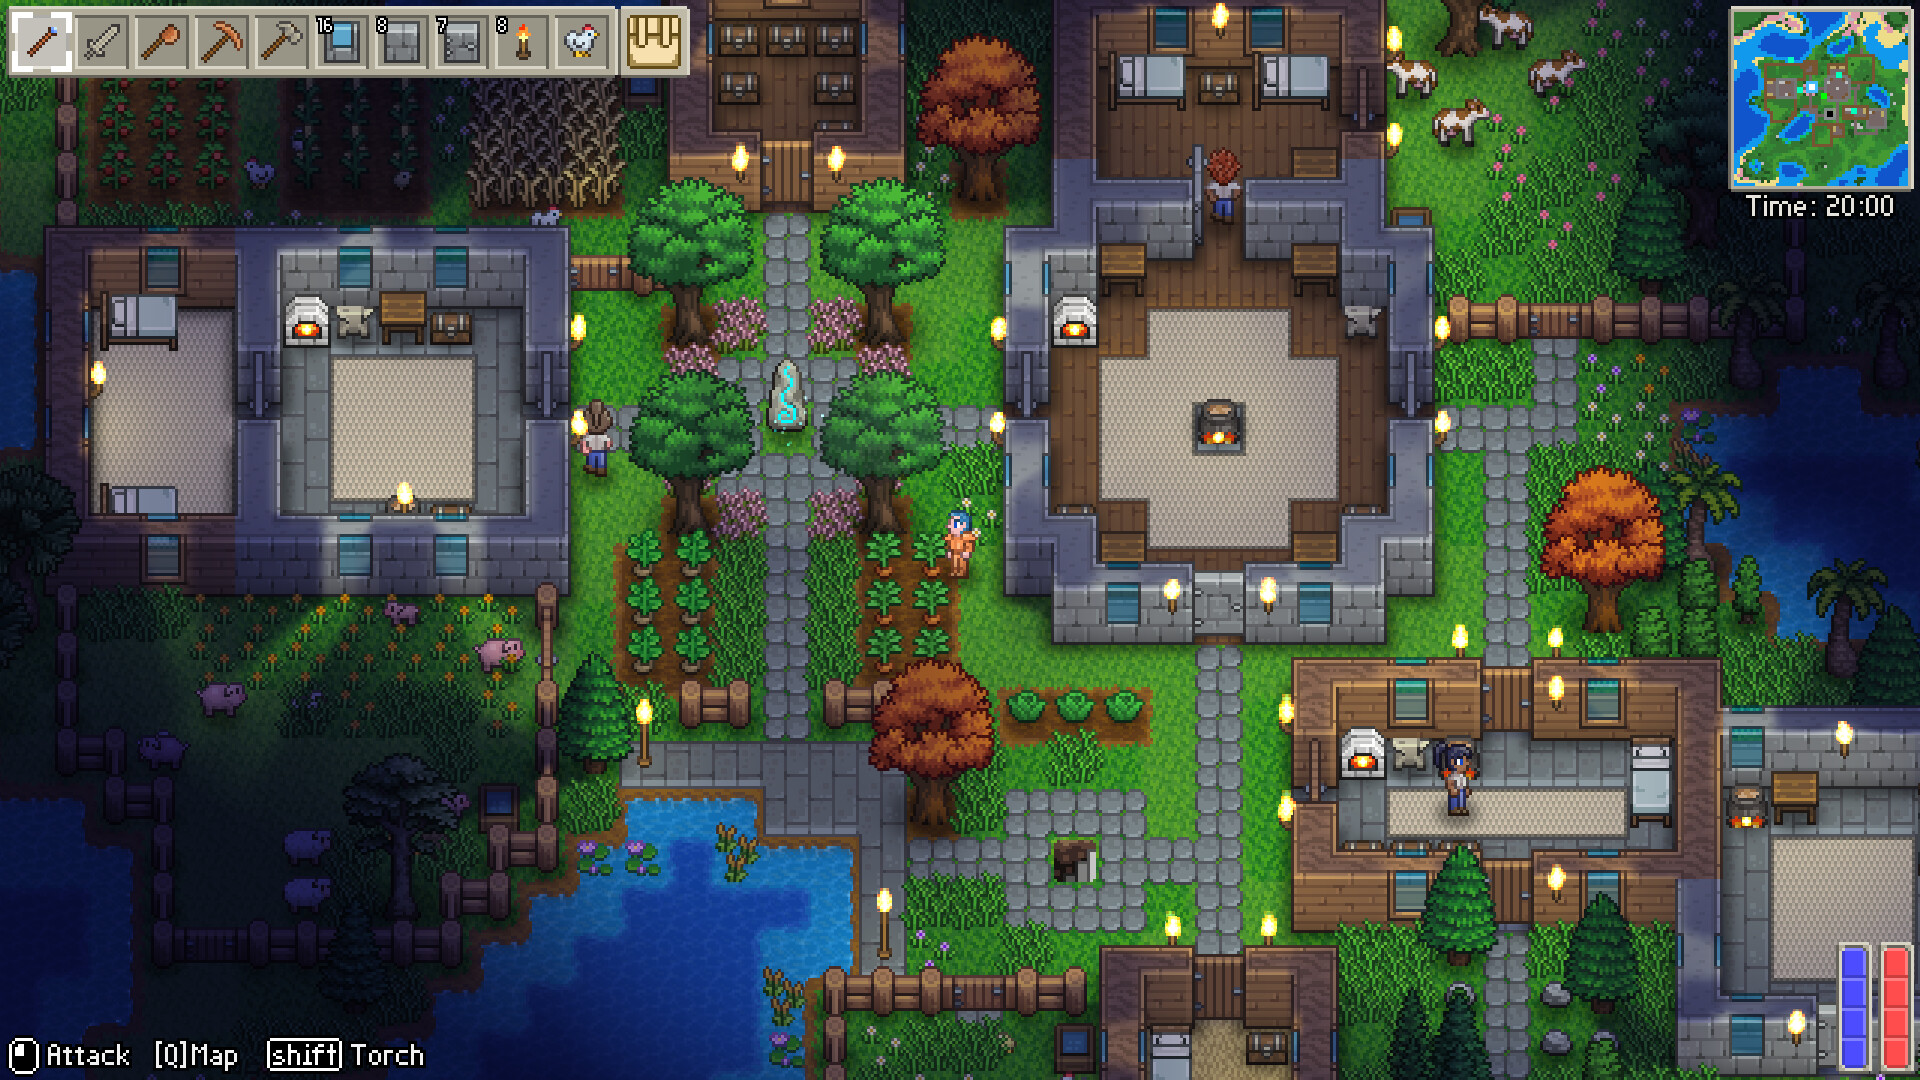
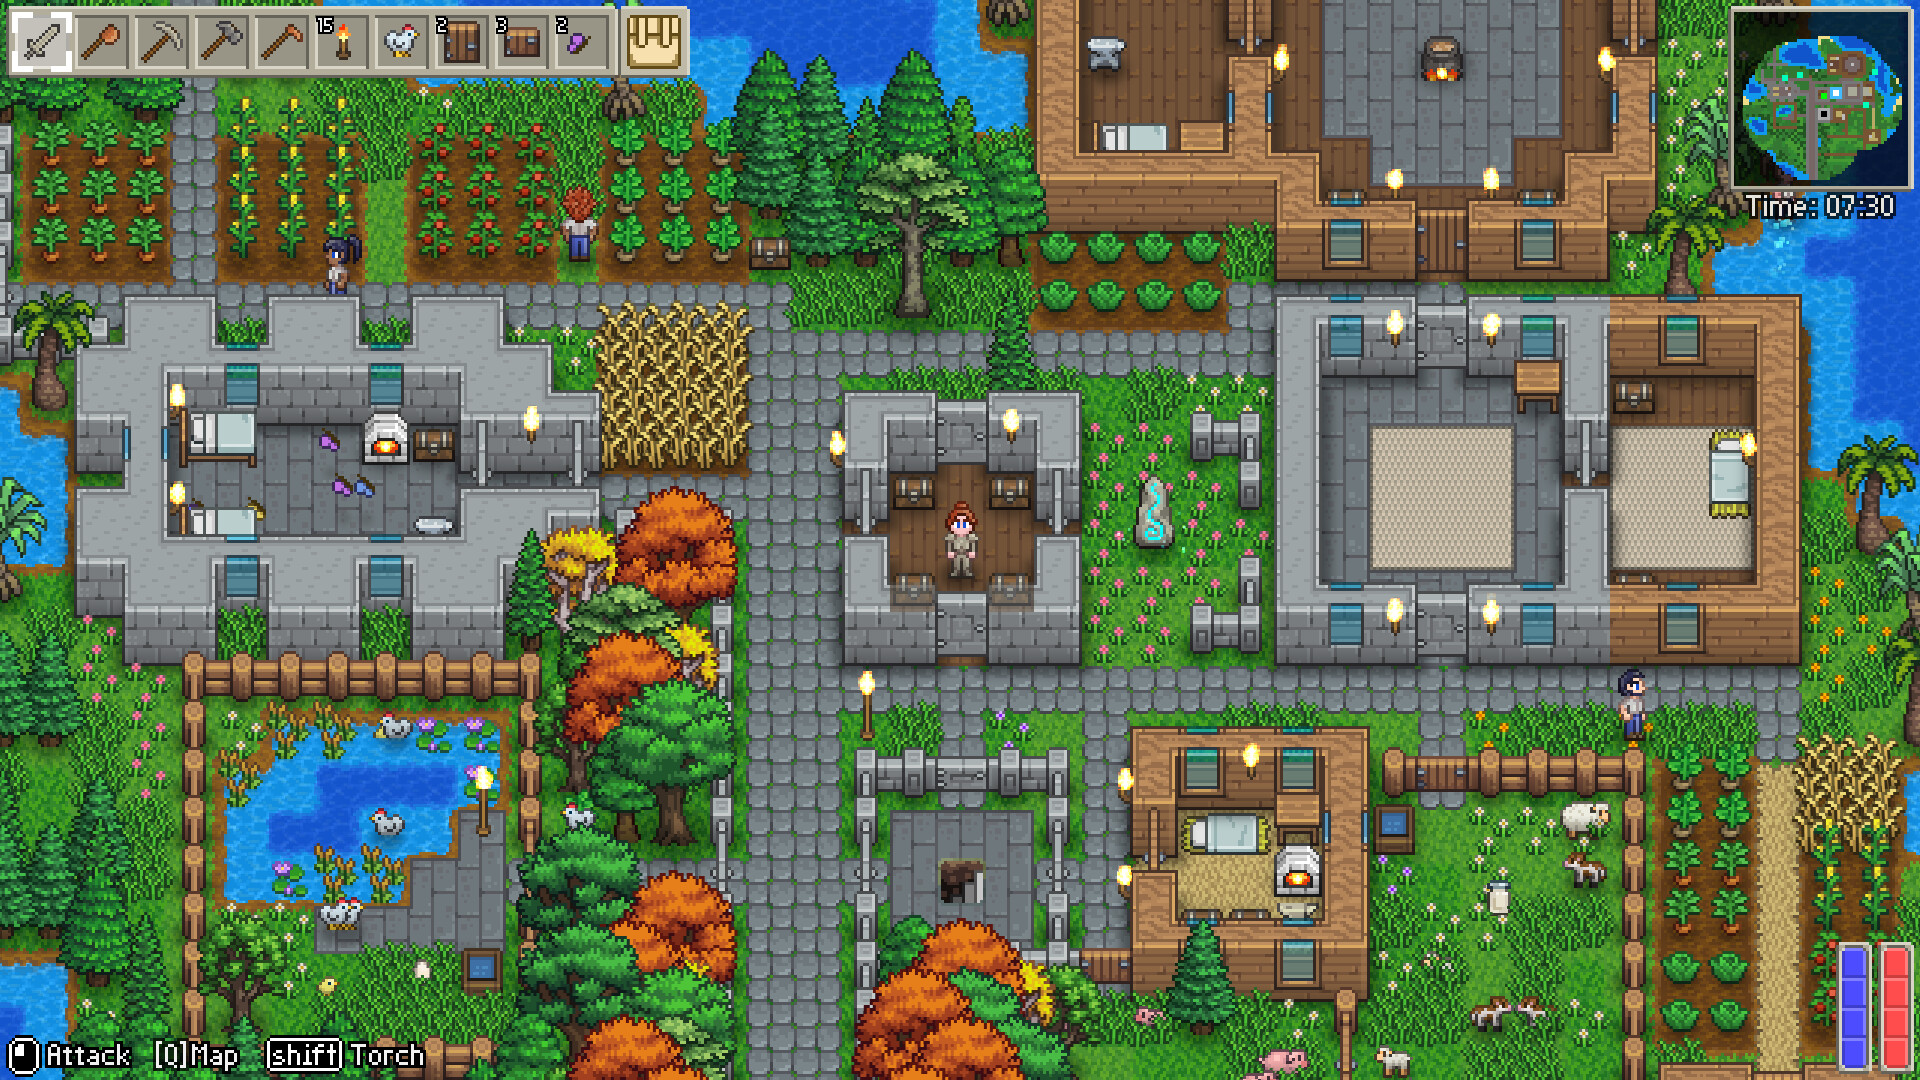
Delverium is a co-op survival sandbox from Sagestone Games, born from the developer's family game nights. It launched into Steam Early Access on September 22, 2026 at $12.49 (a 20% launch discount dropped it to $9.99 for the first two weeks). The pitch is simple: explore a vast procedurally generated world with up to seven friends, gather resources, build shelters, tend a farm, recruit NPCs, craft gear, and take on high-risk dungeon crawling. Underneath all of it runs a mystery. A great peril is infecting the land, and the only way to restore stability is to hunt down the "Faults" and piece together the hidden truth.
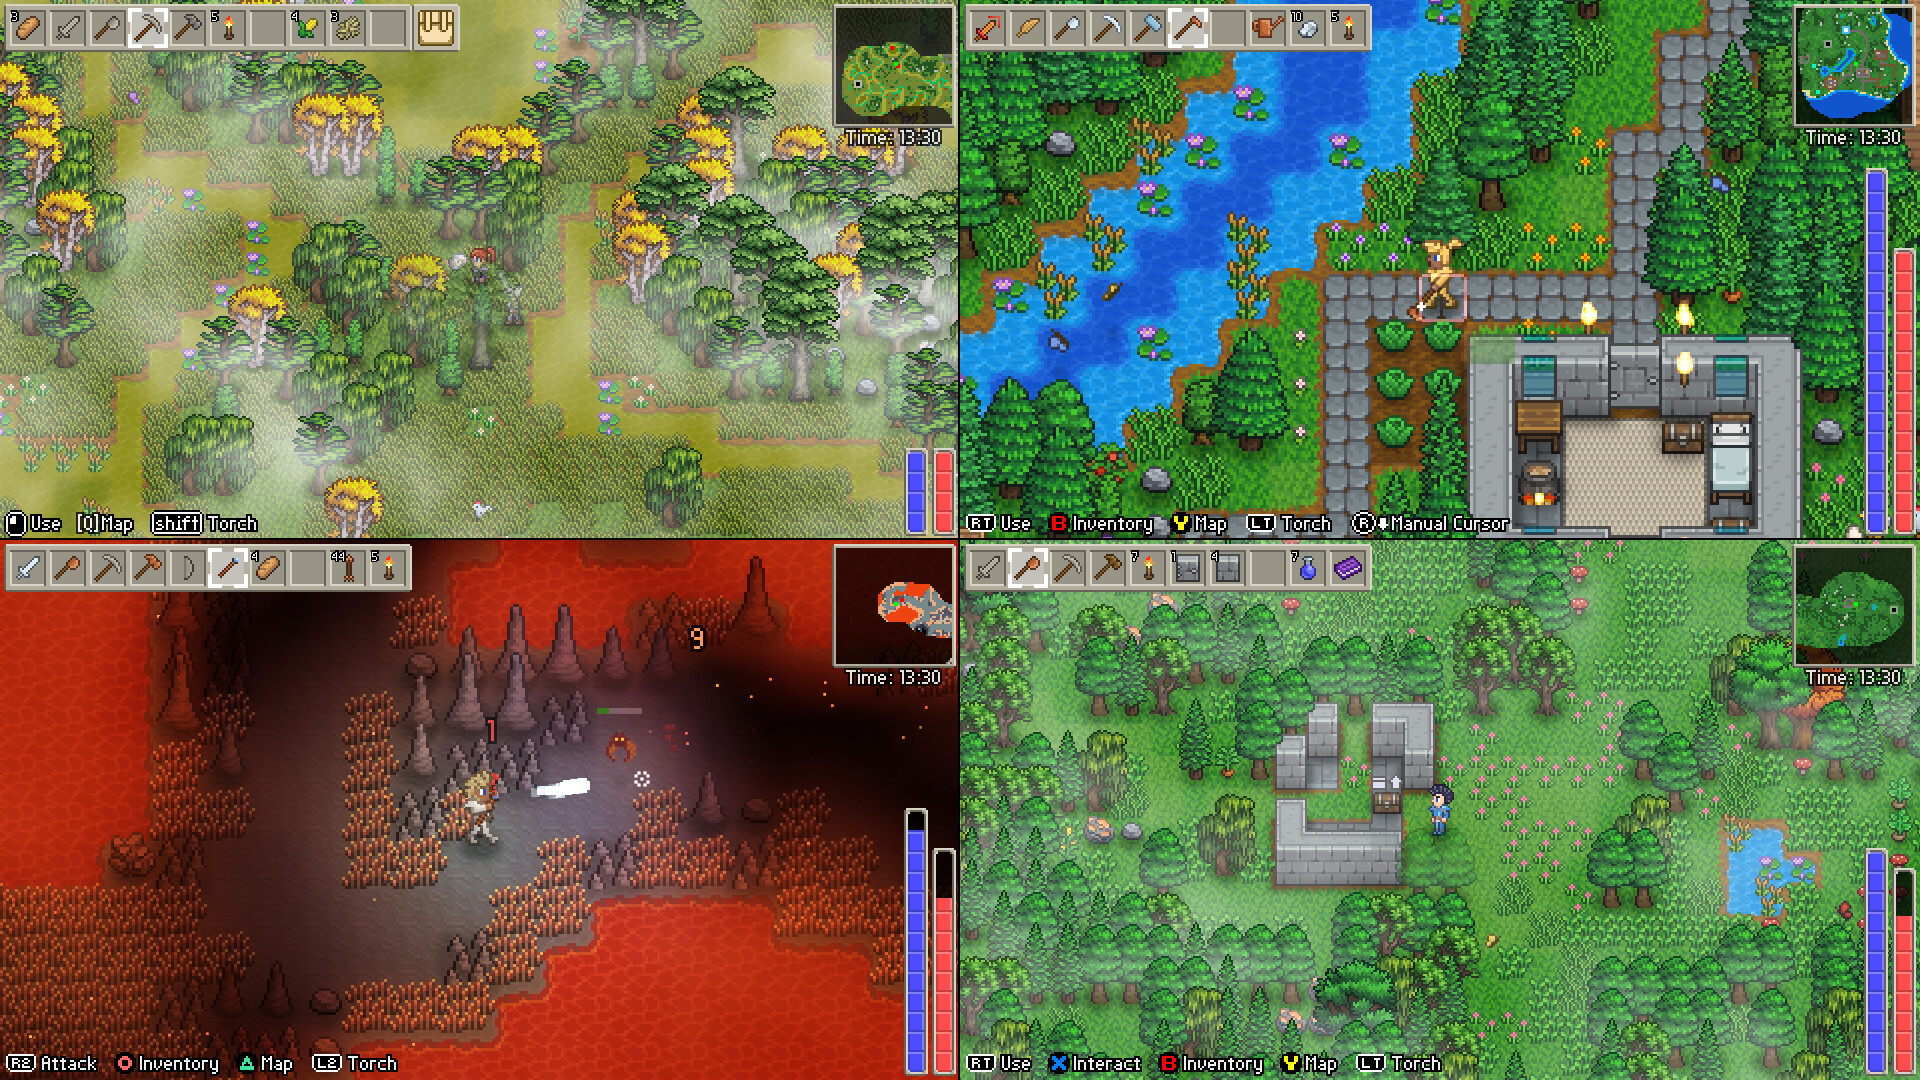
The game wears its inspirations on its sleeve. The core loop reads like a Terraria-meets-Valheim sandbox: dig, chop, build, plant, fight. But Delverium splits the difference between cozy farming sim and dangerous dungeon crawler more deliberately than most. You can spend an entire session never leaving your settlement, breeding animals and trading with NPCs. Or you can gear up and descend into caves where one wrong pull brings a horde down on your head. Solo play, 4-player split screen, and up to 8-player online co-op are all supported, including simultaneous split-screen plus online co-op, a feature the devs shipped in a February 2026 demo update.
Early Access has been active, not dormant. Three patches landed in the first two weeks after launch (v0.1.0.1 through v0.1.0.3), addressing the two loudest pieces of launch feedback: content discoverability and enemy spawn pressure. The game is also Steam Deck Verified as of launch, which makes it one of the few survival sandboxes you can hand to a family member on a couch and a handheld at the same time.
Game Details
| Field | Detail |
|---|---|
| Genre | Survival sandbox, co-op, RPG |
| Developer | Sagestone Games |
| Publisher | Sagestone Games |
| Platform | Windows (64-bit) |
| Price | $12.49 USD (launched at $9.99 with 20% discount) |
| Players | 1-8 (solo, split-screen, online co-op) |
| Release | Sep 22, 2026 (Early Access) |
| Steam Deck | Verified |
| Difficulties | Casual, Normal, Hard (+ optional Horde Mode) |
| World sizes | Small, Medium, Large |
| Death penalties | Drop all money, drop all items, or permadeath |
| Controllers | Full controller support, DualShock/DualSense profiles |
| Languages | English, Japanese, French, German, Spanish, Korean, Portuguese-Brazil, Russian, Simplified Chinese, Ukrainian, Traditional Chinese |
| Steam | store.steampowered.com/app/2710040 |
| Wiki | delverium.wiki.gg |
Bundle shoppers should know Delverium launched alongside three survival-craft bundles with Necesse, Tinkerlands, and Allumeria. If you already own any of those, the bundle discount stacks on top, which frequently brings Delverium under $8.
Target Audience
Delverium is for the group that wants a sandbox they can sink a whole weekend into without the survival pressure of Valheim's bosses or the base-raid anxiety of Rust. It leans cozier than the average survival game. Farming, cooking, NPC trading, and settlement building are first-class systems, not afterthoughts. If you liked Stardew Valley's loop but wished you could fight a dungeon boss with four friends, or if Terraria's building depth appealed but the combat felt too frantic, Delverium sits in that middle lane.
It is also explicitly built for families and mixed-skill groups. The developer's origin story is family game nights, and the design shows it: split-screen co-op, generous play-your-way options, and difficulty rebalancing on the roadmap. Skip it if you want a hardcore survival experience with permadeath stakes or PvP, or if you need a finished game. Early Access means systems will shift between now and 1.0, and the current content curve runs out around 20 hours for a solo player pushing hard.
Getting Started: First 30 Minutes
1. Decide your group size before you spawn. The world scales with player count. A solo run and an 8-player run are different games. For a first session, two to four players hits the sweet spot: enough hands to split gathering, not so many that everyone fights over the same trees.
2. Set your world rules honestly. World creation asks for Difficulty (Casual, Normal, Hard), World Size (Small, Medium, Large), and a Horde Mode toggle that spawns significantly more enemies at night and inside caves and dungeons. For a first world: Normal difficulty, Medium size, Horde Mode off. The game is generous about letting you tailor the experience; use that.
3. Pick your death penalty before you die. Character creation offers three death penalties: Drop all Money, Drop all Items, or Permadeath. This is the single most impactful choice in the game. Drop all Money is the friendliest; Drop all Items turns every death into a loot run; Permadeath is exactly what it sounds like. For your first character, take Drop all Money. Your character can have up to 20 characters in the name, 7 hair styles, 9 hair colours, two body types, and 5 skin colours. Cosmetic choices matter later when you find a hair clip, so make a character you like looking at.
4. Skip the demo import. The launch update added a Demo Character Save import option that appears on first launch if the demo is installed. The developers themselves recommend against using it: demo world saves are incompatible, and a fresh character gets the balanced Early Access progression curve. Import only if you are sentimentally attached to a character's face.
5. Talk to the Forager. Your spawn point has a nearby Forager NPC with tips for new players. NPCs in Delverium are not decoration. They trade, and this one is your introduction to the system. Chat before you chop.
6. Activate the Journey Shrine immediately. The starting area has a Journey Shrine near your spawn. Activating it enables fast travel between all other Journey Shrines hidden around the map. This is a ten-second action that saves you hours of walking for the rest of the world. The Well-traveled achievement (10 shrines in one world) rewards players who treat shrine activation as a reflex.
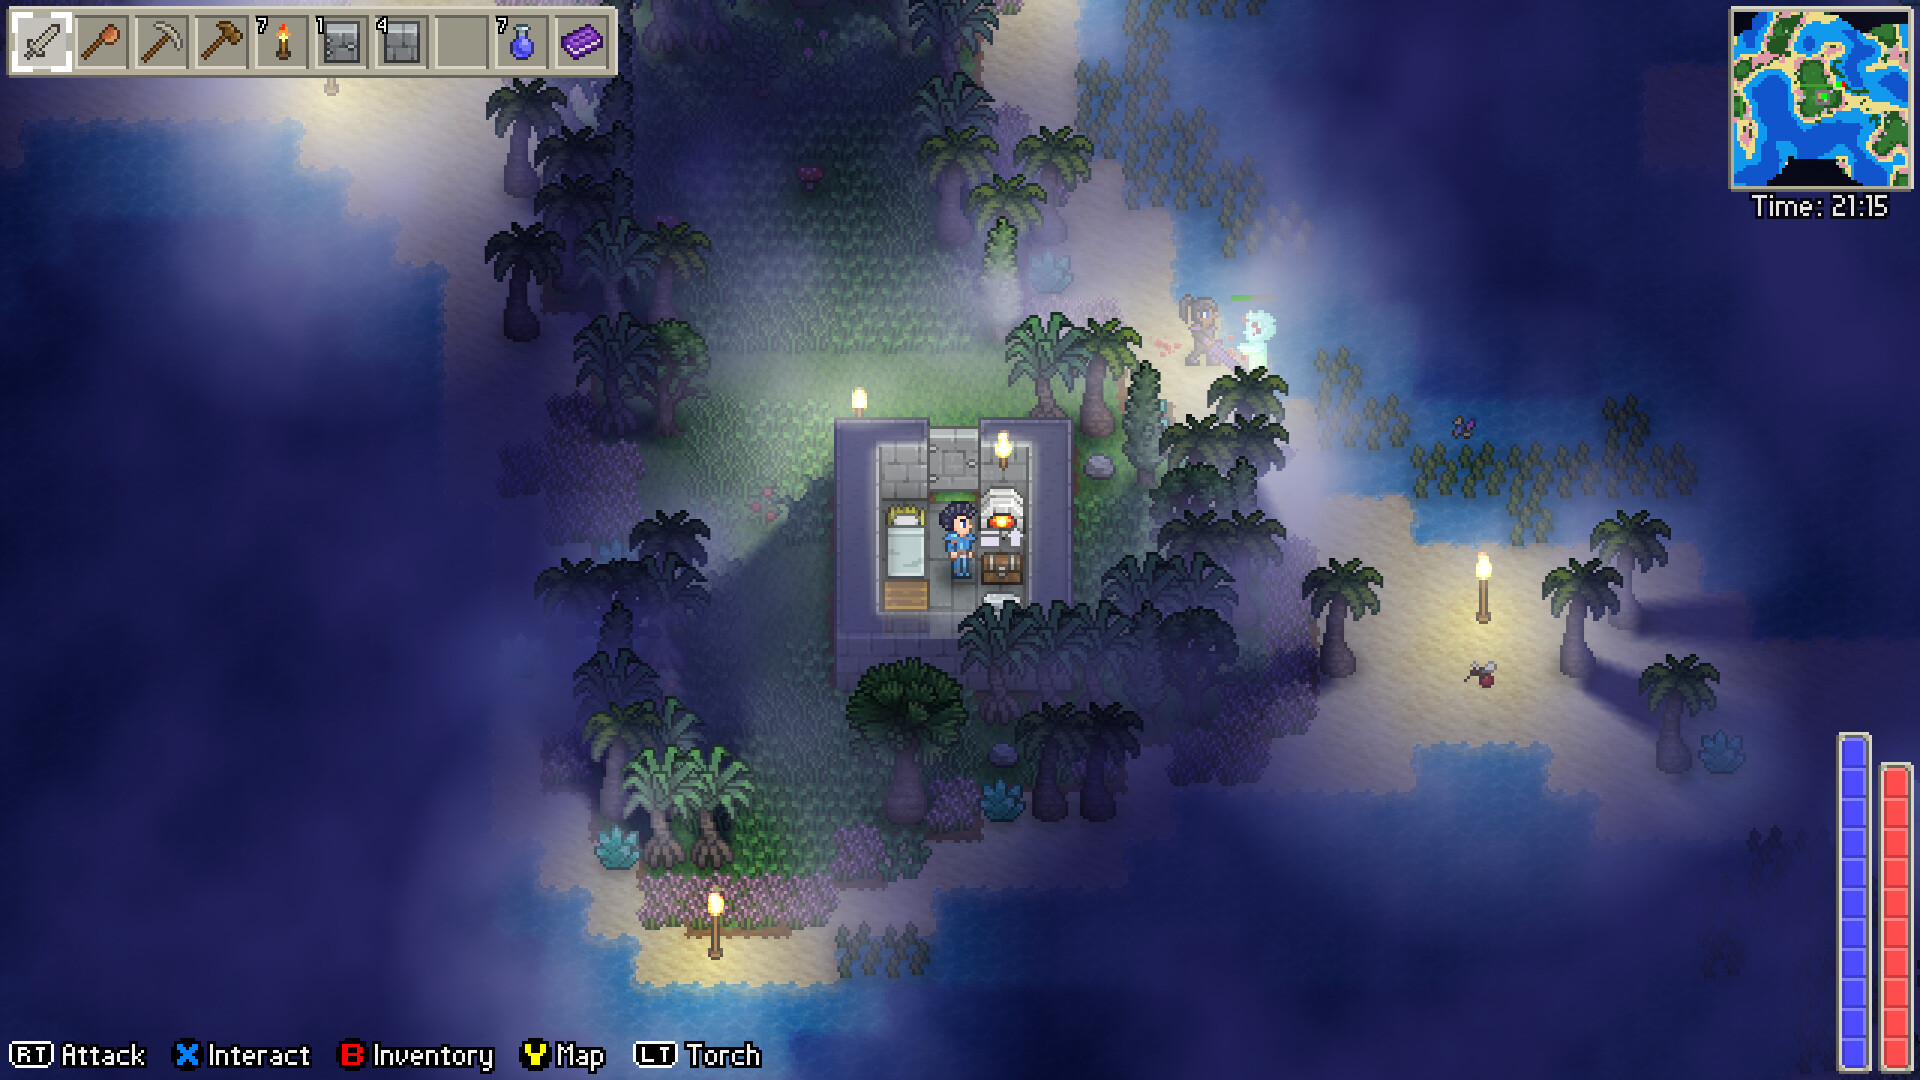
7. Build your first shelter near the shrine. The starting plains have a much lower enemy spawn rate than the rest of the map, and patch v0.1.0.3 widened that advantage: plains biomes now have a 10x torch spawn modifier, meaning a basic torch completely suppresses enemy spawns nearby, and the surrounding woodlands have a 3x modifier for 75% suppression. A valid shelter needs walls, flooring, a door, a light source, and a bed, with an internal size of at least 3x2 tiles. It gives you a spawn point, lets you sleep through the night, and is required to recruit an NPC.
8. Craft armor before you explore far. Starting tools (axe, pick, hammer, torches) get you going but deal little damage. Armor is essential against enemy attacks. Gear up before you leave the plains.
9. Don't chase the Faults on day one. The story content, hunting the invading Faults, is the endgame draw. Early on, focus on the survival loop. The Faults will still be there when you have armor.
Beginner Mistakes to Avoid
| Mistake | Why It Hurts | Fix |
|---|---|---|
| Ignoring the farm | Cooked food is the best healing and buff source; relying on foraged berries caps your dungeon time | Plant seeds on day one, water daily, breed animals as soon as you can |
| Hoarding every material | Your inventory expands but starts small; hauling everything home wastes trips | Prioritize wood, stone, and food; leave bulk ore until you have storage |
| Fighting before crafting armor | Early enemies hit hard and death costs time | Craft armor and a decent weapon before your first dungeon attempt |
| Skipping NPC recruitment | NPCs are your trading lifeline and offload resource management | Recruit early, station them at base, check their stock regularly |
| Delving alone unprepared | Dungeons are high-risk by design; a solo death far from base loses your loot run | Bring food, torches, and a full inventory plan before descending |
| Building too far from resources | Every gathering trip becomes a marathon | Scout a base location with water, wood, and stone within a short run |
| Ignoring the death penalty setting | Drop all Items makes every death a salvage operation | Choose Drop all Money for your first character |
| Leaving Horde Mode on for a first world | Night and cave spawns become overwhelming before you have gear | Toggle it off until your settlement and armor are established |
| Using a low-tier pick on high-tier ore | The ore refuses to break and you stand there confused | Match your pick tier to the ore: Wood pick handles dirt, stone, and copper; Iron and Silver ores need higher tiers |
| Fighting in the open post-v0.1.0.3 | Spawn caps now track recently killed enemies with distance decay; open-field grinding keeps the pressure on | Kill what you need, then move; the spawn system punishes stationary farming |
Core Mechanics Deep Dive
Craft and Build
Crafting is the game's backbone. You craft a huge array of items: food, tools, weapons, armor, and building materials. Two quality-of-life features define the system:
- Nested crafting. Recipes chain automatically. Need a Copper Sword? As long as you have Copper Ore and stand near a furnace, the recipe auto-smelts the bars and assembles the sword. You never manually craft intermediate components for a known recipe.
- Proximity-based ingredients. Crafting draws ingredients from your inventory and from nearby chests automatically. Patch v0.1.0.1 raised this range from 5 tiles to 10 tiles, which makes workshop design dramatically more forgiving: a single room with your chests in the middle and stations around the walls is now a fully integrated factory floor.
Ingredients display in three colors: white (available), red (not enough), and blue (not enough directly, but enough base ingredients to nested-craft). One catch remains: ingredients are not pulled from a chest that another player is currently browsing, so in co-op, don't stand in a chest menu while your teammate is mid-craft.
The station chain, in order:
| Station | Cost | Unlocks |
|---|---|---|
| Workbench | 2 Wood | Basic tools, walls, beds, chests, Twine |
| Furnace | 2 Wood + 2 Stone | Smelting: 4 Ore → 1 Bar (Copper, Iron, Silver, Code Fragment), 2 Silica Ore → Glass Brick, Fine Arrows |
| Stone Anvil | 4 Stone | Copper/Iron tools, swords, bows, staves, Copper/Iron/Flutter armor |
| Iron Anvil | 4 Iron Bar | Silver tools and weapons, Fragment armor, Silver armor, Vertical Slice, Soul Staff |
| Cookpot | 2 Copper Bar | All cooked food and potions |
| Stove | - | Standard cooking (upgraded kitchen station) |
Building lets you craft and place directly into the world. Select a recipe, aim at a valid tile, and place. The placement cursor shows white for valid, red for blocked, and a red cross for invalid. You never need to craft a wall into your inventory first. A Hammer unplaces anything and returns it to your inventory; placing a different item into an occupied tile also returns the old one. Base materials for most building recipes are Straw, Wood, Silica Ore, and Stone. All flooring and torches are now placeable in "Underground" flagged locations, which matters for cave bases.
The Shelter Rule
A valid shelter is the first real milestone: walls, flooring, a door, a light source, and a bed, with an internal size of at least 3x2 tiles. The maximum internal size is 24x24 tiles, so you can keep growing a room into a proper hall. Shelters are mechanical, not cosmetic. They set your spawn point, let you sleep through the night, and unlock NPC recruitment. A Wool Rug (1 Wool at the Workbench) counts as valid flooring, which makes decorating a room cheaper than laying full floors. Build your first shelter in the starting plains near the Journey Shrine, where the combination of low base spawns and full torch suppression creates a genuinely safe zone.
Two related fixes landed in the launch patches: sleeping or respawning after death now correctly resets your mana, and flooring move-speed buffs (around 10%) actually work after being broken at launch. Build wooden floors in your workshop and mining base; the speed buff is real now.
Tend Your Farm
Farming is a full system, not a mini-game. The crop cycle: till soil with a Hoe, place a seed, optionally water with a Watering Can and fertilize with Fertiliser to speed growth, wait, harvest with a tool or melee weapon. Swords harvest multiple tiles in one swing, which makes them the best harvesting tool. Only a Hoe can destroy immature crops.
Crops include Wheat, Corn, Tomato, Carrot, Lettuce, and Potato. Seeds come from mature plants, chests, or the Agronomist NPC. Growth speed is the farm's bottleneck, and you have two levers:
| Boost | Effect | Cost |
|---|---|---|
| Watering Can | +100% growth, unlimited use, no refill | 2 Copper Bar at Stone Anvil |
| Fertiliser | +100% growth | 1 Smelly Gunk + 1 Straw |
| Enhanced Fertiliser | +150% growth | 1 Bone + 1 Blood Sac + 1 Fertiliser |
Hold the action button with the Watering Can to spray a larger crop area in one pass. Fertiliser is applied per seed, so apply it right after planting to get the full window of benefit.
Animals are caught with Nets (Small Net: 4 Wood + 4 Twine at the Workbench), tamed by building a pen around a wild animal, or bought from the Agronomist. Mature tamed animals inside a Valid Pen (fencing plus a Water Trough, internal size 2x3 minimum up to 24x24) randomly produce materials and babies on a semi-regular timer. Sheep give Wool and Raw Mutton; chickens give Eggs and Raw Chicken. Baby animals mature into adults before they produce. The pen stops spawning babies once it hits its supported animal count, so keep pens stocked but not overcrowded. The Animal Husbandry achievement asks for 5 animals in one pen, which is a natural early target.
The payoff is cooking: Herbal Tea, Garden Salad, Mushroom Soup, Bread, Vegetable Soup, Hearty Vegetable Soup, Mutton Stew, Quiche, Fritter, Scrambled Eggs, Cooked Chicken, Chicken and Corn Soup, Roast Chicken, Chicken and Egg Roll, Seasoned Lamb, Roast Lamb, and Shepherd's Pie. Cooked meals are the best healing and buff source in the game. Kelp was quietly reclassified as a cooking ingredient in the launch patches, so coastal bases should treat seaweed harvests as a food source, not decoration.
Fishing
Fishing entered with the July 2026 playtest and shipped in Early Access. The flow: craft a fishing pole, collect bait, cast into a body of water, and reel in a catch. The quality of both the pole and the bait affects what you land. Fish feed into cooking recipes, so a water-adjacent base has a food advantage.
Bait comes from critters, and the devs warn the critters are cute enough that you may prefer keeping them as pets. That is viable. But fishing has a hidden depth: the loot tables include weapons. Patch v0.1.0.2 added the Rusty Dagger, Rusty Trident, and Lake Sword to fishing loot, making the fishing rod a legitimate early weapon acquisition path. The Gone Fishin' achievement (retrieve 50 items) is currently the rarest achievement in the game at roughly 3% of players, which tells you most players still ignore this system. That is their loss.
Delve Deep
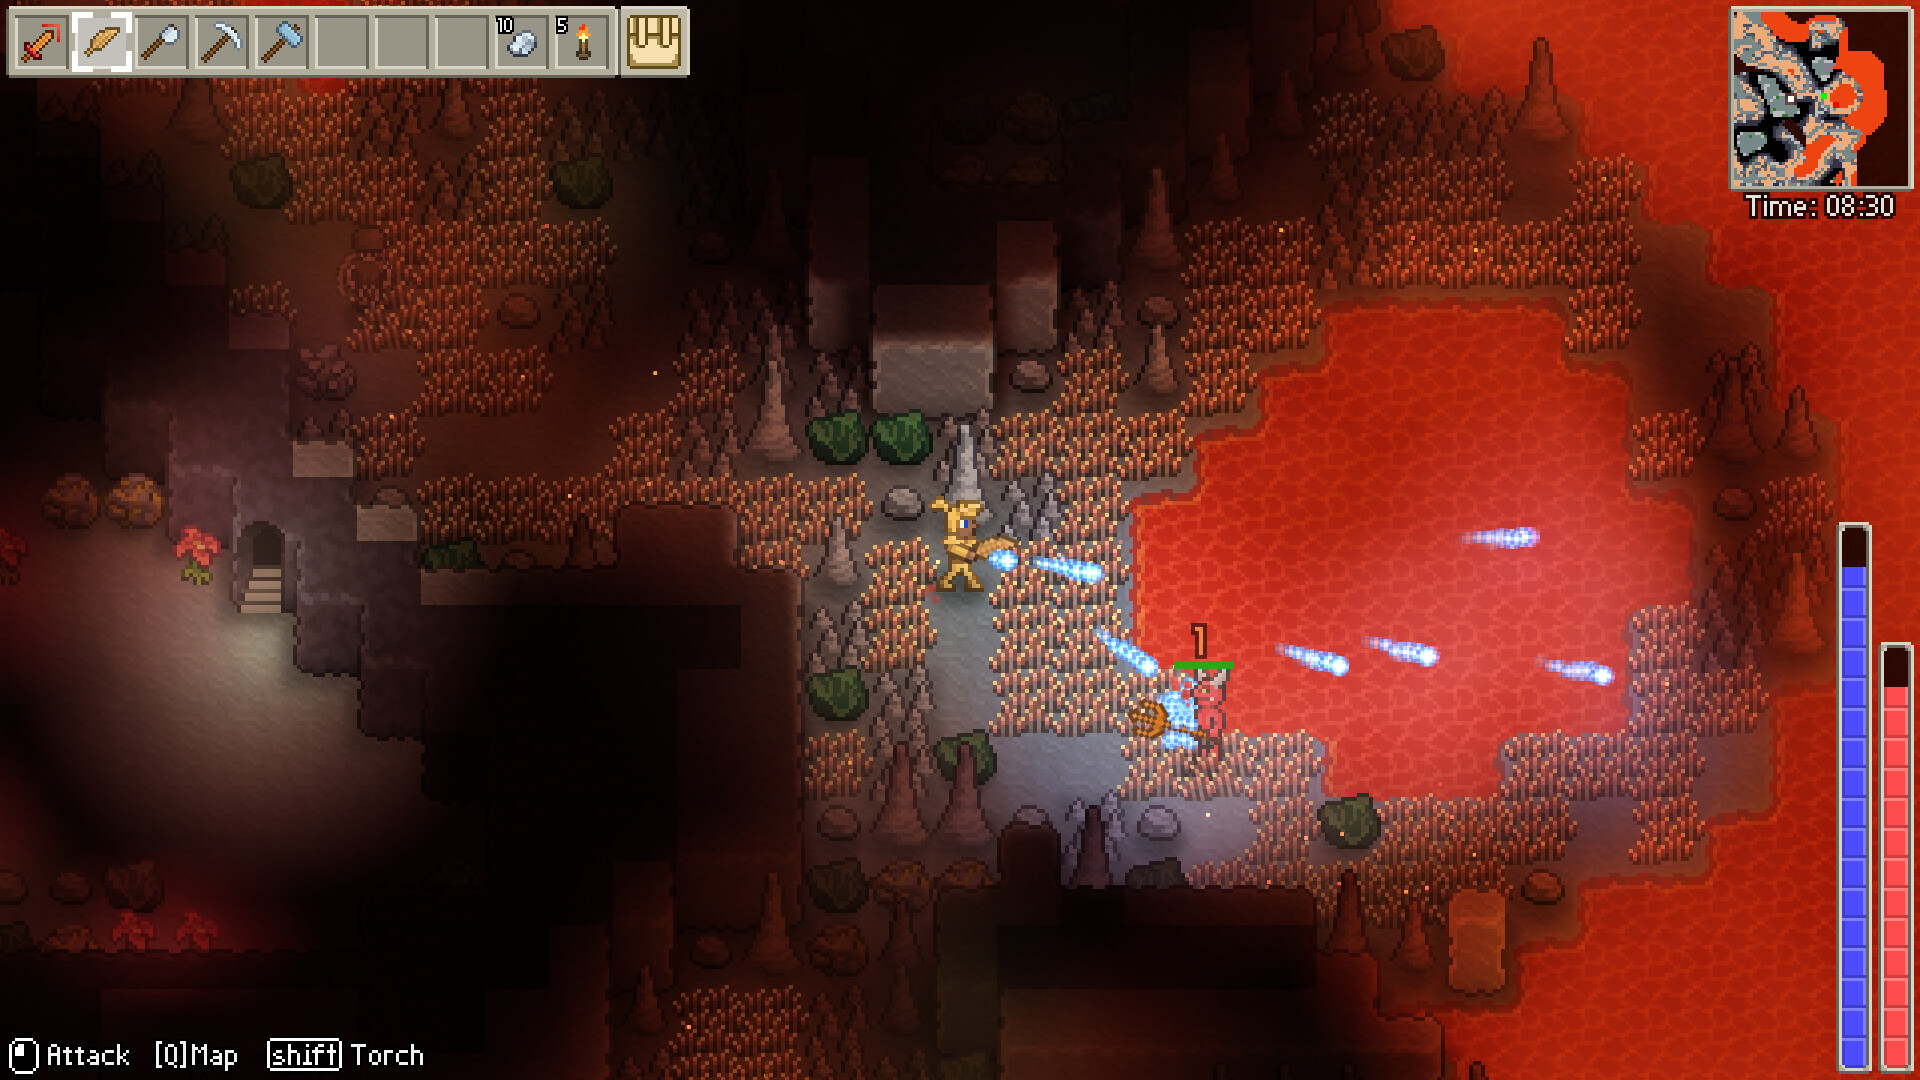
Dungeon crawling is the risk/reward pillar. The world contains exotic biomes, hidden caves, and dangerous dungeons. You mine ores, collect rare materials, unearth lost treasures, defeat foes, and loot unique items.
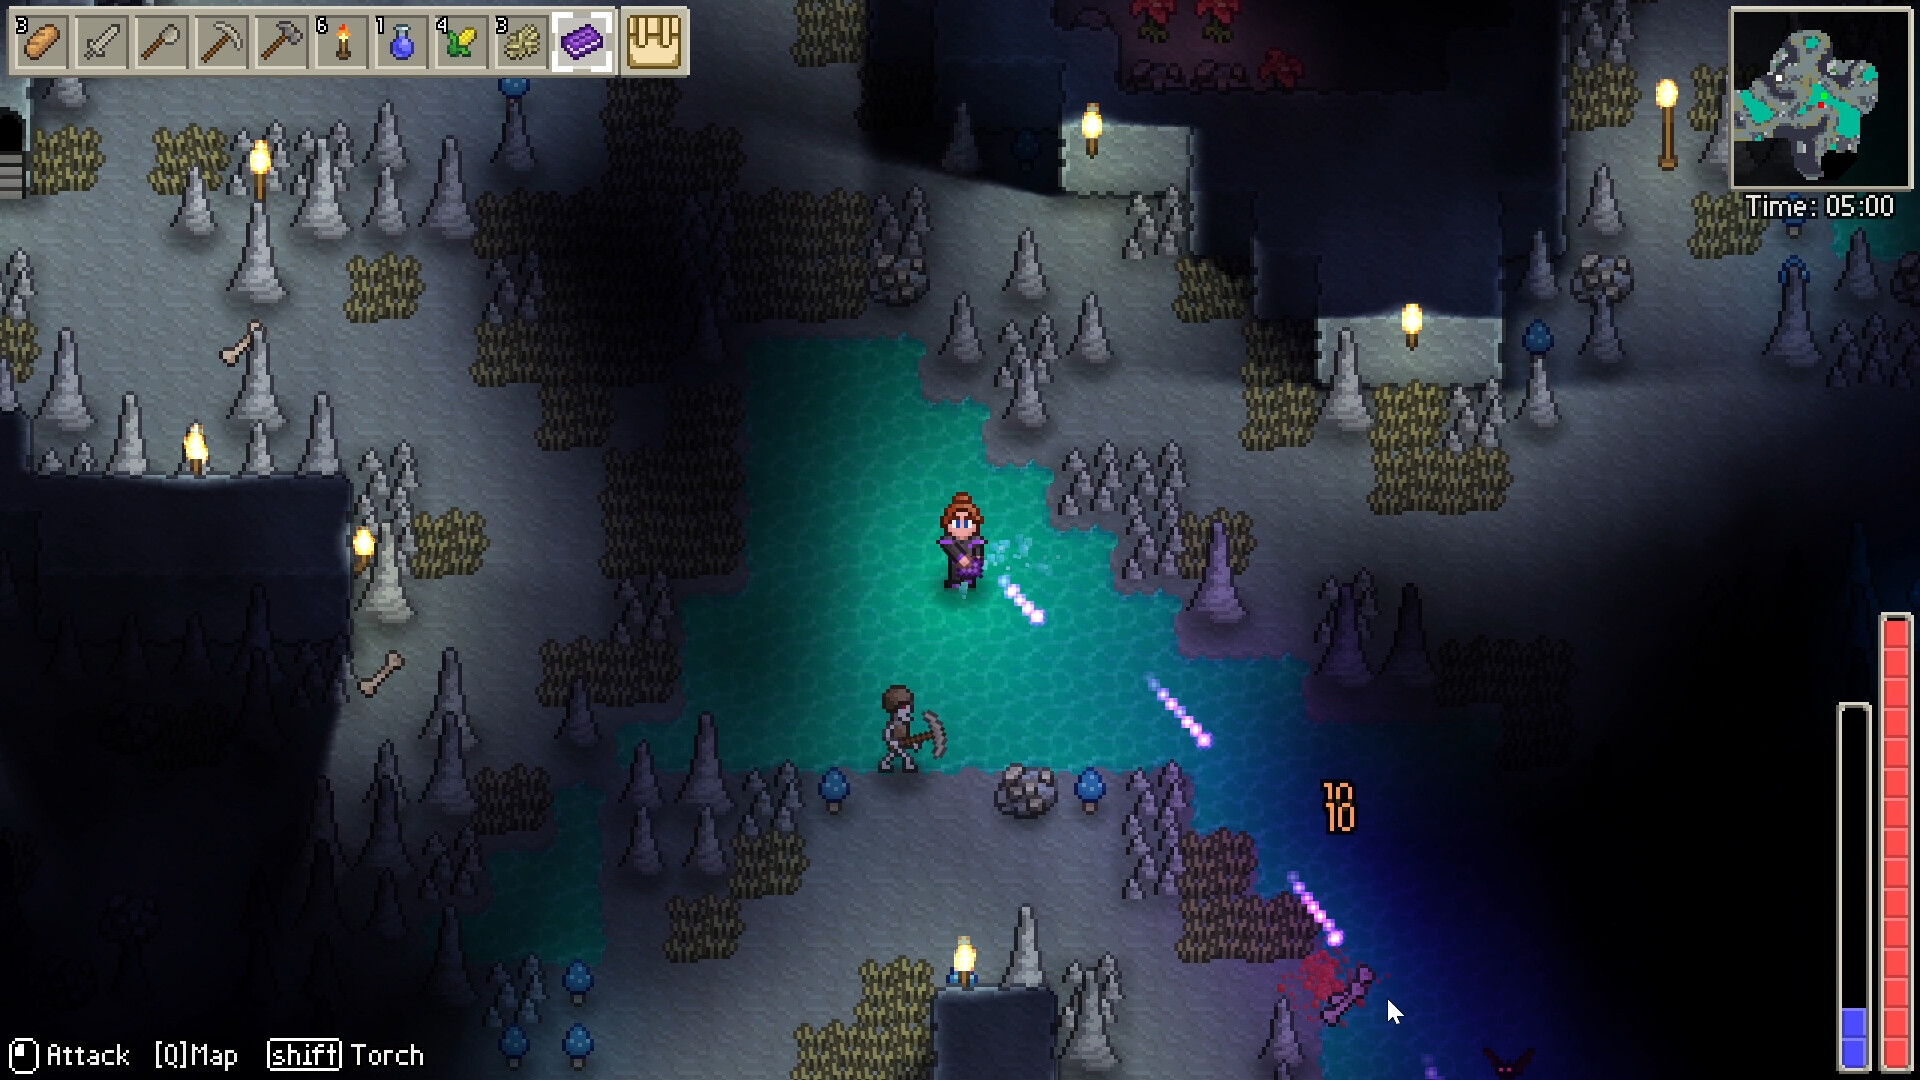
Cave entrances look like little grey staircases descending into the dark. Inside, it is pitch black without torches, so carry spares and place them on the ground and walls as you work. Torches are now a tactical system, not just a light source. Standard torches suppress 25% of enemy spawns within range, and patch v0.1.0.3 added two upgrade tiers: the Quartz torch (50% suppression) and coloured crystal torches (75% suppression). Crucially, suppression strength varies by biome: plains allow full suppression with basic torches, woodlands 75%, but the Labyrinth biome has a 0.5x modifier that halves any torch's effect. Deep dungeons also soften spawn waves once you kill enough enemies nearby, with a linear scale-down from 1.0x to 0.125x once the local kill count climbs, and the tracking now decays with distance so retreating actually lets spawns recover.
Health (red bar) and mana (blue bar) are in short supply early. Zombies, bats, and skeletons cluster in tight passageways and dead-ends, and there are few ways back up. If you go deep, keep your escape route in mind. The starting cave near your base holds copper ore, useful materials, chests, and sometimes a lost NPC who needs help back to the surface. Rescuing villagers earns the Good Samaritan achievement (36% of players, the most common in the game).
The Faults and the Hidden Truth
The story layer is the hook that separates Delverium from a pure sandbox. A great peril is infecting the land, and you are the only hero who can restore stability. The game asks you to uncover lost fragments of lore and hunt down the Faults, the invading entities, to piece together the hidden truth.
The launch acknowledged that this layer was too well hidden. Patch v0.1.0.1 admitted that "a lot of it is hard to find, and can leave many players feeling as though there is little content," and v0.1.0.2 added map markers attached to lore discoveries specifically to help boss findability. If you played before late September and bounced off the mystery, the discovery experience is materially better now.
The enemy roster behind the mystery has grown considerably since the demo:
| Enemy/Boss | Where | Drops / Notes |
|---|---|---|
| Flutterboss | Early dungeon boss | Flutter Scales (armor material), 50% chance Flutterboss Foreleg (a pick) |
| Critical Error | Mid-game | Code Fragments, 25% chance each of Deadline, Iterator, Mallocs Call |
| Runtime Errors | Forests and caverns (small chance since v0.1.0.2); occasionally underground | Occasional Code Fragments |
| Unhandled Exceptions | Underworld (small chance since v0.1.0.2) | Late-game horror enemy |
| Wraith kills | Track a mini-boss timer (added v0.1.0.3) | Timed mini-boss chain |
| Goblin King | Triggered by killing Goblin Mages | Voice added in v0.1.0.1 |
| Liche | Triggered by Necromancer kills (40 progress per kill, spawns at 180 since v0.1.0.2) | Reaper achievement |
| Fallen Ranger / Mage / Warrior | Late game | Champion achievement (defeat all three) |
| Iron Golem | Rare cavern spawn (added v0.1.0.1) | Tanky rare enemy |
The Liche chain deserves explanation because the game never explains it. Killing Necromancers accumulates hidden trigger progress. At launch you needed 240 progress at 30 per Necromancer kill; v0.1.0.2 changed this to 180 at 40 per kill, so roughly five Necromancer hunts can summon a Liche. Necromancers themselves were reduced from 20% to 10% of the spawn pool relative to trigger progress, making them rarer but more meaningful. This is the single most important hidden system for the Reaper achievement.
Co-op Modes and Multiplayer Etiquette
The game supports solo, 4-player split screen, and up to 8-player online co-op, including simultaneous split-screen plus online co-op. Remote Play Together and Family Sharing are listed. In practice, the two multiplayer rules that matter: clear chest menus before group crafting sessions (ingredients never pull from a chest another player is browsing), and assign loot responsibility. Patch v0.1.0.2 added a controls.autoUnpairPreviousController setting (manual settings.xml edit for now) for players who bind multiple gamepads to the primary player, which fixes the most common couch co-op friction.
Progression Strategy
Tier 1: Wood and Stone. Your starting axe and pick handle trees and basic rocks. Craft the Wood armor set (Helm, Cuirass, Greaves, Boots) as soon as you have materials. Build the Workbench, then the Furnace. Smelt your first Copper Bars.
Tier 2: Copper. Upgrade to Copper tools (axe, pick, hoe, hammer) and the Copper weapon set: Copper Sword, Copper Bow, or start on staves. Craft the full Copper armor set. This is your first dungeon-ready loadout for the starting cave. The Watering Can (2 Copper Bar) also becomes available at the Stone Anvil. Build it the same session you build the Cookpot.
Tier 3: Iron and Flutter. Iron tools and weapons come next. Flutter gear (Flutter Helm, Mail, Greaves, Boots) is a mid-tier craftable set made from Flutter Scales dropped by the Flutterboss. The Flutterboss Foreleg even serves as a pick and drops at a 50% rate. This is the tier where you can start hunting mini-bosses and taking on proper dungeons.
Tier 4: Fragment and Silver. Fragment gear comes from Code Fragments, the mysterious ore tied to the Faults. Silver is the top craftable tier: Silver Sword, Silver Bow, Silver armor, Silver tools. Unique named weapons like Deadline, Iterator, Malloc's Call, and the Soul Staff drop from or relate to boss content. This is the endgame loadout.
Tier 5: Fishing weapons and Tech. The launch patches quietly expanded the loot economy. Fishing can net the Rusty Dagger, Rusty Trident, and Lake Sword. Upgrade recipes exist for Dagger, Fine Dagger, Trident, and Regents Sword, giving dagger-and-trident builds a full progression path that did not exist in the demo. Tech-tier material sounds were added for armour and swords, confirming a Tech equipment tier in the live build.
Gear Tier Table
| Tier | Tools | Weapons | Armor | Source |
|---|---|---|---|---|
| Wood | Axe, Pick, Hammer | Wood Sword, Wood Bow | Wood Helm/Cuirass/Greaves/Boots | Starting materials |
| Stone | Axe, Pick, Hammer, Hoe | - | - | Stone |
| Copper | Axe, Pick, Hammer, Hoe | Copper Sword, Copper Bow | Copper Helm/Cuirass/Greaves/Boots | Copper Ore |
| Flutter | Flutterboss Foreleg (pick) | - | Flutter Helm/Mail/Greaves/Boots | Flutter Scales from Flutterboss |
| Iron | Axe, Pick, Hammer, Hoe | Iron Sword, Iron Bow | Iron Helm/Cuirass/Greaves/Boots | Iron Ore |
| Fragment | Vertical Slice (axe) | - | Fragment Helm/Mail/Greaves/Boots | Code Fragments |
| Silver | Axe, Pick, Hammer, Hoe | Silver Sword, Silver Bow | Silver Helm/Cuirass/Greaves/Boots | Silver Ore |
| Unique | - | Deadline, Iterator, Malloc's Call, Soul Staff, Fireball/Spirit/Gloom Staff | Reboots, Agile Methodology | Bosses/dungeons |
| Fishing | - | Rusty Dagger, Rusty Trident, Lake Sword | - | Fishing loot tables |
Crafting Costs That Matter
| Item | Recipe | Station |
|---|---|---|
| Copper Helm | 8 Copper Bar + 1 Simple Cloth | Stone Anvil |
| Copper Cuirass | 12 Copper Bar + 1 Simple Cloth | Stone Anvil |
| Flutter Helm | 32 Flutter Scales + 1 Simple Cloth | Stone Anvil |
| Flutter Mail | 48 Flutter Scales + 2 Simple Cloth | Stone Anvil |
| Fragment Helm | 8 Fragment Bar + 1 Simple Cloth | Iron Anvil |
| Fragment Mail | 12 Fragment Bar + 2 Simple Cloth | Iron Anvil |
| Silver Helm | 8 Silver Bar + 1 Simple Cloth | Iron Anvil |
| Silver Cuirass | 12 Silver Bar + 1 Wool + 2 Simple Cloth | Iron Anvil |
| Soul Staff | 4 Silver Bar + 2 Glass Brick + 4 Soul Essence | Iron Anvil |
| Vertical Slice | 4 Wood + 4 Fragment Bar | Iron Anvil |
| Fireball Staff | 4 Wood + 2 Glass Brick + 4 Fire Essence | Workbench |
| Spirit Staff | 4 Copper Bar + 2 Glass Brick + 4 Spirit Essence | Stone Anvil |
| Gloom Staff | 4 Iron Bar + 2 Glass Brick + 4 Gloom Essence | Stone Anvil |
| Teleport Potion | 1 Cave Moss + 1 Fire Essence + 1 Ectoplasm | Cookpot |
| Simple Cloth | 4 Plant Fibre | Anywhere |
| Twine | 2 Plant Fibre | Workbench |
| Fine Arrow | 10 Wood Arrow + 1 Copper Ore | Furnace |
| Venom Arrow | 10 Wood Arrow + 1 Venom Gland | Workbench |
| Quartz Torch | Craftable (v0.1.0.3) | 50% enemy suppression |
| Coloured Crystal Torch | Craftable (v0.1.0.3) | 75% enemy suppression |
Armor pieces eat 6-12 bars each, so budget your ore. A full Copper set needs about 38 Copper Bars before cloth. Smelt in bulk: stand near the Furnace, queue the bars, and let nested crafting handle the rest.
Weapon Families
| Family | Examples | Ammo/Resource | Strength |
|---|---|---|---|
| Melee | Wood/Copper/Iron/Silver Sword, Deadline, daggers, tridents | None | Reliable arc damage in front of you |
| Ranged | Wood/Copper/Iron/Silver Bow, Iterator | Arrows from first valid inventory slot | Precise long-range damage |
| Magic | Fireball Staff, Spirit Staff, Gloom Staff, Soul Staff, Malloc's Call | Mana from blue bar | Higher damage or AoE, less accurate |
Named weapons carry real stat weight. Deadline hits for 14 damage at 1.5 speed with knockback 1.5. Iterator fires for 10 damage at 1.3 speed and consumes arrows from the first inventory slot that holds them. Mallocs Call trades damage for range: 10 damage at speed 2 with a range of 20. Soul Staff tops the craftable magic list at 16 damage, speed 1.2, range 20. Arrows matter too: Fine Arrows (upgraded at the Furnace) and Venom Arrows (Venom Glands from Wasps) are worth carrying once ranged is your main damage.
One honest warning from the player base: armor upgrades add only about +4 armor per tier while enemy damage climbs faster, so late-game survival depends more on potions, food buffs, and positioning than on armor stacking. Plan your build around avoiding damage, not absorbing it.
Currency and Economy
The economy runs on three coin tiers: Copper Coin (value 1), Silver Coin (value 100), Gold Coin (value 10,000). Coins auto-convert to the next tier when stacked, and split back down for change from NPC purchases. Coins come from enemy drops, chests, and selling items to NPCs. NPC trading is the backbone of the economy. A well-stocked base with the right NPCs beats hours of manual gathering. Different NPCs carry different stock: it took one reviewer three or four recruited tenants before a vendor with chickens and sheep showed up, so recruit widely and check every new arrival's wares. Recruit at least five if you want the Urban Planning achievement's five homes to be more than decoration.
Consumables That Matter
- Food: cooked meals heal and buff. Shepherd's Pie, Roast Lamb, and Hearty Vegetable Soup are the heavy hitters.
- Potions: Minor Mana Potion (Cave Moss + Glowing Mushroom), Mana Potion (Minor Mana Potion + Ectoplasm), Agility Potion (Cave Moss + Butterfly Chitin), Dexterity Potion (Cave Moss + Bat Wing), and the crucial Teleport Potion (Cave Moss + Fire Essence + Ectoplasm), a panic button for deep delves that returns you to your last spawn point.
- Permanent: Health Token, Mana Token, and Inventory Token permanently increase stats by 10 each. These are the best long-term investments of any currency you find, and they turn up in chests across the world. Health Tokens can turn up in the starting cave on a first run. Explore every chest.
Builds and Role Strategies
Delverium has no classes. Roles emerge from gear and habits. The best group composition for a 4-player run:
| Role | Loadout | Job |
|---|---|---|
| Farmer | Hoe, Watering Can, Swords | Crops, animals, cooking; keeps the group fed and buffed |
| Builder | Hammer, Axe, materials | Shelter, walls, storage, NPC housing; keeps the base functional |
| Delver | Sword/Bow, armor, potions | Leads dungeon runs, carries the risk |
| Ranger | Bow, arrows, Teleport Potion | Long-range support, scout, escape artist |
Solo players should lean on the farm-first economy and skip pure-builder loadouts. A solo builder is a solo player with no one to build for. In a duo, one farmer and one delver covers both loops; the farmer's cooking keeps the delver alive, and the delver's loot funds the farm.
Three build archetypes worth naming for the current patch:
- The Untouchable Paladin. Built around the Untouchable achievement: defeat 15 enemies without taking damage using a melee weapon. Bow until you have a choke point, then sword work in doorways. High-risk, high-glory; the achievement sits at 17% completion.
- The Angler Artisan. Fishing pole, critter farm, cookpot. Uses fishing loot weapons (Rusty Trident into Regents Sword upgrades) and fish recipes to fund a peaceful run. Ignores combat until the food economy is invincible.
- The Torch Warden. Post-v0.1.0.3 build that treats Quartz and crystal torches as fortification. Builds torch-lined paths into dungeons, suppressing spawns along the route. Slower delves, near-zero ambush deaths, ideal for Hardcore-adjacent play.
Step-by-Step Strategy
Sequence 1: Day One Setup.
- Talk to the Forager, then activate the Journey Shrine near spawn.
- Chop trees and mine stone for the Workbench (your first crafting station).
- Build the Furnace (2 Wood + 2 Stone) at the Workbench.
- Till a small plot with your Hoe and plant Wheat and Carrot seeds.
- Craft the Wood armor set and a Wood Sword.
- Build your first valid shelter: 3x2 internal minimum, walls, flooring, door, torch, bed.
- Sleep through the first night. Your shelter is now your spawn point.
Sequence 2: The Copper Push.
- Enter the starting cave with your Wood gear. Mine Copper Ore and loot chests.
- Place a torch at every junction as you go; in the plains biome this near-eliminates back-spawns.
- Rescue any lost NPC you find wandering the cave.
- Smelt Copper Bars (4 Ore each) at the Furnace.
- Craft Copper tools: axe, pick, hoe, hammer.
- Craft the Copper Sword and full Copper armor.
- Build the Stone Anvil (4 Stone), then the Cookpot (2 Copper Bar) and Watering Can.
- Return to the surface. You are now dungeon-ready for the starting region.
Sequence 3: The Farm-First Economy.
- Expand your plot. Add Corn, Tomato, and Lettuce alongside Wheat and Carrot.
- Craft Fertiliser (1 Smelly Gunk + 1 Straw) and apply it to speed growth.
- Craft a Net and catch a chicken and a sheep. Build a Valid Pen with a Water Trough.
- Let the animals breed toward five head for the Animal Husbandry achievement.
- Cook the produce: Bread, Scrambled Eggs, Chicken and Corn Soup, Seasoned Lamb.
- Trade surplus to NPCs for coins and materials. The farm now funds the dungeon runs.
Sequence 4: Dungeon Prep.
- Before any deep dive: full armor for your tier, a cooked-meal stack, torches, and a Teleport Potion.
- Scout the entrance and the biome around it. Know what you are walking into.
- Fill your inventory plan: empty slots for loot, food in the hotbar, potions one key away.
- In co-op, designate a runner who shuttles loot between the delve party and base.
- Learn enemy patterns on the first pull. If a horde spawns, fall back to a choke point.
- Extract before your food runs out. A loot run that ends in death is a net loss.
Sequence 5: The Iron and Flutter Transition.
- Locate an Iron Ore vein in a deeper cave or dungeon.
- Mine it with your Copper Pick. If the pick is too low a tier, it will not work. Upgrade first.
- Smelt Iron Bars and craft the Iron Sword and Iron armor.
- Hunt the Flutterboss for Flutter Scales. Farm it until you have a full Flutter set; grab the Foreleg pick while you are at it.
- Keep a Copper set as a backup for risky expeditions.
Sequence 6: The Liche Chain.
- Recruit widely and build NPC rooms; Necromancer hunting needs a strong base behind it.
- Hunt Necromancers (rare spawns, roughly 10% of relevant spawn pools). Each kill adds 40 hidden Liche trigger progress.
- Around 180 progress (about five kills), the Liche spawns. Bring Silver-tier gear, plenty of cooked food, and a Teleport Potion.
- Kill the Liche for the Reaper achievement (21% of players have it).
- Repeat Liche cycles if you want the Fallen Ranger/Mage/Warrior chain afterward for the Champion achievement.
Sequence 7: Fault Hunting.
- Collect Code Fragments from deep caves and dungeons and from Critical Error and Runtime Error enemies. Smelt them into Fragment Bars.
- Craft Fragment gear (or push to Silver) before engaging the Faults.
- Treat the first Fault encounter as a scouting run. Learn the pattern, extract.
- Return with the right loadout: maxed armor, cooked meals, potions.
- Bring the group. The Faults are the endgame; solo attempts are for experts only.
- Farm Critical Error for the named drops: Deadline, Iterator, and Mallocs Call each have a 25% drop chance.
Advanced Tips
The "Farm-First Economy" Strategy. Build the farm before the fortress. A self-sustaining food supply funds everything else. You can trade surplus crops to NPCs for tools and materials you would otherwise spend hours gathering. In co-op, designate one player as the farmer early; their cooking output keeps the whole group dungeon-ready.
The "Nested Crafting Pipeline." When a new tier of gear unlocks, do not craft items one at a time. Use the blue ingredient indicator to spot nested-crafting opportunities, and stand near the right stations. Bulk-smelt bars in one session, then assemble finished items as needed. The 10-tile chest range makes a single factory room viable; use it.
The "Torch Cartography" Rule. Post-v0.1.0.3, your torch is a spawn-suppression tool first and a light source second. In plains, basic torches fully suppress spawns. In dungeons, quartz and crystal torches suppress 50-75%. Place torches at junctions, not just in your walking path, because suppression works on spawn attempts in range, not line of sight.
The "Spawn Decay" Exploit That Is Not One. The v0.1.0.3 spawn cap tracks recently killed enemies with distance decay. If a cave section is flooding you, kill what blocks the path, then advance out of range and let the kill-tracker decay before coming back. Fighting the same room for twenty minutes keeps the soft cap engaged and the horde coming. Rotation beats attrition.
The "Scout Before You Delve" Rule. Before committing to a dungeon, do a quick surface recon: where's the entrance, what biome surrounds it, what does the nearby ore look like? Dungeons are high-risk by design, and knowing what you're walking into halves the risk. Labyrinth-biome dungeons halve your torch suppression, so pack extra potions there.
The "NPC Anchor" Setup. Position NPCs at your base as a trading hub, but also scout for NPCs near dungeon entrances. A vendor at the dungeon door means you can sell junk and restock supplies without a full return trip. In 8-player runs, station one player as the runner who shuttles loot between the delve party and the base.
The "Fishing for Food and Steel" Side Hustle. If your base sits near water, set up fishing as soon as the pole and bait are available. Quality of pole and bait determines your catch, and the loot table now includes three weapons, so fishing is a gear source, not just a food source. Budget a few critters for bait even if you keep the cute ones as pets.
The "Fault-Hunting Prep" Checklist. Before you go after a Fault: maxed armor for your tier, a full stack of cooked meals, torches, and a clear escape route. Treat the first Fault encounter as a scouting run. Learn the pattern, then come back with the right loadout.
The "Sword Harvest" Trick. Swords harvest multiple crop tiles in one swing. When the farm gets big, swap your hoe for a sword at harvest time. It cuts the harvest chore down to seconds.
The "Fertiliser First" Rule. Fertiliser doubles crop growth speed and costs only Smelly Gunk and Straw, both common. Apply it to every plot before you expand. Once you can kill Blooderflies and Mosquitos, upgrade to Enhanced Fertiliser for the 150% boost.
The "Journey Shrine Network." Every new region you explore, activate the shrine first. The fast-travel network turns a sprawling map into a connected one, and it makes dungeon supply runs practical instead of punishing. Ten shrines is the Well-traveled achievement.
The "Cosmetic Slot" Rule. Cosmetic armour slots cost nothing and override visuals without touching stats. Wear your best real gear and your favourite look at the same time. Hunt the hair clip early. It frees your helmet slot from fashion duty. Filling every equipment and cosmetic slot earns Trendsetter.
The "Token Hunt." Health, Mana, and Inventory Tokens permanently add 10 to their stat and hide in chests everywhere, including the starting cave. Make chest-hunting part of every dungeon run. Ten inventory slots from one token is worth more than almost any consumable.
Achievements Reference
| Achievement | Requirement | Unlock Rate | Difficulty |
|---|---|---|---|
| Good Samaritan | Rescue a villager from the caves | 36% | Easy, do it on your first cave trip |
| Animal Husbandry | Fill an Animal Pen with 5 animals | 32% | Easy, natural farm progression |
| Urban Planning | Build 5 homes in one world | 32% | Easy, needs 5 valid shelters |
| Green Thumb | Harvest 30 planted crops | 30% | Easy, comes with normal farming |
| Trendsetter | Fill all equipment and cosmetic slots | 22% | Medium, needs a full late-game wardrobe |
| Reaper | Defeat a Liche | 21% | Medium-hard, requires the Necromancer chain |
| Untouchable | Defeat 15 enemies without damage (melee) | 17% | Hard, pick weak enemies in plains |
| Well-traveled | Activate 10 Journey Shrines in one world | 11% | Medium, requires real exploration |
| Bullseye | Shoot 50 arrows without missing | 10% | Hard, use point-blank shots on slow enemies |
| Champion | Defeat Fallen Ranger, Mage, and Warrior | 4% | Hard, late-game elite hunt |
| Gone Fishin' | Retrieve 50 items from fishing | 3% | Grind, but passive while you do other things |
Known Issues and Roadmap
Launch stability has been good; the devs called the initial release "very stable in solo and online play." The rough edges are discoverability and balance, and the patches have been aimed squarely at both.
Current known friction points: the game still does not hold your hand (the devs consider this a feature but are adding map markers and guidance), enemy damage scaling outruns armor scaling in the late tiers, and Horde Mode has no aggro-range modifier as of v0.1.0.2, which makes it a pure spawn-count increase. NPC respawn locations can get stuck on old saves after a world reload; re-assign their rooms manually if it happens.
The public roadmap divides into immediate and long-term tracks. Immediate: player guidance and content discoverability, balancing, QoL, more enemies and loot. Long-term: NPC behaviour and quests, official modding support (basic content modding already works internally), additional biomes and bosses, and pets and mounts. Demo world saves do not carry into the full game, and demo character imports are supported but not recommended.
FAQ / Common Mistakes
When did Delverium release? Early Access launched September 22, 2026, at $12.49 with a 20% launch discount for the first two weeks.
How much does it cost? $12.49 USD / £9.49 / €11.99. It also ships in discounted bundles with Necesse, Tinkerlands, and Allumeria.
What platforms is it on? Windows at launch, and it is Steam Deck Verified, so handheld play is officially solid. No macOS or Linux builds are listed.
How many players can play together? Up to 8 players in online co-op, 4-player split screen, or a combination of both. Solo play is fully supported.
Should I import my demo character? You can, but the developers recommend starting fresh. Demo world saves are incompatible, and the Early Access balance curve assumes a new character.
What does Horde Mode do? It spawns significantly more enemies at night and inside caves and dungeons. As of v0.1.0.2 it no longer modifies enemy aggro range. Toggle it off for a first world.
What is the best death penalty setting? Drop all Money is the friendliest. Drop all Items turns every death into a loot run. Permadeath deletes the character. Choose according to how much pain you want.
What does a valid shelter need? Walls, flooring, a door, a light source, and a bed, with an internal size of at least 3x2 tiles and at most 24x24. A Wool Rug counts as flooring.
What does a valid animal pen need? Fencing plus a Water Trough, internal size 2x3 minimum up to 24x24.
Does crafting require opening chests? No. Crafting draws ingredients from your inventory and nearby chests automatically (range now 10 tiles), unless another player is currently browsing that chest.
How do I summon the Liche? Kill Necromancers. Each kill adds 40 trigger progress and the Liche spawns at 180 (values after the v0.1.0.2 rebalance). Necromancers are roughly 10% of relevant spawn pools, so expect a hunting session.
Where do Runtime Errors spawn? Since v0.1.0.2, they have a small spawn chance in forests and caverns. Unhandled Exceptions spawn in the underworld.
What are the bosses? Flutterboss (Flutter Scales, 50% Foreleg pick), Critical Error (Code Fragments, 25% each of Deadline, Iterator, Mallocs Call), Runtime Errors (occasional Code Fragments), the Goblin King chain, Wraith mini-bosses on a timer, the Liche, and the Fallen elite trio.
Is there fishing? Yes, and it is deeper than food: fishing loot tables include the Rusty Dagger, Rusty Trident, and Lake Sword weapons.
How do torches affect enemies? Standard torches suppress 25% of spawn attempts in range; Quartz torches 50%; coloured crystal torches 75%. Suppression strength scales by biome: plains allow full suppression, the Labyrinth halves it.
Is there modding? Basic content modding already works in the development build; official modding support is on the long-term roadmap.
Is the game finished? No. It is Early Access with an active patch cadence (three patches in the first two weeks) and a published roadmap.
Final Tips & Verdict
The single best move in Delverium is to plant your first seeds before you build your first wall. Dungeons, Faults, and gear all become easier when food is a solved problem. A group that splits roles (farmer, builder, delver) will outpace four players all doing the same thing.
The second best move is to set your world rules honestly. Death penalty, Horde Mode, difficulty. The game hands you the knobs. The players who bounce off Delverium are usually the ones who picked Permadeath plus Horde Mode for a first world and then blamed the game. Pick the friendly settings, learn the loop, and dial the pain up later.
The third move is new: mine the patch notes. Delverium's Early Access patches have already reshaped spawn suppression, the Liche chain, and fishing loot. The meta is moving under your feet, in a good direction, and the discoverability complaints that dominated launch feedback are being fixed patch by patch. If you tried the demo and found the world opaque, the map markers and guidance improvements are reason enough to look again.
Verdict: Delverium is a strong pick for co-op sandbox fans who want the survival loop without the hardcore pressure, and for families or mixed-skill groups who want a game everyone can enjoy at their own pace. Steam Deck Verified means the couch-and-handheld combo works out of the box. The wiki-grade depth of its systems (crafting proximity, nested recipes, shelter requirements, gear tiers, the coin economy, fishing, torch suppression, hidden boss chains) gives theorycrafters plenty to sink into, while the farm-first loop keeps casual players fed. Early Access means expect changes, but three patches in two weeks suggests a studio that ships. 4/5 for its target audience.
Last reviewed by Game How To Editorial. We play each game, verify controls against official sources, and update guides when game mechanics change.