Daily Pick
One deeply researched guide worth reading today.
A practical route through the systems that matter most, written to help new players make confident decisions quickly.
Overview
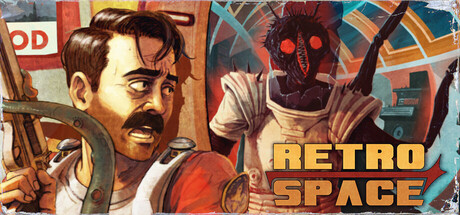
RetroSpace is a disco-punk space horror immersive sim developed by The Wild Gentlemen, the Hungarian studio behind the noir detective game Chicken Police, and published by Kwalee. You play a nameless janitor aboard the Aurora 5, one of the AURORA fleet's generation ships swallowed by a sentient black hole. The station is a twisted mess of mutated crew, time anomalies, and reality-bending physics. Your goal: survive, adapt, and find a way out.
The setting: Year 2177. Humanity's last hope is the AURORA fleet, a convoy of city-sized space stations drifting through the cosmos searching for a new home. During a centuries-long mission, humans lie in deep hibernation while robots, androids, and a dedicated crew of janitors guard their dreams. One ship goes off-course and is swallowed by a sentient black hole. The corridors teem with animal-hybrid mutants. The ship itself hops between timelines. You wake up with a wrench in hand and a universe of problems.
The game gives you two broad playstyles from the start. The Sneaky Chap relies on stealth, hacking, and environmental manipulation. The Mutant Action Hero absorbs alien biomass to gain superhuman abilities and fights head-on. You can switch between both approaches freely — the game never commits you to a single path.
Think System Shock 2 meets Prey (2017) with a heavy dose of '70s disco aesthetic. The tone walks a fine line between genuine cosmic horror and gonzo humor. A free demo has been on Steam since June 11, 2026 and has received two major updates based on player feedback. Full release targets 2026.
Platforms: PC (Steam), PlayStation 5, Xbox Series X|S, Nintendo Switch 2 — all launching in the same window.
Target audience: fans of immersive sims, metroidvania exploration, and horror games that do not take themselves too seriously. Difficulty is medium with spikes in puzzle sections and boss encounters. Estimate 8-12 hours for a first playthrough.
Quick Facts
| Attribute | Detail |
|---|---|
| Developer | The Wild Gentlemen |
| Publisher | Kwalee |
| Genre | Immersive sim, FPS, Horror, Stealth |
| Engine | Unreal Engine |
| Platforms | PC, PS5, Xbox Series X|S, Switch 2 |
| Release | 2026 (full), Demo June 11, 2026 |
| Playtime | 8-12 hours |
| Difficulty | Medium (spikes in puzzles/bosses) |
| Playstyles | Stealth (Sneaky Chap) / Action (Mutant Hero) |
| Demo Rating | 80% positive (200+ reviews) |
Developer Background
The Wild Gentlemen are a Hungarian indie studio founded by former AAA developers. Their first game, Chicken Police (2019), was a noir detective adventure with anthropomorphic animals that earned a cult following for its sharp writing and unique visual style. RetroSpace is their sophomore title — a complete genre pivot from point-and-click adventure to first-person immersive sim. The studio describes RetroSpace as "a love letter to classic immersive sims" like System Shock 2, Thief, and Deus Ex.
The developer self-labels the game's tone as a "disco-fever space-satire" — expect dark humor, fourth-wall-breaking moments, and a surprising amount of narrative depth beneath the gonzo exterior. The mustache obsession is intentional: at least one locked door in Habitation Deck requires a mustache prop to pass (a facial recognition gag). Check every locker.
The studio is responsive to feedback. Both demo updates were direct responses to player complaints: the death system was rebalanced because players found it too hardcore, the UI was fixed after floaty complaints, and the wrench got more range. This responsiveness suggests the full release will land in a polished state.
Demo Experience (as of August 2026)
The demo launched June 11, 2026 and accumulated 200+ Steam reviews at 80% positive — a "Very Positive" rating. It has been updated twice since launch.
What players liked:
- The retro-futuristic aesthetic is cohesive and immersive
- World-building feels unified — art, sound, and UI all sell the same 70s space-disco vibe
- High completion level for a demo — few bugs, polished mechanics
- Stealth mechanics with genuine light/sound considerations feel rewarding
Common complaints:
- No difficulty selection in the demo (turrets and monsters hit hard)
- Limited healing items — players die often
- Corridors look similar; easy to get lost even with the minimap
- Gunplay does not feel as punchy as the stealth options (the Scatterblaster shotgun is the exception)
Update 1 (death + rebirth rebalance): the developers softened the death system after players called it too hardcore. The core loop stayed — you die, you clone, you recover your corpse — but the punishment curve was flattened.
Update 2 (major quality pass): protected quick save feature, overhauled UI (no longer floaty), box stacking and item handling improvements, and a wrench with more range. These directly address the demo's most-cited friction points.
What the demo proves: the death system works as intended. Dying feels punishing but fair. The clone recovery mechanic creates real tension — you care about reaching your corpse. Save terminals are placed generously, so the game is forgiving despite its difficulty.
Getting Started — First 30 Minutes
Arrival Hub Walkthrough
You wake up in a maintenance closet. The station emergency lighting flickers. Your only possession is a wrench (your multi-tool and melee weapon).
Critical early path:
- Find the save terminal — immediately to your left when you exit the closet. Save here. Terminals are your checkpoints. The second demo update added a protected quick save — use it liberally, but know that protected saves do not overwrite your terminal saves.
- Loot everything. The Arrival Hub has 12 breakable lockers, 4 desk drawers, and 3 wall safes. Break everything with your wrench.
- Find the hidden armory. In Cargo Bay 3, there is a cracked wall section. Hit it with your wrench 4 times to break through. Inside: the Scatterblaster (shotgun) and 12 shells. This weapon carries you through the first two sectors.
- Locate the maintenance closet. Behind the staircase — contains the Vent Master upgrade chip (enter vents silently). This is the single most important upgrade for stealth runs.
- Restore power to the central elevator. The breaker room is locked (code: 1977 — the year Saturday Night Fever released). Inside, flip the main breaker. This powers the elevator to Habitation Deck.
Beginner Mistakes
| Mistake | Why It Hurts | Fix |
|---|---|---|
| Skipping the hidden armory | You fight the first Screamers with only the wrench | Break the cracked wall in Cargo Bay 3 |
| Ignoring the Vent Master chip | Entering vents makes a loud clang that alerts enemies | Find it in the maintenance closet |
| Running through Habitation Deck | Noise attracts enemies from 3 rooms away | Crouch-walk through unknown areas |
| Not saving before time loops | Time loop puzzles have fail states | Save before entering any room with flickering lights |
| Hoarding biomass | Biomass drops from dead enemies; you lose it on death | Spend it at mutation stations early |
| Fighting turrets head-on | Turrets deal 25 DPS and never miss at range | Hack them or break line of sight; never trade shots |
Core Mechanics — Deep Dive
The Two Paths
| Aspect | Sneaky Chap | Mutant Action Hero |
|---|---|---|
| Playstyle | Stealth, hacking, avoidance | Combat, biomass absorption, mutations |
| Primary resource | Upgrade chips, keycards | Biomass |
| Key upgrades | Silent Treads, Optical Camo, Hack Expert | Regeneration, Bone Spikes, Wall Crawl |
| Combat approach | Wrench stealth kills, Electro-Javelin sniping | Scatterblaster, melee, sonic roar |
| Difficulty curve | Easy start, harder late (more enemies in later sectors) | Hard start, easier late (mutations scale well) |
| NPC reactions | Neutral | Fear (highly mutated characters scare NPCs) |
You can swap between approaches at any time. The game has no commitment mechanic. Early sectors let you sample both styles freely. The meta approach: stealth through unfamiliar areas, then go loud once you have the layout memorized.
Light and Sound Systems
RetroSpace uses a dual-threat detection system:
Light meter (HUD icon — eye):
- Bright = fully visible at 15m
- Dim = detectable at 8m
- Dark (shadows) = detectable at 4m
- Pitch black (broken lights) = effectively invisible
You can shoot out lights to create safe zones. The Electro-Javelin's charged shot disables lights in a 5m radius.
Noise meter (HUD icon — ear):
- Walking = 3m sound radius
- Crouch-walking = 1m (silent with Silent Treads upgrade)
- Sprinting = 10m
- Unsuppressed gunfire = 25m+
- Breaking objects = 5m per break
- Opening locked doors = 6m (the lockpick mechanism clicks)
Environmental noise masking:
- Generators — any sound within 4m of a running generator is masked
- Ventilation fans — crouch near them to mask movement sounds
- Disco music (Habitation Deck lounge) — all sounds reduced by 40% while music plays
The Clone Death System
Dying in RetroSpace is not a reload. You are cloned by the station's automated systems:
- You die. Your clone body activates in the nearest cloning bay.
- Clone degeneration: each death adds a random "degeneration" effect — reduced max HP, slower movement, visual distortion, or a cosmetic change.
- Corpse run: your previous body remains where you died, holding your inventory. You must return to it and interact to reclaim your gear.
- Permanent loss: if you die again before reclaiming your corpse, the old corpse (and its inventory) despawns permanently.
Degeneration effects stack. Die 5+ times before reclaiming your gear and you will be playing with significantly reduced stats.
Lore context: the Aurora 5 can produce infinite clones of you — the ship's automated systems ensure you never truly die. But cloning is never perfect. Each replication introduces flaws. The degeneration effects represent accumulated replication errors.
How to mitigate clone degeneration:
- Store spare gear in your hideout (Habitation Deck, room 204 — becomes available after power restoration)
- Use the HUB area's cloning bay to "reset" degeneration (costs 3 biomass)
- Prioritize the Regeneration mutation — it counteracts some HP-related degeneration effects
- Do not hoard biomass: spend it at mutation stations before risky encounters
Time Anomalies
The black hole's influence creates three types of time distortion:
| Type | Appearance | Solution | Reward |
|---|---|---|---|
| Time Loop | Flickering lights, deja vu text prompt | Perform a specific action within the loop window (usually destroy an object at the right moment) | Permanent upgrade or key item |
| Time Freeze | Enemies frozen mid-animation, blue tint | Shatter frozen enemies for bonus biomass; some wake up when you approach | Extra resources |
| Flashbacks | Screen distortion, vision of past crew | Follow the vision to find a hidden item or clue | Story context, puzzle solutions |
Time Loop rooms are the most dangerous. If you fail the loop-breaking action, you are returned to the room's start with any damage you took preserved. The game has 4 upgrade chips locked behind time loops that become permanently missable if you fail. Save before every loop room.
Weapons Compendium
Weapon Comparison Table
| Weapon | Type | Damage | DPS | Ammo Type | Ammo Common? | Special |
|---|---|---|---|---|---|---|
| Wrench | Melee (blade) | 25 | 50 | None | N/A | Charged heavy = 75 damage, silent |
| Pneumatic Riveter | Pistol | 15 | 45 | Rivets | Very common | Headshot 2x (30), semi-auto |
| Plasma Torch | Melee (energy) | 40 | 30 | Battery | Common | Burns targets for 5 DPS over 3 seconds |
| Scatterblaster | Shotgun | 80 (x5 pellets) | 120 | Shells | Rare | Devastating close range, 2-shot most enemies |
| Electro-Javelin | Rifle | 50 | 25 | Javelins | Uncommon | Charged shot stuns 3 seconds + 75 damage |
| Flare Gun | Special | 10 | — | Flares | Rare | Lights enemies on fire, illuminates dark areas |
Stealth Weapons Priority
If you are playing Sneaky Chap:
- Wrench (charged heavy) — silent kill on unaware enemies. Always your first option.
- Electro-Javelin (charged) — silent ranged kill. The charged shot kills Screamers without triggering their shriek.
- Pneumatic Riveter (headshots only) — for emergencies when stealth breaks. Each shot is loud but single kills are manageable.
Action Weapons Priority
If you are playing Mutant:
- Scatterblaster — room clearer. Do not use against single enemies; save shells for groups.
- Plasma Torch — excellent DPS against Void-Touched. The burn prevents their teleport for 2 seconds.
- Bone Spikes (mutation) — infinite ranged option. Replaces your need for ammo entirely.
Weapon Durability
Each weapon has a condition bar. Damage output drops to 50% when broken. Repair at workbenches for 1 biomass per 10% repair. Shotgun shells are scarce until Engineering — do not waste them on basic Shamblers.
Mutamods — Full Breakdown
All Mutation Abilities
| Mutation | Biomass Cost | Effect | Best For | Side Effect |
|---|---|---|---|---|
| Regeneration | 3 | Heal 1 HP per 5 seconds out of combat | All builds | None |
| Bone Spikes | 5 | Ranged projectile (15 damage), infinite ammo | Action builds | Arms visibly deform |
| Wall Crawl | 7 | Climb surfaces for 10 seconds, cooldown 30s | Exploration, shortcuts | More spider-like movement |
| Sonic Roar | 10 | AoE stun (5m radius), breaks lights/windows | Crowd control | Damages hearing (ambient audio reduced) |
| Hive Mind | 15 | Control an enemy for 15 seconds | Puzzle solving, chaos | Permanent visual change (eyes) |
| Carapace | 8 | +50% armor, -20% move speed | Tank builds | Visible shell growth on back |
| Shadow Step | 6 | Short teleport (8m), silent | Stealth builds | Casts shadow even in dark |
| Adrenaline Rush | 4 | +50% attack speed for 10 seconds | Burst damage | Heartbeat audible to enemies |
What the official site says about side effects: "Mutamods are at your disposal to enhance your average stealth-shooter experience with juicy superpowers. BEWARE: With great power comes great responsibility (and unexpected side effects)." Side effects are permanent once applied — you can acquire new mutations but cannot undo existing ones. Plan your mutation path before spending biomass.
Optimal Mutation Order
For Sneaky Chap runs:
1. Regeneration (3 biomass) — passive healing reduces bandage usage
2. Shadow Step (6 biomass) — get out of detection instantly
3. Wall Crawl (7 biomass) — access secret areas
4. Hive Mind (15 biomass) — turn dangerous enemies into distractions
For Action Hero runs:
1. Bone Spikes (5 biomass) — infinite ranged attack, no ammo worries
2. Regeneration (3 biomass) — sustain through fights
3. Carapace (8 biomass) — survive frontal assaults
4. Sonic Roar (10 biomass) — panic button for surrounded situations
For completionist runs:
1. Wall Crawl (7 biomass) — opens more secrets than any other mutation
2. Shadow Step (6 biomass) — access behind locked gates
3. Hive Mind (15 biomass) — force enemies to open doors for you
4. Everything else
Enemy Encyclopedia
Enemy Tactics Table
| Enemy | HP | Damage | Speed | Behavior | Weakness | Best Counter |
|---|---|---|---|---|---|---|
| Shambler | 60 | 20 | Slow | Patrols, attracted to sound | Headshots, fire | Wrench heavy attack (silent) |
| Screamer | 40 | 35 | Medium | Patrols, shrieks to alert area | Stealth kill from behind | Electro-Javelin charged shot |
| Crawler | 30 | 15 | Fast | Ceiling/vent dweller, ambush | Bright light (flashlight) | Sonic Roar to stun, then Scatterblaster |
| The Forgiven | 100 | 50 | Medium | Sentient, can be negotiated | Depends on dialogue | Talk first, fight as last resort |
| Void-Touched | 150 | 60 | Fast (teleport) | Teleports every 5 seconds | Plasma Torch (burn prevents teleport) | Burn with Plasma Torch, DPS down |
| Security Turret | 80 | 25/s | Stationary | Fires on sight | Hack to disable or EMP | Hack Expert chip (3s hack time) |
Enemy Behavior — Advanced
Shamblers patrol set routes. They have 3 states:
- Patrol — walks a loop. Detection range 8m in bright, 3m in dark.
- Investigate — attracted to sounds (gunfire, breaking objects). Investigates for 20 seconds then returns to patrol.
- Alert — charges your last known position. Melee attacks only.
Shambler trick: throw a loose object (press G) to attract them into a group, then use a Scatterblaster blast to clear 3-4 at once.
Screamers are the real threat. When alerted, they emit a shriek that:
- Damages you if you are within 4m
- Alerts all enemies in the current sector
- Summons 2-3 additional Shamblers to their location
Always stealth-kill Screamers first. A Screamer that sees you before you see it is a failed stealth run.
Void-Touched teleport every 5 seconds if not burning. They always teleport directly behind you. Counter by:
- Hitting them with Plasma Torch (the burn pauses teleport for 2 seconds)
- While they burn, lay into them with Scatterblaster
- Repeat until dead
The Forgiven are sentient survivors mutated by the black hole's energy. They remember who they were. Dialogue determines the outcome — friendly responses earn a keycard and information. Hostile responses trigger a tough fight for bonus biomass but cost you story content. Neutral responses get you nothing.
Sector-by-Sector Strategy
Sector 1: Arrival Hub
Goal: get your bearings, find initial gear, restore central power.
Loot priority:
- Cargo Bay 3 hidden armory — Scatterblaster + ammo
- Maintenance closet — Vent Master chip
- Breaker room (code 1977) — restores power
Time loop puzzle: Room 7A — a flickering light room. You enter, see a crew member die, and the loop resets. Solution: in the 5-second window before the crew member dies, shoot the control panel on the far wall. This prevents their death, and the loop breaks. Reward: access code to a locked weapon locker.
Tips:
- The hidden armory is missable. If you do not break the wall in Cargo Bay 3, you do the next sector with only the wrench.
- Save before entering the breaker room. A Shambler lurks in the corner.
Sector 2: Habitation Deck
Goal: find survivors, set up hideout, locate the Disco Lounge.
Key locations:
- Room 204 — your hideout. Save terminal, storage locker, bed (restores HP). Requires power from Sector 1.
- Disco Lounge — locked neon door. The jukebox inside plays different songs. Certain locked doors elsewhere respond to specific tracks. The tracks and their effects are randomized per playthrough — experiment or find the song list notes scattered around the station.
- Locker room — contains the Silent Treads upgrade (crouch-walking makes zero noise). Locked. Code on a note in room 201.
The Forgiven encounter: in the Habitation Deck cafeteria, you meet your first Forgiven crew member. They are sentient mutated survivors. Dialogue choices matter:
- Friendly response — they share information and give you a keycard.
- Hostile response — they attack (tough fight, 100 HP, but drop bonus biomass).
- Neutral response — they leave. You miss both the keycard and the biomass.
For the best ending, always be friendly to The Forgiven.
Sector 3: Research Wing
Goal: find mutation vats, gather biomass, deal with science puzzles.
Critical path:
- Find the Captain's Keycard — locked in a safe in the Research Wing office. Code: 1977 (same as the breaker room).
- Unlock Mutation Vat Alpha — requires the Captain's Keycard. First mutation station.
- The specimen puzzle: 6 specimen jars labeled A-F. The note on the desk says "Start with the one that shouldn't exist (it's not on the manifest), then the newest addition, then the oldest." Solution: C → F → A. This unlocks a hidden room with the Optical Camo upgrade chip.
Danger zone: Specimen Storage is filled with Crawlers. The ceiling is dense with them. Use your flashlight (F key) to scan ahead before entering. Crawlers retreat from bright light.
Sector 4: Engineering
Goal: restore reactor stability, reach the Bridge.
Gravity puzzles: Engineering has sections with zero gravity (you float) and sections with double gravity (you move slowly).
Zero-G navigation:
- Push off walls to move (aim and press space)
- No weapon recoil in zero-G — your shots do not push you back
- Electro-Javelin is king here (no bullet drop in zero-G)
Reactor puzzle: three coolant valves need to be turned in the correct order. The clue is on the whiteboard: "Blue follows red, green is always last, red is never first." Solution: turn valve 2 (blue) → valve 3 (red) → valve 1 (green).
Hazards:
- Radiation leaks — green glowing pipes. Stay in radiation for 5+ seconds and you take damage. Use Wall Crawl to move along the ceiling (radiation is ground-level).
- Steam vents — intermittent burst of steam. Watch the pattern (5 seconds on, 3 seconds off). Time your movement.
Sector 5: Bridge
Goal: final confrontation, choose the station's fate.
Preparation checklist before entering the Bridge:
- Full HP (save and rest in hideout)
- All three keycards (Captain's, Engineering Chief's, Research Director's)
- At least 12 Scatterblaster shells
- Regeneration mutation active
- Manual save at the Bridge checkpoint terminal
Final choices: the game presents you with 3 options after defeating the final boss:
- Destroy the station — escape pod launches, station collapses into the black hole. Bittersweet ending.
- Stabilize the black hole — use the bridge's gravity controls to reverse the singularity. Happy ending, but the station remains in unknown space.
- Merge with the black hole — become one with the sentient singularity. "True" ending, unlocks New Game+ mode.
Step-by-Step Strategy Sequences
Sequence 1: The First Hour (Sneaky Chap Start)
- Wake up, grab the wrench, save at the terminal.
- Loot the Arrival Hub systematically — lockers, drawers, safes. Do not skip the cracked wall in Cargo Bay 3.
- Grab the Vent Master chip from the maintenance closet before anything else.
- Power up the elevator (breaker room, code 1977). Save before entering.
- In Habitation Deck, crouch-walk everywhere. Locate room 204 (hideout) and set your save point.
- Find the Disco Lounge. It is a safe zone — use it to regroup.
- Meet The Forgiven in the cafeteria. Be friendly.
Sequence 2: The Screamer Protocol
- Enter a new room crouched, flashlight off in lit areas.
- Identify all Screamers before any other enemy. They are the alarm system.
- Stealth-kill them with the wrench charged heavy or the Electro-Javelin charged shot.
- Only then engage Shamblers. A single alerted Screamer summons 2-3 Shamblers and alerts the sector.
- If a Screamer spots you, break line of sight, reposition, and kill it before it shrieks.
Sequence 3: The Turret Neutralization
- Never trade shots with a turret — it has 25 DPS and perfect aim at range.
- Break line of sight, then approach from a blind angle.
- With the Hack Expert chip, hack it in 3 seconds to disable it permanently.
- Without the chip, shoot out the lights near it to reduce its detection, then flank.
- Alternatively, lure a Shambler into its line of fire — turrets shoot anything that moves.
Sequence 4: The Time Loop Checklist
- Save at the nearest terminal before entering any flickering-light room.
- Enter and observe for one loop cycle. Do not act yet — learn the sequence.
- Identify the loop-breaking action (usually shooting a specific object at the right moment).
- Reload if you fail — the loop locks permanently after failure.
- Collect the upgrade chip, then continue. There are 4 such rooms total; do not skip any.
Sequence 5: The Void-Touched Kill
- Spot the Void-Touched from range. Do not engage until you have the Plasma Torch.
- Hit it with the Plasma Torch — the burn pauses its teleport for 2 seconds.
- Switch to the Scatterblaster and dump shells while it burns.
- Re-apply the torch before the burn ends. Never let it teleport — it always lands behind you.
- Repeat until dead. Expect 3-4 burn cycles for a full kill.
Sequence 6: The Bridge Prep Run
- Complete all three side objectives that grant keycards (Captain's, Engineering Chief's, Research Director's).
- Return to the hideout. Rest to full HP, store surplus gear.
- Verify ammo: 12+ Scatterblaster shells, 6+ Electro-Javelins.
- Confirm the Regeneration mutation is active. It counters HP degeneration during the gauntlet.
- Save at the Bridge checkpoint terminal.
- Enter the Bridge, fight the final boss, choose your ending.
Advanced Tips
Economy Optimization
- Biomass is life. Every enemy drops 1-3 biomass. Spend it as soon as you reach a mutation station. Carrying unspent biomass through a death is painful if you cannot reach your corpse.
- Shells are rare. The Scatterblaster uses shotgun shells that are uncommon until Engineering. Save them for Screamers and Void-Touched. Use the wrench or Electro-Javelin for Shamblers.
- Upgrade chips are missable. The game has 14 upgrade chips total. 4 are in time loop rooms that lock permanently if you fail the loop. Save before attempting time loops.
- Do not hoard. Weapons have durability (indicated by a condition bar). Each weapon degrades with use. A broken weapon deals 50% damage. Repair at workbenches (costs 1 biomass per 10% repair).
Shortcut Map
The station opens up significantly once you have specific abilities:
| Ability Unlocked | Shortcut Opens |
|---|---|
| Wall Crawl | Engineering → Research Wing ceiling passage (skips 4 rooms) |
| Vent Master | Habitation Deck → Arrival Hub air vent (skips elevator wait) |
| Shadow Step | Locked security gates (4 locations across all sectors) |
| Hive Mind | Force a turret to open a locked door (1 in Research Wing) |
Speedrun Route
If you are replaying and want to finish fast:
- Arrival Hub: hidden armory → breaker room → elevator (5 min)
- Habitation Deck: skip hideout → Disco Lounge → Captain's Log (10 min)
- Research Wing: Mutation Vat → Captain's Keycard → Bridge access (15 min)
- Engineering: reactor puzzle → elevator repair → Bridge (20 min)
- Bridge: final boss → credits (15 min)
Total speedrun time: ~65 minutes.
The Disco Lounge
The Disco Lounge in Habitation Deck is a safe zone. Enemies do not enter while music plays. Use it as a secondary save point and healing room. The jukebox has 7 tracks. Different songs unlock different doors elsewhere on the station:
- Disco Fever (track 3) opens the locked armory in Engineering
- Space Funk (track 7) opens the secret captain's quarters in Habitation Deck
Tracks are randomized per playthrough — experiment or find the notes.
Stealth Philosophy
The demo's stealth system is closer to Thief than Splinter Cell. There is no cover system, no wall-hugging, no enemy marking. You have light, shadow, and sound. The strengths: your wrench is always silent, the Electro-Javelin gives you a silent ranged option, and environmental noise (generators, fans, disco music) masks your movement. The weakness: no night vision, no gadgets beyond what you find. Plan routes around darkness and noise sources.
Build Compendium
S-Tier: Ghost (Pure Stealth)
Mutations: Regeneration → Shadow Step → Wall Crawl → Hive Mind
Upgrade chips: Vent Master, Silent Treads, Optical Camo, Hack Expert
Weapons: Wrench (stealth kills), Electro-Javelin (ranged stealth), Pneumatic Riveter (emergency)
Playstyle: Complete undetected runs. Zero combat unless forced.
Strengths: Safest build. Lowest death rate.
Weaknesses: Slow room clearing. Struggles against unavoidable boss encounters.
A-Tier: Mutant Menace (Action Hybrid)
Mutations: Bone Spikes → Carapace → Sonic Roar → Regeneration
Upgrade chips: None critical (action build does not depend on them)
Weapons: Scatterblaster, Plasma Torch, Flare Gun
Playstyle: Aggressive room clearing. Tank damage and heal through it.
Strengths: Fast progression. Easy resource gathering.
Weaknesses: Higher death rate. Clone degeneration stacks up fast.
A-Tier: Completionist (Exploration Focus)
Mutations: Wall Crawl (first), Shadow Step, Regeneration, Hive Mind
Upgrade chips: Vent Master FIRST, then every chip you find
Weapons: Wrench (default), Electro-Javelin (stealth), Scatterblaster (panic)
Playstyle: 100% map exploration. Every locker, every vent, every secret.
Strengths: Find all upgrades. Max resources.
Weaknesses: Overprepared for combat but slower overall.
Visual Style & Soundtrack
RetroSpace uses low-poly aesthetics inspired by 60s and 70s retro-futuristic sci-fi. The "disco-punk" style combines retro visual elements with modern graphical techniques. Think lava lamps, neon grids, shag carpet, and CRT monitors alongside gory mutant horror. The effect is both familiar and disorienting — perfect for a game that cannot decide if it is a comedy or a horror.
The soundtrack leans heavily on funk, disco, and psychedelic rock. The jukebox in the Disco Lounge is a mechanical gameplay element, but the ambient score throughout the station builds tension with electronic drones and distorted basslines. Audio logs are plentiful and well-written — accessible as transcripts in the pause menu if you miss dialogue during combat.
FAQ / Common Mistakes
Q: I keep dying and my clone degeneration is stacking up. How do I fix it? A: Two ways. 1) The HUB area cloning bay resets degeneration for 3 biomass. 2) If you recover your corpse within 5 minutes, the degeneration from that death is reversed. Do not die again before reaching your corpse.
Q: The time loop puzzle in Room 7A is impossible. What am I missing? A: You have 5 seconds when you enter. Shoot the control panel on the far wall — not the crew member, not the window. The panel is on the left wall near the ceiling. If you fail, reload your save (you did save before entering, right?).
Q: I cannot find the Electro-Javelin. Where is it? A: It is in the Disco Lounge in Habitation Deck. Unlock the neon door (requires a key from The Forgiven or lockpick the door). The Electro-Javelin is on the wall behind the jukebox.
Q: What is the jukebox for? A: Different songs open different doors. Play Disco Fever (track 3) to open the locked armory in Engineering. Play Space Funk (track 7) to open the secret captain's quarters in Habitation Deck. The tracks and their effects are randomized per playthrough.
Q: Can I save all the survivors? A: No. Some survivors are scripted to die. You can save The Forgiven (be friendly), the engineer in Engineering (fix the reactor > shut down cloning), and the researcher in Research Wing (free her from the specimen chamber). Everyone else is story-coded to die.
Q: Is there a New Game Plus? A: Yes. Unlocked by completing the "Merge with the black hole" ending. NG+ retains your mutations and upgrades but increases enemy density and damage.
Q: Do I need to carry a mustache? A: Yes, seriously. The game's description mentions this. There is at least one locked door in Habitation Deck that requires a mustache prop to pass (it is a facial recognition gag). You find mustaches randomly in lockers.
Q: Is RetroSpace like Chicken Police? A: Tonally, yes — both games share a darkly humorous, narrative-heavy style with unexpected twists. Mechanically, they are completely different. Chicken Police is a point-and-click detective game. RetroSpace is a first-person immersive sim FPS. Same studio, different genre entirely.
Q: Should I buy it on PC or console? A: PC for moddability and mouse+keyboard precision. Console for couch comfort. The devs have confirmed simultaneous release on all platforms, so there is no timing advantage.
Q: How has the demo changed since launch? A: Two major updates. The first rebalanced the death + rebirth system (players found it too hardcore). The second added protected quick saves, a fixed UI, box stacking, and a longer-reaching wrench. The full release should reflect all this feedback.
System Requirements (Estimated)
| Component | Minimum | Recommended |
|---|---|---|
| OS | Windows 10 64-bit | Windows 11 |
| CPU | Intel i5-6400 / Ryzen 3 1300X | Intel i7-8700 / Ryzen 5 3600 |
| Memory | 8 GB RAM | 16 GB RAM |
| GPU | NVIDIA GTX 960 / AMD RX 470 | NVIDIA GTX 1070 / AMD RX 5700 |
| Storage | 20 GB available | 20 GB SSD |
Final Tips
- The first upgrade you buy should always be Vent Master. Silent vent entry prevents the most common detection in early sectors.
- Disco Lounge is a safe zone. Enemies do not enter while music plays. Use it as a secondary save point and healing room.
- Experiment with both paths. The early sectors are forgiving enough to try both stealth and combat approaches. Find your style before Engineering.
- Read audio log transcripts. The game provides written versions of audio logs in the pause menu. Use this if you miss dialog during combat.
- The mustache is not a joke. There is a door in Habitation Deck that only opens if your character model has a mustache equipped. Check every locker.
- Side effects are permanent. Plan your mutation path. You cannot undo a mutation once applied.
- The demo is generous. Even if you are waiting for the full release, the demo covers the first sector and part of the second — enough to decide if the game clicks for you.
- Watch the news hub. The developers post regularly and are responsive. The Convergence Showcase (July 16, 2026) showed new content. If you are on the fence, the demo plus the trailers will tell you everything.