Official game
Play Hyper Trigger
This game is hosted by Steam. Continue to the official page to play or download it.
Play on SteamWhat Is Hyper Trigger?
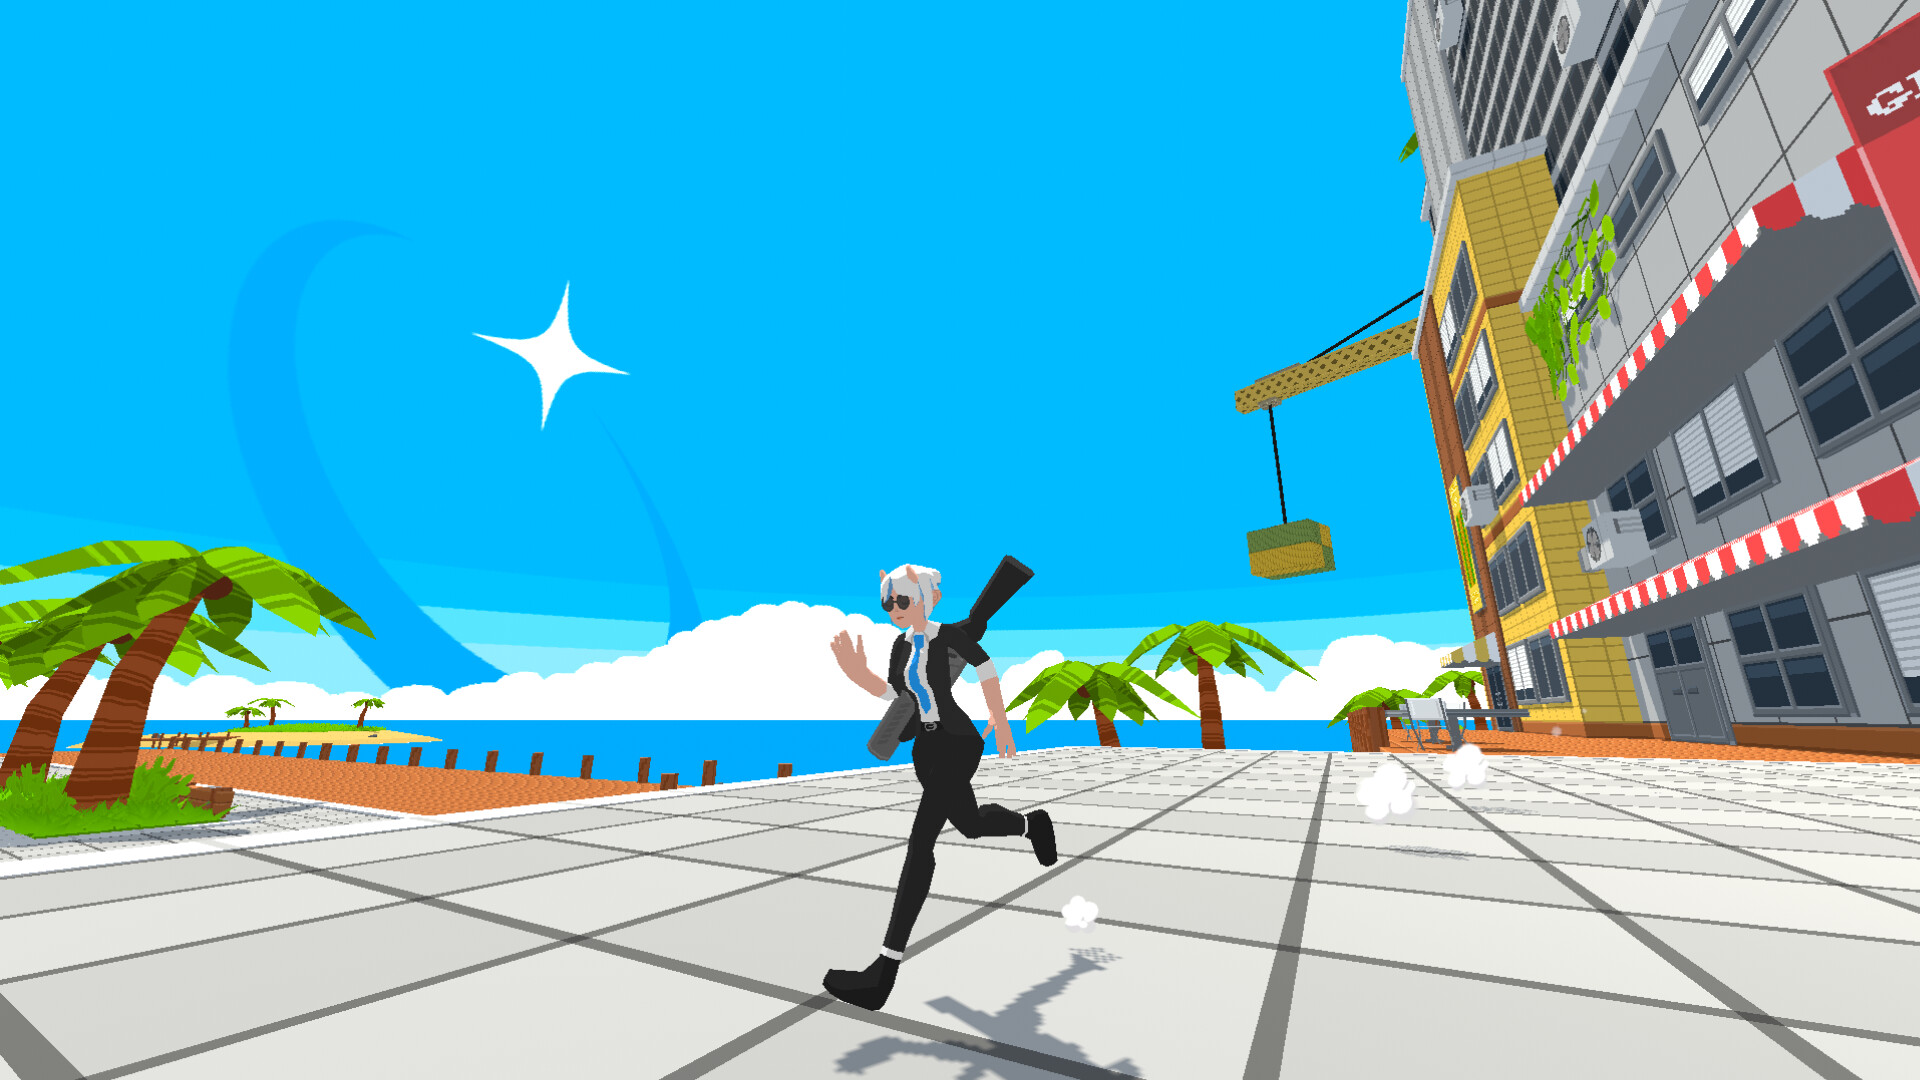
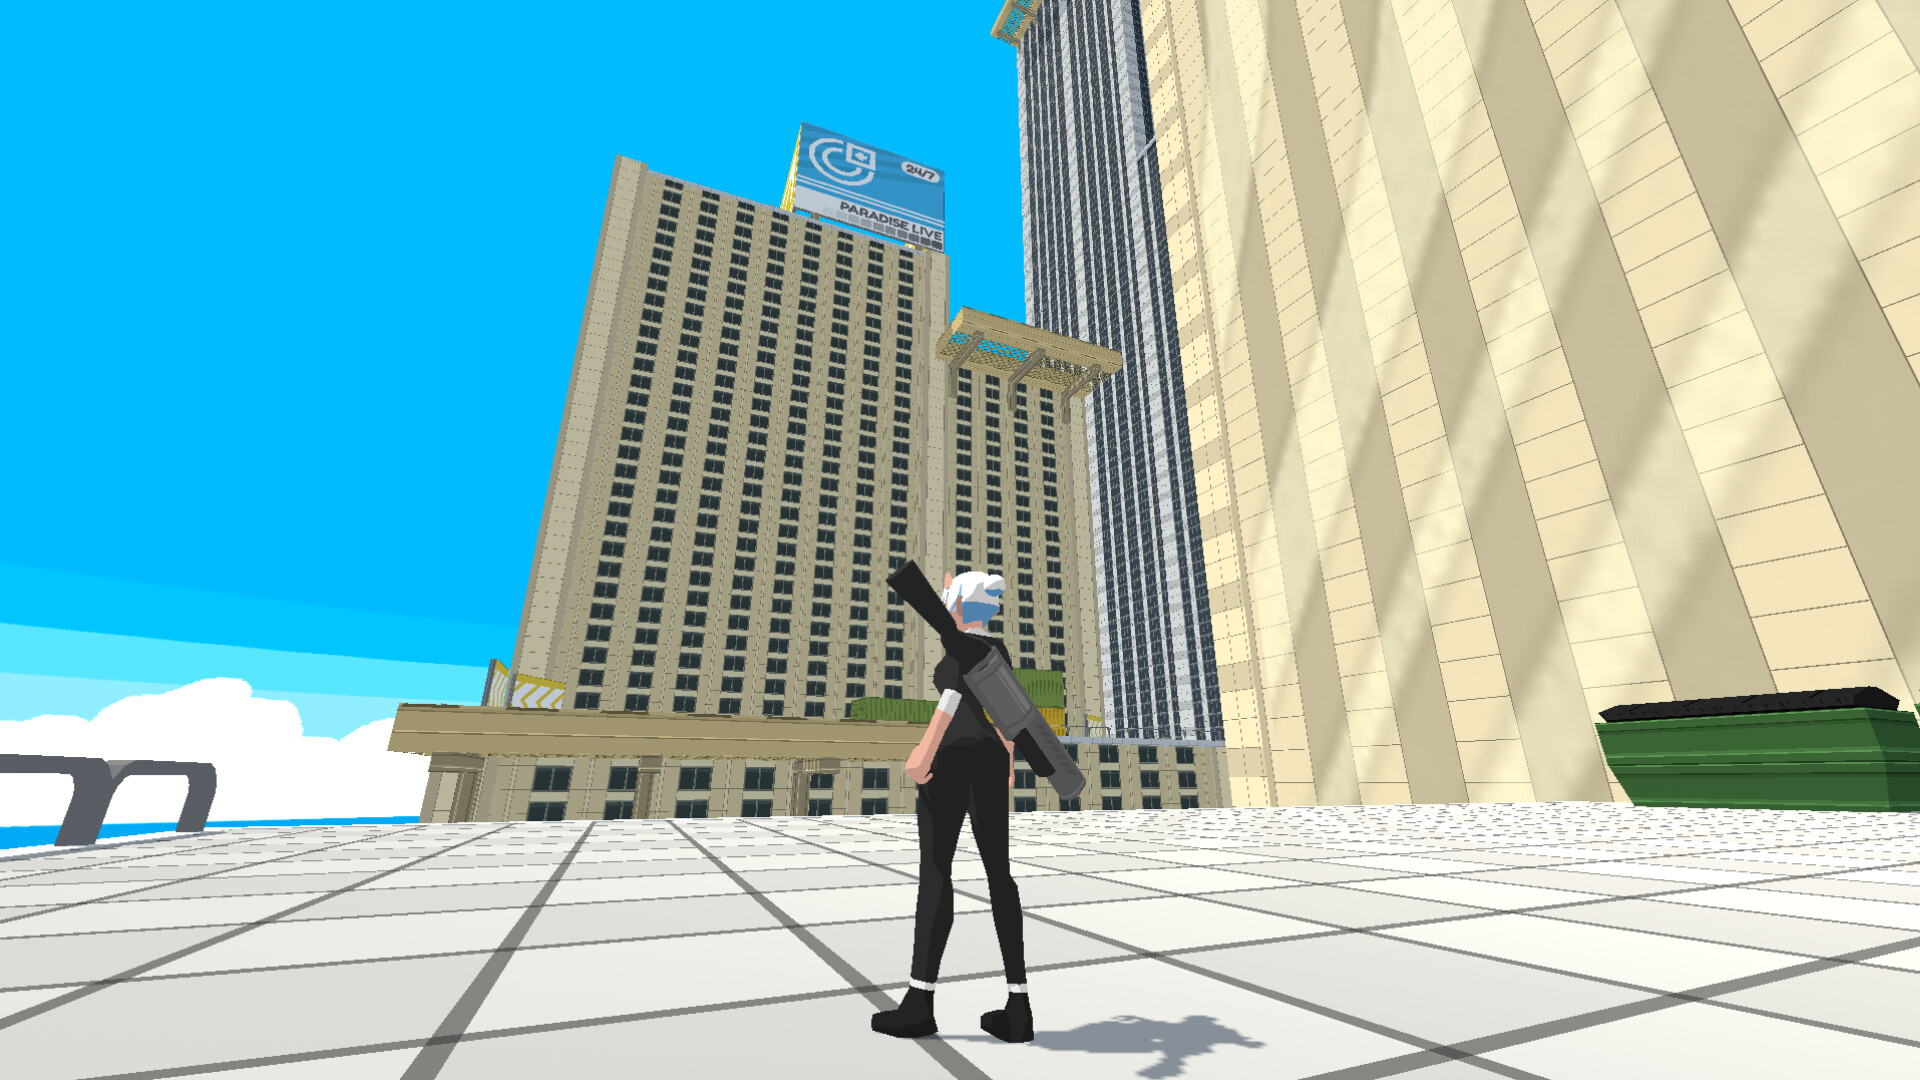
Hyper Trigger is a rocket-jumping platformer where you play as a security program in HyperNet, a virtual metropolis infected with hazardous viruses. Armed with a revolving-rocket-shotgun, you blast upward through city districts, carry momentum through the entire game without loading screens or interruptions, and uncover secrets while collecting cash.
Developed by indie studio hitstop, Hyper Trigger takes the rocket-jumping DNA from games like Quake and Team Fortress and builds a full platformer around it. The core loop: shoot the ground beneath you to launch upward, chain dashes and wall-jumps, keep your speed bar alive, and reach the top of each district before time runs out. It's coming to Steam as a free title, Windows only.
What makes it different from other first-person platformers:
- No explicit walls. The entire level is one continuous climb. You see your goal from the start — a glowing beacon at the top — and figure out how to get there.
- Shotgun as mobility tool. Your only primary weapon doubles as your jump engine. Aim down to rocket jump, aim sideways for horizontal bursts, aim backward to dodge. The shotgun fires a spread that works on both enemies and terrain.
- Combo bar, not health bar. Instead of dying when hit, your combo bar drains. Let it hit zero and you reset. Every stylish move refills it. The game rewards aggression over caution.
- Breakcore soundtrack. The music is fast, glitchy, and unpredictable — matching the on-screen chaos. Tracks from indie artists across the breakcore and drum-and-bass scene.
- Leaderboard-driven replay. Every level has an online leaderboard. You can see exactly which segments your friends beat you on and practice them in isolation.
The story framing is light but stylish: you are Agent Typhoon, a level-9 security program dispatched when hazardous viruses are detected throughout cyberspace. Dispatch the threats, identify the root cause, and stop a system-wide shutdown. The narrative is delivered through the same environmental design as the mechanics — flavor text, terminal logs, and the escalating districts.
Controls & Key Bindings
Hyper Trigger uses keyboard controls optimized for precision platforming. Mouse aim is required for shotgun direction.
| Action | Default Key |
|---|---|
| Move | W, A, S, D |
| Look / Aim | Mouse |
| Fire Rocket-Shotgun | Left Mouse Button |
| Jump | Space |
| Dash | Left Shift |
| Interact / Pickup | E |
| Restart Checkpoint | R |
| Pause / Menu | Escape |
| Tab | Leaderboard |
Recommended adjustments:
- Lower mouse sensitivity below your normal FPS setting. Rocket jumping requires precise 45–90 degree flicks, not wrist-snapping 180s.
- Remap Dash to a mouse thumb button if available — you'll use it constantly mid-air, and taking your finger off movement keys kills momentum.
- Consider binding a secondary "jump" to the mouse wheel if your mouse supports it. Some top leaderboard players use wheel-jump to chain rocket jumps faster than a keyboard press can repeat.
Core Mechanics Explained
Momentum & Speed Bar
The speed bar sits at the bottom of your HUD. It fills when you chain aerial moves — rocket jumps, dashes, wall-jumps, slide-lands. Empty it by touching the ground for more than a split second, hitting a wall head-on, or stopping movement.
Speed bar has three states:
- Gray (idle): You're on the ground or barely moving. Rocket jumps start at minimum height.
- Orange (warm): You've chained 2+ aerial moves. Rocket jumps get a 30% height bonus.
- Red (hot): 5+ chained moves. Maximum jump height, dash recharges 50% faster, and your shotgun spread tightens for better accuracy mid-flight.
The trick: maintain orange or red through the entire level. A single floor touch drops you back to gray unless you're slide-landing (holding crouch as you land, which preserves one tier).
Rocket-Shotgun
The revolving-rocket-shotgun fires explosive shells. Direct hits deal heavy damage to viruses. The explosion also propels you in the opposite direction — that's your primary movement tool.
Shotgun modes:
- Standard shot: Wide spread, moderate damage. Best for clearing virus clusters and generating horizontal boost.
- Charged shot (hold 0.5s): Tight spread, double damage, massive knockback. Use for vertical rocket jumps or breaking cracked walls.
- Quick shot (tap): Minimal spread penalty if you're moving. Best for maintaining speed while dealing damage mid-flight.
The shotgun holds 6 shells. Shells regen automatically (1 per 2 seconds while moving, 1 per second while in air). You can also find shell pickups hidden in vents and behind cracked walls.
Viruses (Enemies)
Float around levels. Three types:
| Virus Type | Behavior | Best Approach |
|---|---|---|
| Scuttler | Scuttles along surfaces in patterns | Quick shot while passing — don't stop |
| Hopper | Teleports every 2 seconds | Wait for teleport, then shoot where it lands |
| Swarm | Cluster of small viruses, moves as unit | Charged shot to clear entire cluster at once |
Taking damage from any virus drains your combo bar (about 20% per hit). Let the bar hit zero and you lose all momentum, resetting to the last checkpoint.
Checkpoints & Seamless Flow
Hyper Trigger has no loading screens. When you hit a checkpoint, the level continues — your position resets but the timer keeps running. Checkpoints are marked by glowing blue terminals. Touching one saves your progress for the level.
The catch: Checkpoints don't refill your speed bar. If you hit a checkpoint at gray speed, you restart from that point at gray. The best players hit every checkpoint while orange or red so they never lose momentum.
Getting Started — First 30 Minutes
Skip the Tutorial Text
The game explains controls through environmental design — arrows painted on walls, glowing paths, breakable barriers that teach you rocket jumping. Reading slows you down.
Learn the Rocket Jump Timing
Stand still, look at the ground (roughly 70 degrees down), fire. You'll launch straight up. Practice this until you can consistently hit the same height. Then try it while running forward — you'll arc forward and up. That's your primary traversal method.
Don't Fight the First Virus
Your first encounter is in a wide corridor. The game wants you to shoot while moving past, not stop and aim. Fire a quick shot as you rocket jump over it.
Die on Purpose
Each "death" (combo bar empty) resets you to the last checkpoint with full combo bar. The game expects you to fail sections repeatedly. Each reset teaches the path.
Beginner Mistakes That Kill Momentum
| Mistake | Why It Hurts | Fix |
|---|---|---|
| Standing still to aim | Drains speed bar to gray immediately | Fire while moving — the shotgun is accurate enough mid-run |
| Overusing the charged shot | Takes 0.5s to charge, kills horizontal speed | Use charged shot only for vertical ascents |
| Ignoring wall jumps | Misses free speed boost | Tap jump near any wall while airborne |
| Touching the ground for too long | Resets speed bar | Crouch as you land (slide) to preserve one speed tier |
| Chasing every secret | Wastes time that kills your line run | Learn the main path first, secrets second |
| Holding the trigger on swarms | Wastes shells and drags you into a hover | Quick shot through, charged shot only when stationary |
Game Modes
Story Mode (Campaign)
The main experience. Climb from the bottom of HyperNet to the top, clearing districts one by one.
District structure:
- District 1: The Subnet — Tutorial area. Introduces basic rocket jumping, scuttlers, checkpoints. 3 levels.
- District 2: The Firewall — Vertical gauntlet. Tight corridors, hopper viruses, cracked walls that require charged shots. 4 levels.
- District 3: The Kernel — Open arena-style levels. Swarm viruses, moving platforms, environmental hazards (laser grids, steam vents). 5 levels.
- District 4: The Core — Final ascent. Mix of all mechanics, worst hazards, boss encounter. 4 levels.
Total: 16 levels. A skilled player completes the campaign in about 45 minutes. First-timers will take 2–3 hours.
Time Trial Mode
Unlocked after completing each district. Every level in that district gets a time trial variant with:
- No viruses (pure platforming)
- All shortcuts unlocked
- Your best time saved locally
- Online leaderboard for each level
Time trials are where Hyper Trigger's depth really shows. The difference between a good run and a top-10 leaderboard run is often 3–5 seconds, achieved through perfect momentum chains.
Challenge Rooms
Bonus challenges scattered throughout each district. Accessible from the district hub. Each is a self-contained platforming puzzle:
- Time Rush: Reach the goal within a tight time limit. No enemies.
- Shell Conservation: Complete the room using exactly N shells. One miss means restart.
- No-Dash Gauntlet: Dashes are disabled. Pure rocket jumping and wall climbing.
- Invisible Path: The floor is invisible. Shadow indicators show where you can land. Trust your momentum.
Progression Strategy
What to Master First, Second, Third
There is no skill tree in Hyper Trigger — progression is purely mechanical. But the order you learn the moves determines how fast you climb the districts:
- Rocket jump (vertical). Non-negotiable. If you can't consistently hit the same height, nothing else matters.
- Rocket jump while running (arc). The horizontal version. This is your level-crossing tool and the difference between a 2-hour and 45-minute campaign.
- Wall jump + dash chain. The speed maintenance kit. Wall jumps regrant one air charge; dashes extend chains. Together they keep you in red speed through tight corridors.
- Slide-land. The recovery skill. One crouch at landing preserves a speed tier and keeps a run alive.
- Charged shot on the move. The late-game tool. Charging while falling (not while standing) turns the 0.5s windup into free hang time.
Resource Priority
- Shells are the only resource that matters. 6 shells, regen while moving. Spend them on movement first, enemies second. A virus you pass is cheaper than a shell you waste.
- Cash unlocks cosmetics only. Shotgun skins, trail colors, death effects. Nothing pay-to-win. Collect cash on your main-path runs; don't detour for it until you've beaten the level once.
- Checkpoints are free. Touch every one. There is zero downside.
District Progression Checklist
| District | Gate Skill | Secret Focus |
|---|---|---|
| 1: Subnet | Vertical rocket jump | Cracked panels above vents |
| 2: Firewall | Charged shot + dash timing | Laser grid gaps |
| 3: Kernel | Swarm clearing + moving platforms | Moving platform ledges |
| 4: Core | Full chain mastery | Vent routes off the main path |
Step-by-Step Strategy
Sequence 1: The Momentum Chain (Core Loop)
- Start each level with a running rocket jump — forward + up, not straight up.
- At the jump's peak, fire a second rocket angled 45 degrees forward. The height stacks.
- Dash horizontally to extend the arc, then wall-jump off the next surface.
- When you must land, hold crouch to slide-land and preserve a speed tier.
- Repeat until the speed bar is red, then keep the chain alive with minimal ground contact.
Sequence 2: Clearing the Firewall Gauntlet (District 2)
- Approach each laser grid while airborne — never stop in front of it.
- Identify the gap pattern, then dash through the moment it opens. Do not wait for a second cycle.
- After the grid, immediately rocket jump to rebuild the height you lost.
- For cracked walls, fire the charged shot while falling past them, not standing in front — you lose less speed.
- Take the hopper viruses' teleport rhythm as your timing cue; shoot where they land, then move.
Sequence 3: Surviving the Swarm Rooms (District 3)
- Spot the swarm cluster before entering its aggro radius.
- Fire one charged shot into the cluster center — it clears the unit in one shell.
- If the charged shot misses, do not chase. Quick-shot through the stragglers and keep moving.
- Use the moving platforms as cover — swarms path poorly around them.
- Rebuild speed after the room with a wall-jump chain; swarms don't follow across the platform gaps.
Sequence 4: The Secret Route (Cash Farming)
- Beat each level on the main path first. Secrets are for repeat runs.
- Look up and left after checkpoints — the most common hidden room spot in District 1 is a cracked panel above a vent.
- Break every vent you pass; crouch-walk into any you can fit.
- Take the moving platform at the far edge in District 3, Level 1 — it leads to a 500-cash room.
- In District 3, Level 4, after the swarm room, rocket jump to the upper right corner instead of taking the obvious exit — 300 cash in a vent.
Sequence 5: Time Trial Optimization
- Learn the level's par route first (main path, no secrets).
- Identify the two or three sections where you lose time — usually a missed wall jump or a ground touch.
- Practice those sections in isolation via the checkpoint system, not full runs.
- Chain rocket jumps at 45 degrees instead of 70 — horizontal distance beats height in time trials.
- Never slide-land at the finish line. The final jump should be a running rocket jump through the beacon.
Sequence 6: No-Dash Gauntlet (Challenge Room)
- The dash is disabled, so rocket jumps are your only air control.
- Angle every shot at 60–70 degrees for height, 30–45 for distance.
- Use wall jumps to reset your air options — they still regrant a charge.
- Plan landing spots before firing; you cannot correct mid-air without the dash.
- Patience beats speed here. One clean chain beats three failed fast ones.
Advanced Tips
- The 45-degree rule. Rocket jumps fired at 45 degrees give the best height-to-distance ratio. 70 degrees for pure vertical, 30 degrees for speed across flat stretches. Match the angle to the section.
- Charge while falling. Start a charged shot as you descend, release as you land. The windup becomes free hang time and the knockback launches you immediately on landing.
- Dash recharges on red. At red speed the dash recharges 50% faster. Chain moves to hit red early and the whole level gets easier.
- Slide through checkpoints. Touching a checkpoint doesn't reset your speed tier if you slide into it. Land, slide, and the bar stays warm.
- Sound is a mechanic. The breakcore soundtrack is layered; the snare hits line up with checkpoint triggers in several levels. Learn the audio cues and you can hit checkpoints blind.
- The boss in District 4 punishes standing still. Keep the momentum chain alive through the whole fight — the arena is designed so a red-speed player can circle it indefinitely.
- Leaderboard segment practice. The game shows your split times per checkpoint. Find the segment where you're slowest, restart at that checkpoint, and grind it. This is the fastest way to a top-10 time.
- Shell discipline. Six shells. If you're below three and not in combat, you're spending wrong. Movement shots should double as either damage or traversal — never fire a shell that does neither.
Secrets & Cash
Cash is the collectible currency. Found in three ways:
- Visible environs: Glowing coins on obvious paths (50% are on the main route).
- Hidden rooms: Behind cracked walls (break with charged shot) or in vents (crouch-walk into them).
- Time bonus: Finish a level under par time for a cash reward.
Cash unlocks cosmetic items in the shop between districts: new shotgun skins (4 variants), trail colors (6 options), and death effects (3 styles). Nothing pay-to-win — pure cosmetics.
Key secret spots to know:
- District 1, Level 2: After the third checkpoint, look up and left. There's a cracked panel above the vent. Charged shot opens a room with 200 cash.
- District 2, Level 3: Midway through the firewall gauntlet, there's a gap in the laser grid. Time your dash through it — hidden shells and a coin cluster.
- District 3, Level 1: The moving platform at the far right edge carries you to a ledge with a coin path that circles back to a hidden room with 500 cash.
- District 3, Level 4: After the swarm room, don't take the obvious exit. Rocket jump to the upper right corner — there's a vent leading to 300 cash.
System Requirements
| Component | Minimum |
|---|---|
| OS | Windows 10+ |
| Processor | Intel Core i5-10400F or equivalent |
| Memory | 8 GB RAM |
| Graphics | DirectX 11 compatible |
No Mac or Linux support currently confirmed.
Developer Background
hitstop is a solo indie developer focused on first-person movement games. Hyper Trigger is the studio's debut title. Prior to Hyper Trigger, hitstop developed small Unity prototypes exploring rocket jumping mechanics and momentum-based traversal, posted on itch.io as free demos. The full Hyper Trigger concept took roughly 18 months from prototype to Steam release.
hitstop cites Quake (particularly defrag and rocket jumping community), Neon White, and Ghostrunner as design influences. The breakcore soundtrack features tracks from independent artists recruited through the /r/breakcore community on Reddit.
Known Issues & Troubleshooting
- Momentum bar not filling: Make sure you're chaining aerial moves — ground dashes don't count. Try jumping, then dashing, then rocket jumping in sequence.
- Charged shot not breaking walls: Some cracked walls require a specific angle. Stand directly facing the crack, about 2 meters away.
- Leaderboard not updating: The game syncs on level completion. If you quit mid-level, your partial progress isn't uploaded.
- Shells not regenerating: Shells only regen while you're moving. Standing still pauses regen.
- Low frame rate: Turn down shadow quality and post-processing. The game runs on Unity and is CPU-bound on the physics side — lowering shadow resolution helps most.
Steam Achievements
Hyper Trigger supports Steam Achievements (full list pending release). Expect the standard set: complete each district, beat par times, collect cash thresholds, and the hard-mode boss clear.
FAQ / Common Mistakes
Q: Is Hyper Trigger free? A: Yes. It's coming to Steam as a free title, Windows only.
Q: Is there a health bar? A: No. Your combo bar is your health. Taking virus damage drains it about 20% per hit. Empty bar = reset to checkpoint.
Q: Why does my speed bar reset when I land? A: Ground contact longer than a split second drops you to gray. Hold crouch as you land to slide and preserve one speed tier.
Q: What's the best shotgun mode? A: Quick shot for movement and combat, charged shot for vertical jumps and cracked walls. Standard shot is a trap — it's only good for clusters.
Q: How do I break cracked walls? A: Charged shot (hold 0.5s), standing directly facing the crack about 2 meters away.
Q: How long is the campaign? A: 16 levels across 4 districts. Skilled players finish in ~45 minutes; first-timers take 2–3 hours.
Q: Do shells regenerate? A: Yes. 1 per 2 seconds while moving, 1 per second while airborne. Standing still pauses regen.
Q: Can I play with a controller? A: The game is keyboard and mouse — mouse aim is required for shotgun direction. No controller support confirmed.
Q: What unlocks with cash? A: Pure cosmetics — 4 shotgun skins, 6 trail colors, 3 death effects.
Q: My time trial rank is stuck. A: Practice your worst split via checkpoint restart, and remember: 45-degree rocket jumps beat 70-degree ones in time trials.
Quick Reference Card
| Mechanic | Input | Notes |
|---|---|---|
| Rocket jump | Look down + fire | Hold charge for higher jump |
| Dash | Shift (air only) | Recharges after 3 seconds or hitting red speed |
| Slide-land | Crouch while landing | Preserves one speed tier |
| Wall jump | Jump near wall | Regrants one air charge |
| Quick shot | Tap fire | Minimal spread penalty while moving |
| Charged shot | Hold fire 0.5s | Breaks walls, big knockback |
| Interact | E | Pickups, checkpoints, vents |
Final Verdict
Hyper Trigger takes one of the most technical skills in first-person gaming — rocket jumping — and builds an entire polished platformer around it. The combo-bar health system rewards exactly the aggression the genre needs, and the no-loading-screen continuous climb makes every level feel like one long stylish run.
Start with the rocket jump. Then the arc, the wall-jump chain, the slide-land. Keep the bar orange or red and the whole game opens up. The leaderboards are the real endgame — the gap between a good run and a great one is three to five seconds of perfect momentum. Free, fast, and built for the speedrun crowd.
Screenshots